Blog
Kicking the tires of a European cloud provider - StackIT

In this blog I will show you how you can get started on StackIT using open standard based tools like container images, Terraform and Kubernetes.
You will be able to deploy the infamous paas-monitor application using the following steps:
- create a StackIT project
- create a Kubernetes cluster
- deploy the application
- expose to the internet
Once the application is running, you can:
- do a rolling update of the application
- autoscale the application
- perform a node upgrade
All from the comfort of your Terraform source code!
create a StackIT project
In order to bootstrap the project, handcraft a StackIT project, a service account and service account key using the StackIT console . Download the service account key and store it safely on your computer.
create a Kubernetes cluster
With the project id and the service account key in hand, you can create a Kubernetes cluster with the following Terraform template:
resource "stackit_ske_cluster" "paas-monitor" {
  project_id             = var.project_id
  name                   = "ps-mntr" // only 11 characters allowed
  Kubernetes_version_min = "1.31"
  extensions = {
    acl = {
      allowed_cidrs = var.allowed_cidrs
      enabled       = true
    }
  }

  node_pools = [
    {
      name               = "paas-monitor"
      machine_type       = "g1.3"
      minimum            = 1
      maximum            = 6
      max_surge          = 3
      max_unavailable    = 3
      availability_zones = ["eu01-1", "eu01-2", "eu01-3"]
      os_version_min     = "4152.2.0"
      os_name            = "flatcar"
      volume_size        = 32
      volume_type        = "storage_premium_perf6"
    }
  ]
}

resource "stackit_ske_kubeconfig" "paas-monitor" {
  project_id   = var.project_id
  cluster_name = stackit_ske_cluster.paas-monitor.name
  refresh      = true
}

resource "local_file" "kubeconfig" {
  content  = stackit_ske_kubeconfig.paas-monitor.kube_config
  filename = "./.stackit/kubeconfig"

  directory_permission = "0700"
  file_permission      = "0600"
}
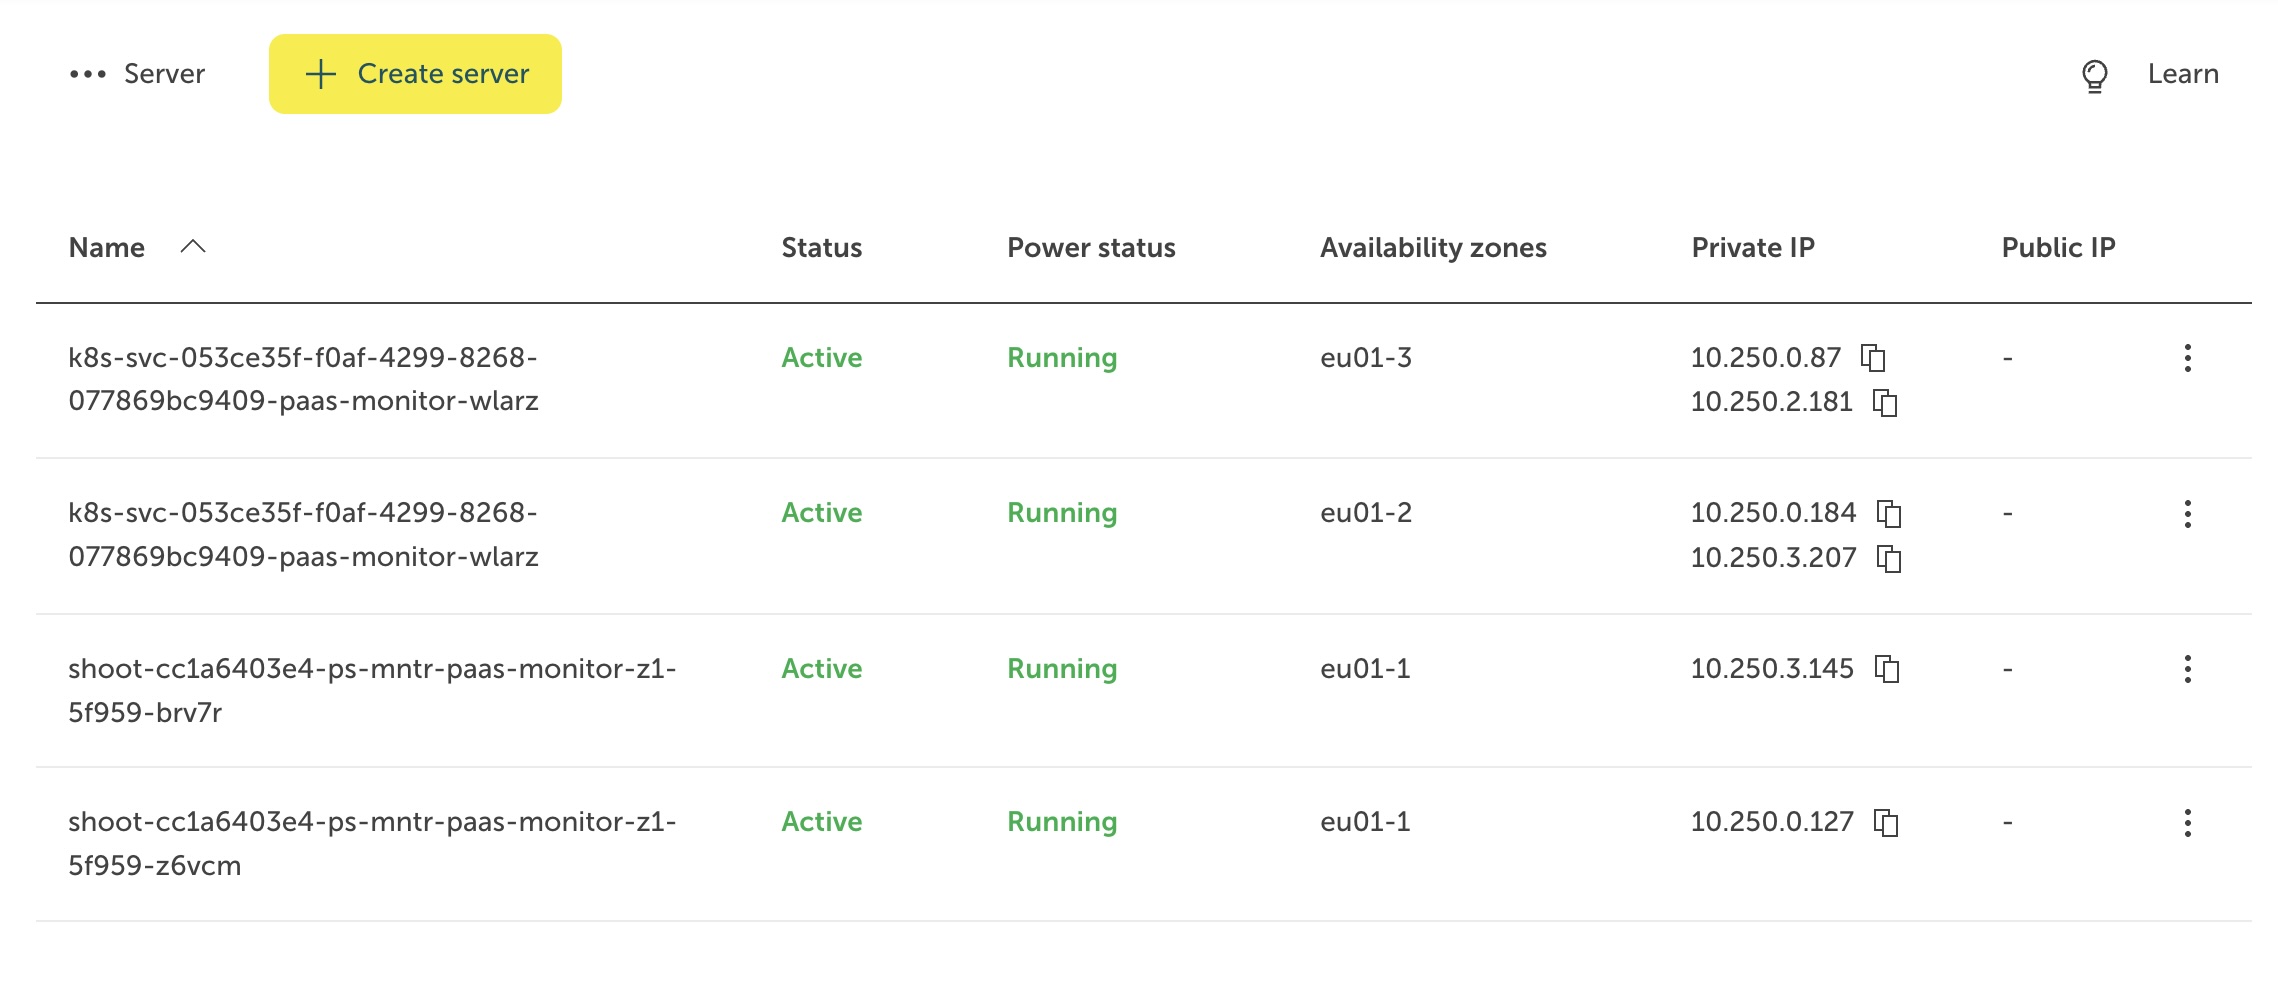
After the cluster is created, you can see both the k8s control plane and worker node VMs In the StackIT console.
 Be sure to enable the ACL extension on the cluster and specify an IP allowlist. This will prevent unauthorised access attempts by third parties.
For your convenience, the kubeconfig to access the cluster is stored in ./.stackit/kubeconfig.
deploy the application
To deploy the infamous paas-monitor application, you use the following Terraform definition:
resource "Kubernetes_namespace" "paas-monitor" {
  metadata {
    name = "paas-monitor"
  }
}

resource "Kubernetes_service_account" "paas-monitor" {
  metadata {
    name      = "paas-monitor"
    namespace = Kubernetes_namespace.paas-monitor.metadata[0].name
  }
}

resource "Kubernetes_deployment" "paas-monitor" {
  metadata {
    name      = "paas-monitor"
    namespace = Kubernetes_namespace.paas-monitor.metadata[0].name
    labels = {
      app = "paas-monitor"
    }
  }

  spec {
    selector {
      match_labels = {
        app = "paas-monitor"
      }
    }

    template {
      metadata {
        labels = {
          app = "paas-monitor"
        }
      }

      spec {
        service_account_name = Kubernetes_service_account.paas-monitor.metadata[0].name
        container {
          image = "gcr.io/binx-io-public/paas-monitor:latest"
          name  = "paas-monitor"

          env {
            name = "MESSAGE"
            value = "Hallo Werld"
          }
          port {
            container_port = 1337
            protocol       = "TCP"
          }

          readiness_probe {
            http_get {
              path = "/health"
              port = 1337
            }
            initial_delay_seconds = 10
            period_seconds        = 10
            timeout_seconds       = 3
            success_threshold     = 1
            failure_threshold     = 3
          }

          liveness_probe {
            http_get {
              path = "/health"
              port = 1337
            }
            initial_delay_seconds = 10
            period_seconds        = 10
            timeout_seconds       = 3
            success_threshold     = 1
            failure_threshold     = 3
          }
          resources {
            limits = {
              cpu    = "0.5"
              memory = "32Mi"
            }
            requests = {
              cpu    = "0.5"
              memory = "32Mi"
            }
          }
        }
      }
    }
  }
}

resource "Kubernetes_horizontal_pod_autoscaler" "paas_monitor" {
  metadata {
    name = "paas-monitor"
    namespace = Kubernetes_namespace.paas-monitor.metadata[0].name
  }

  spec {
    min_replicas = 2
    max_replicas = 10
    target_cpu_utilization_percentage = 15

    scale_target_ref {
      kind = "Deployment"
      name = "paas-monitor"
      api_version = "apps/v1"
    }
  }
}
As you can see, we deploy the application with health and readiness checks and add a horizontal pod autoscaler to scale up to 10 instances.
Note that the pod uses an insane about of CPU and the target CPU utilization is low. This is only for demonstration purposes.
expose to the internet
To expose the service to the internet, you need to allocate a public IP address from StackIT and store it in a DNS zone, as shown in the snippet below:
resource "stackit_public_ip" "paas-monitor" {
  project_id = var.project_id
  labels = {
    "name" = "paas-monitor"
  }
}

resource "stackit_dns_zone" "paas-monitor" {
  project_id    = var.project_id
  name          = "paas-monitor"
  dns_name      = format("%s.runs.onstackit.cloud", data.stackit_resourcemanager_project.current.name)
}

resource "stackit_dns_record_set" "app" {
  project_id = var.project_id
  zone_id    = stackit_dns_zone.paas-monitor.zone_id
  name       = "app"
  type       = "A"

  records    = [stackit_public_ip.paas-monitor.ip]
}
Next, you add a reference to the allocated IP address in the Kubernetes service definition:
resource "Kubernetes_service" "paas_monitor" {
  metadata {
    name = "paas-monitor"
    namespace = Kubernetes_namespace.paas-monitor.metadata[0].name
    labels = {
      app = Kubernetes_deployment.paas-monitor.metadata[0].labels.app
    }

    annotations = {
      "yawol.stackit.cloud/existingFloatingIP": stackit_public_ip.paas-monitor.ip
    }
  }

  spec {
    selector = {
      app = Kubernetes_deployment.paas-monitor.metadata[0].labels.app
    }
    port {
      port        = 80
      target_port = 1337
      protocol    = "TCP"
    }
    type = "LoadBalancer"
  }
}
Now you can access to application via the url http://app.<your-project-name>.runs.onstackit.cloud

rolling update of the deployment
To force a rolling update, change to MESSAGE environment variable of the application to 'Hello Werld' in the Terraform template, and apply the change.
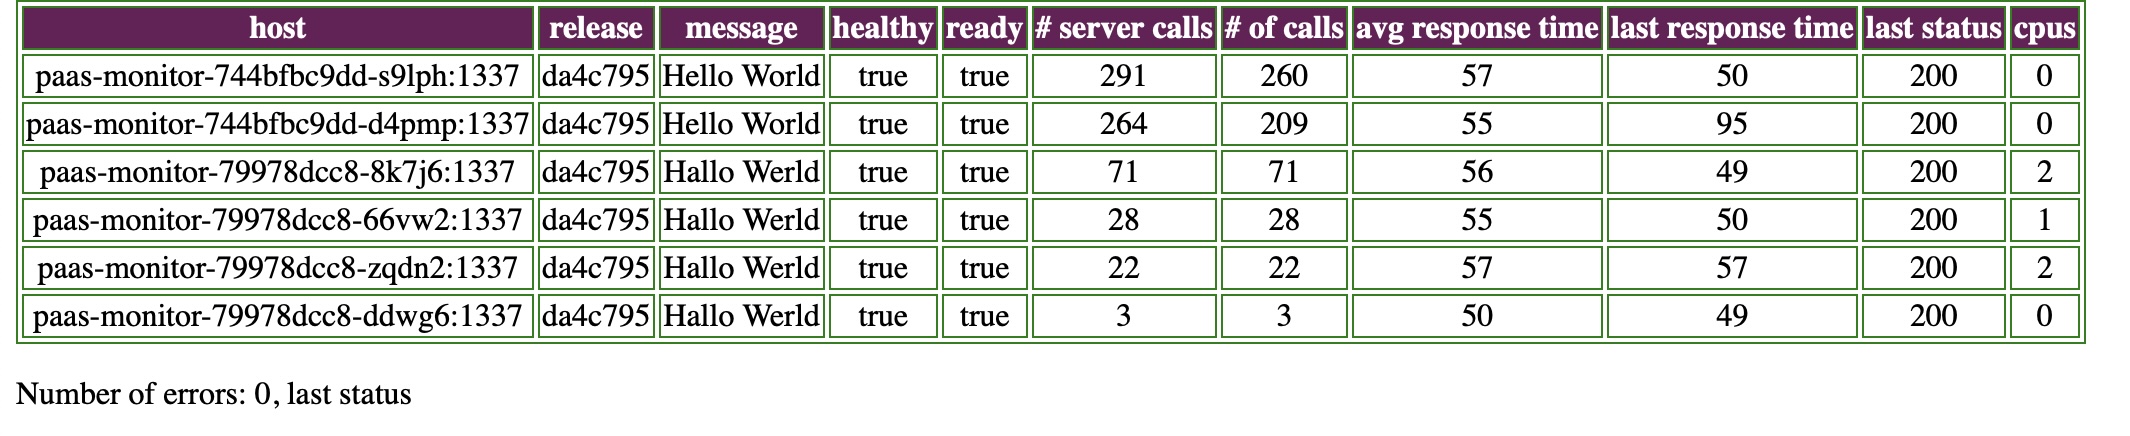
autoscaling at work
To force autoscaling the pods, click on the 'increase CPU' button a few times and you will see the number of instances increase. 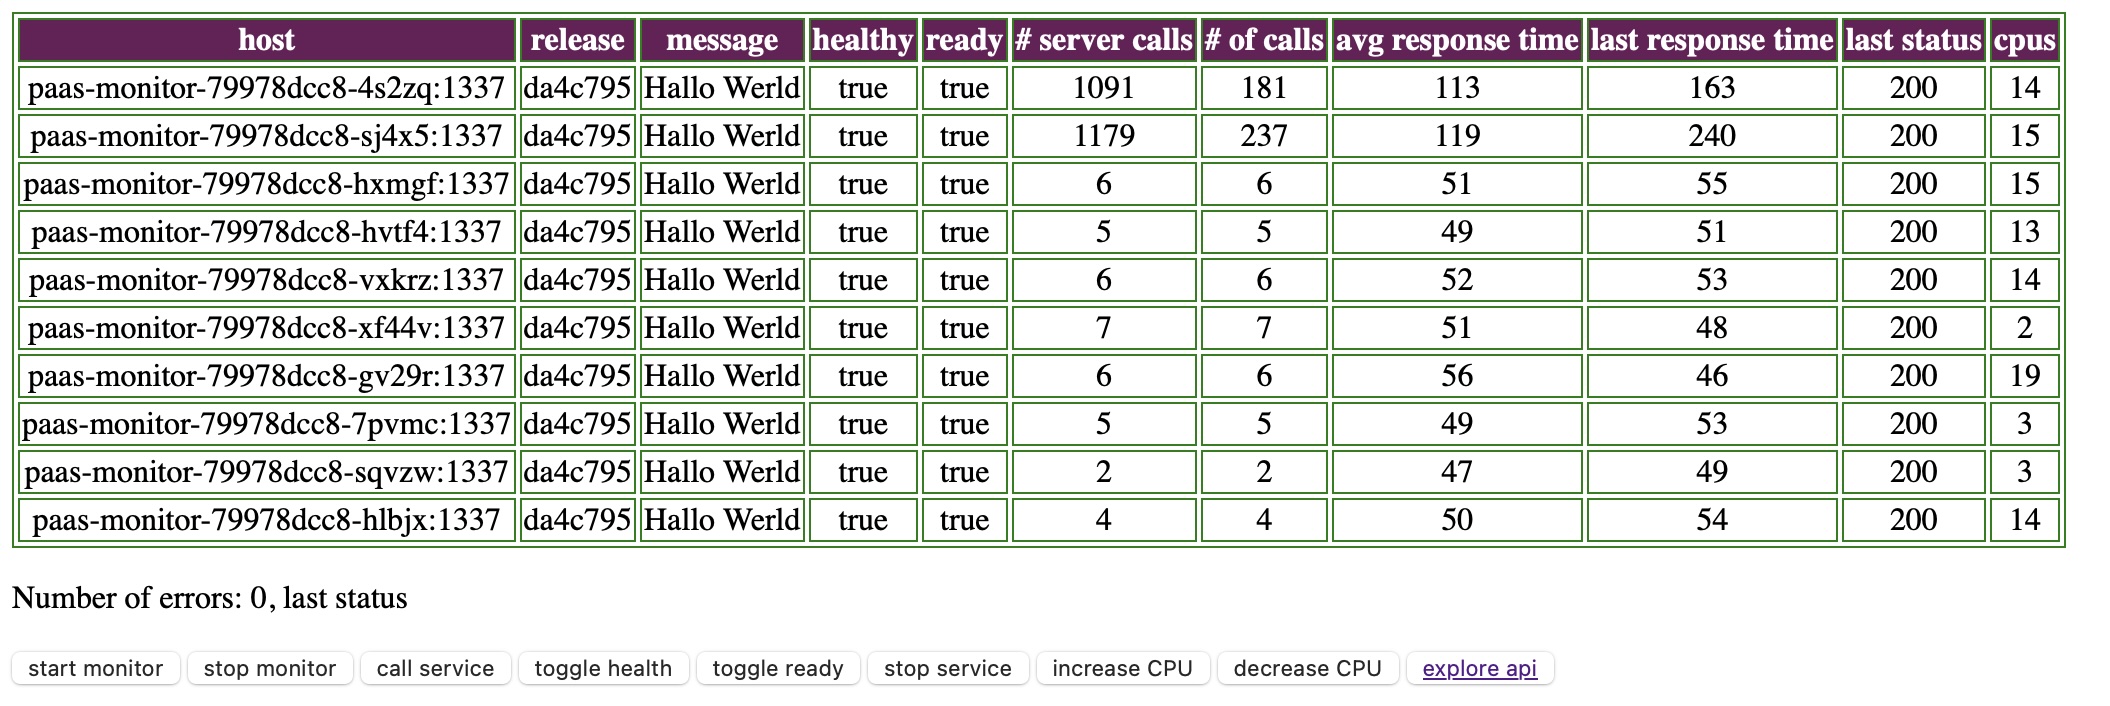
rolling node updates
To force an update of the cluster nodes, update the min_os_version in the Terraform template to the recommended latest version and apply. You can continue to monitor the effect on the application.
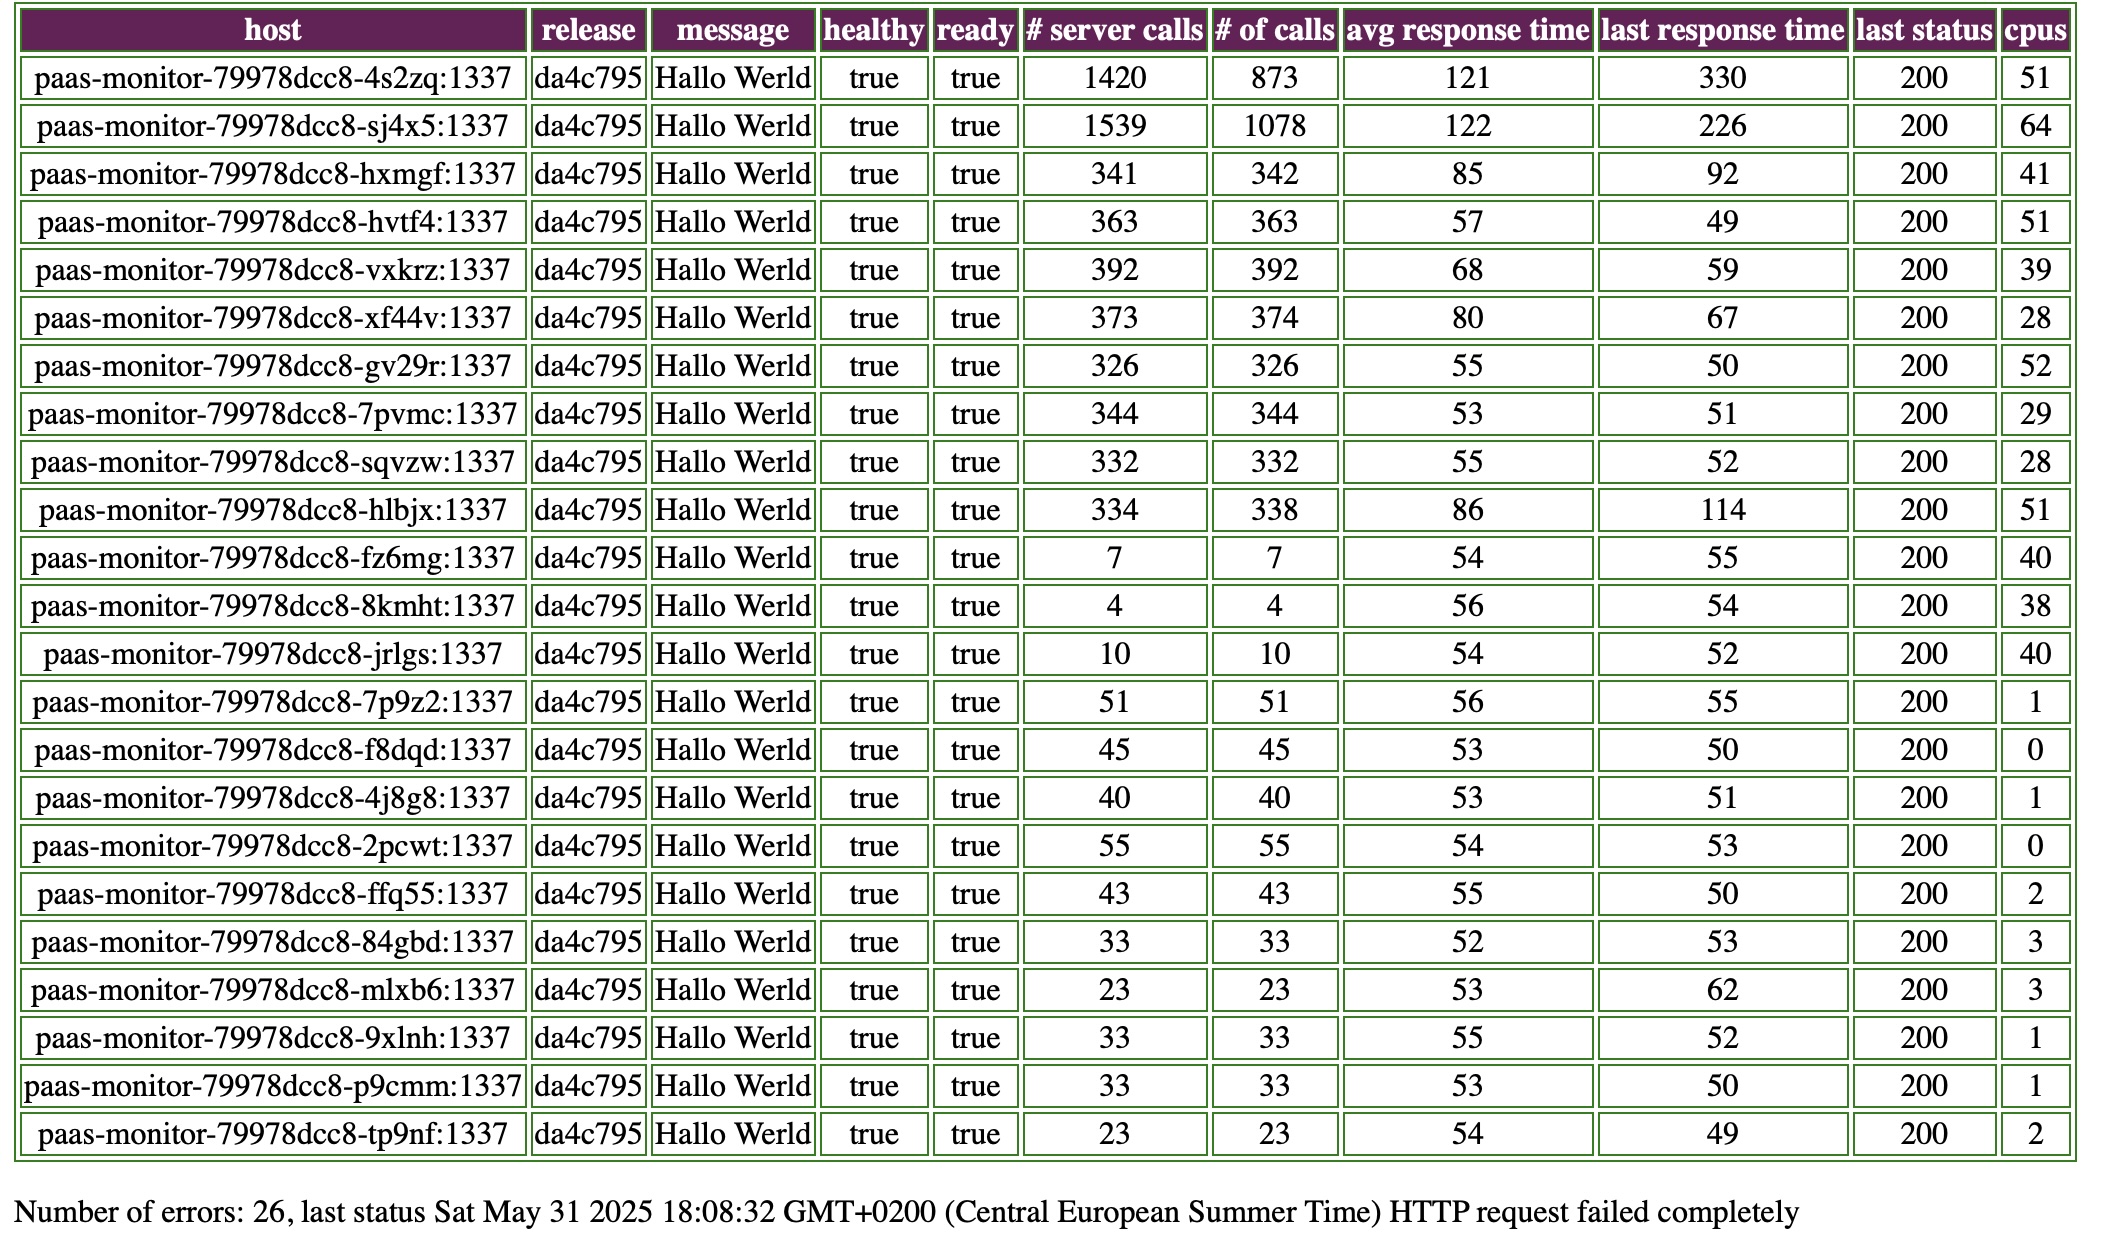
In this case there were 26 errors in short succession, but I have observed node updates without any errors.
Conclusion
it was great to see how easy it was to get a standard web application running on StackIT, based upon open source utilities and frameworks.
All in all, it took me around 2.5 hours to get the application running on StackIT, without any prior knowledge or training on StackIT.
Open, standards based utilities and frameworks are clearly a stepping stone towards improving your portability and contribute to your digital sovereignty.
For the complete Terraform setup, checkout the repository https://github.com/xebia/blog-kicking-the-tires-of-an-european-cloud-provider-stackit.git
Image made by the author using a screenshot from https://stackit.de front page website.
Written by

Mark van Holsteijn
Mark van Holsteijn is a senior software systems architect at Xebia Cloud-native solutions. He is passionate about removing waste in the software delivery process and keeping things clear and simple.
Our Ideas
Explore More Blogs


Contact