Blog
Simplify your workflow deployment with Databricks Asset Bundles: Part II

In the previous blog post, we introduced Databricks Asset Bundles as a unifying solution for managing and deploying data workflows on Databricks. We explained how bundles enable users to consolidate components — such as notebooks, libraries, and configuration files — into a single and simplified command-line interface to validate, deploy, and destroy resources seamlessly through the bundle lifecycle.
Now that we understand DABs' operation in general terms, let's dive into more practical aspects and how we can leverage the tool to facilitate automated deployments across multiple environments, use custom variables designed for our project, add personal compute to accelerate deployment tests, and learn how to interact and deploy with different types of Databricks' resources, such as schemas on Unity Catalog.
Deployment isolation: Handling multiple users and environments
During the development of a new data pipeline, it is common to make tests to check if all dependencies are working correctly. Depending on how your data platform was set up, as a data engineer/scientist, you might have a development environment to test your pipeline and an acceptance/production one to deploy and make data available for end users. Managing deployment across multiple environments can be tedious, especially when multiple users use the same workspace for development. The likelihood of one person overriding each other's work or deploying to the wrong environment increases. In the previous post, we touched on deployment isolation slightly. We saw how bundles accomplishes that natively by deploying all your project's resources under a separate folder specific to your username. Now, let's expand our YAML target configuration to add multiple environments, that is, beyond development we want to add staging and production targets.
So far, we have configured our target environment as shown below.
targets:
  dev:
    default: true
    mode: development
    workspace:
      host: https://adb-xxxxxxxxxxxxxx.xx.azuredatabricks.net/
There are two important configurations here:
First, the default parameter means that whenever you run bundle commands, as default, it will use this environment and, consequently, its configurations. Therefore, we can just run databricks bundle deploy command, to deploy on dev target.
Second, mode: development specifies a few presets configurations to indicate that it is a development target. Let's see through an example.
If you run deploy command:
# -> deploy command's output
# Name: ingestion_demo
# Target: dev
# Workspace:
# Host: https://adb-xxxxxxxxxxxxxx.xx.azuredatabricks.net/
# User: victor.deoliveira@xebia.com
# Path: /Workspace/Users/victor.deoliveira@xebia.com/.bundle/ingestion_demo/dev
#
# Validation OK!
You can see isolation happening since all of our bundle's artifacts are being deployed under my workspace folder name. In the UI, you can check the deployed job:
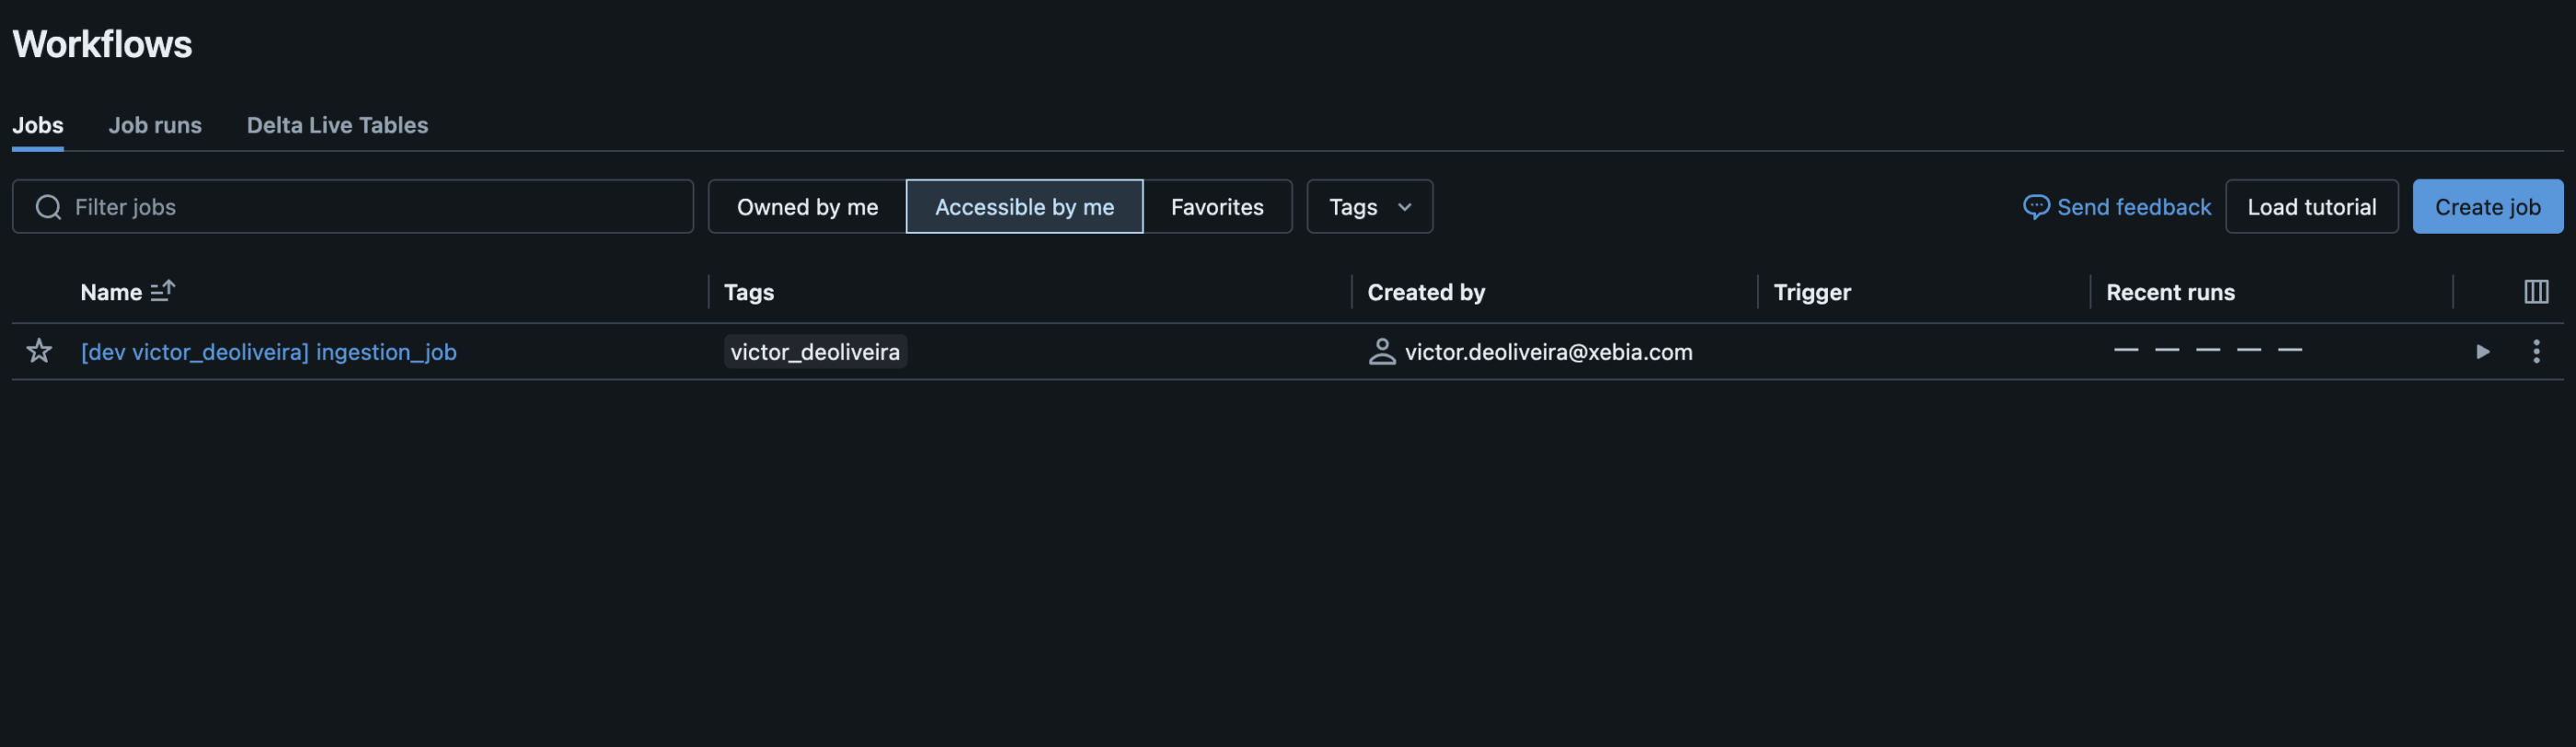
Here, you can notice that my job was deployed with a suffix for the target and username. This is one of predetermined presets under mode development. By default, it will also pause all schedules and triggers on deployed resources, set Delta Live Tables pipeline as development: true, among other functionalities. Check the complete list here.
This simple feature is tremendously useful. In a previous project, we had to implement those presets in our custom deployment code, but now it happens out of the box. Multiple team members can collaborate in the same workspace without the risk of deleting each other's work.
Now, let's say that you are also testing your CI / CD pipeline (we will cover this topic in the future), and you want to deploy it to an staging/acceptance workspace to ensure everything is working as expected. You can just add to the bundle configuration:
targets:
  dev:
    default: true
    mode: development
    workspace:
      host: https://<development-workspace-id>.azuredatabricks.net/

  staging:
    workspace:
      host: https://<staging-workspace-id>.azuredatabricks.net/
Since staging is not your default target, you need to specify it directly in your deploy command. For instance, you can configure your CI / CD pipeline to run:
databricks bundle deploy --target staging
And if we are in a scenario where we have only one workspace environment? Simple, you can use a presets definitions, as better explained through an example:
targets:
  dev:
    default: true
    mode: development
    workspace:
      host: https://<development-workspace-id>.azuredatabricks.net/

  staging:
    presets:
      name_prefix: "stg_"
    workspace:
      host: https://<development-workspace-id>.azuredatabricks.net/
This will produce the following:
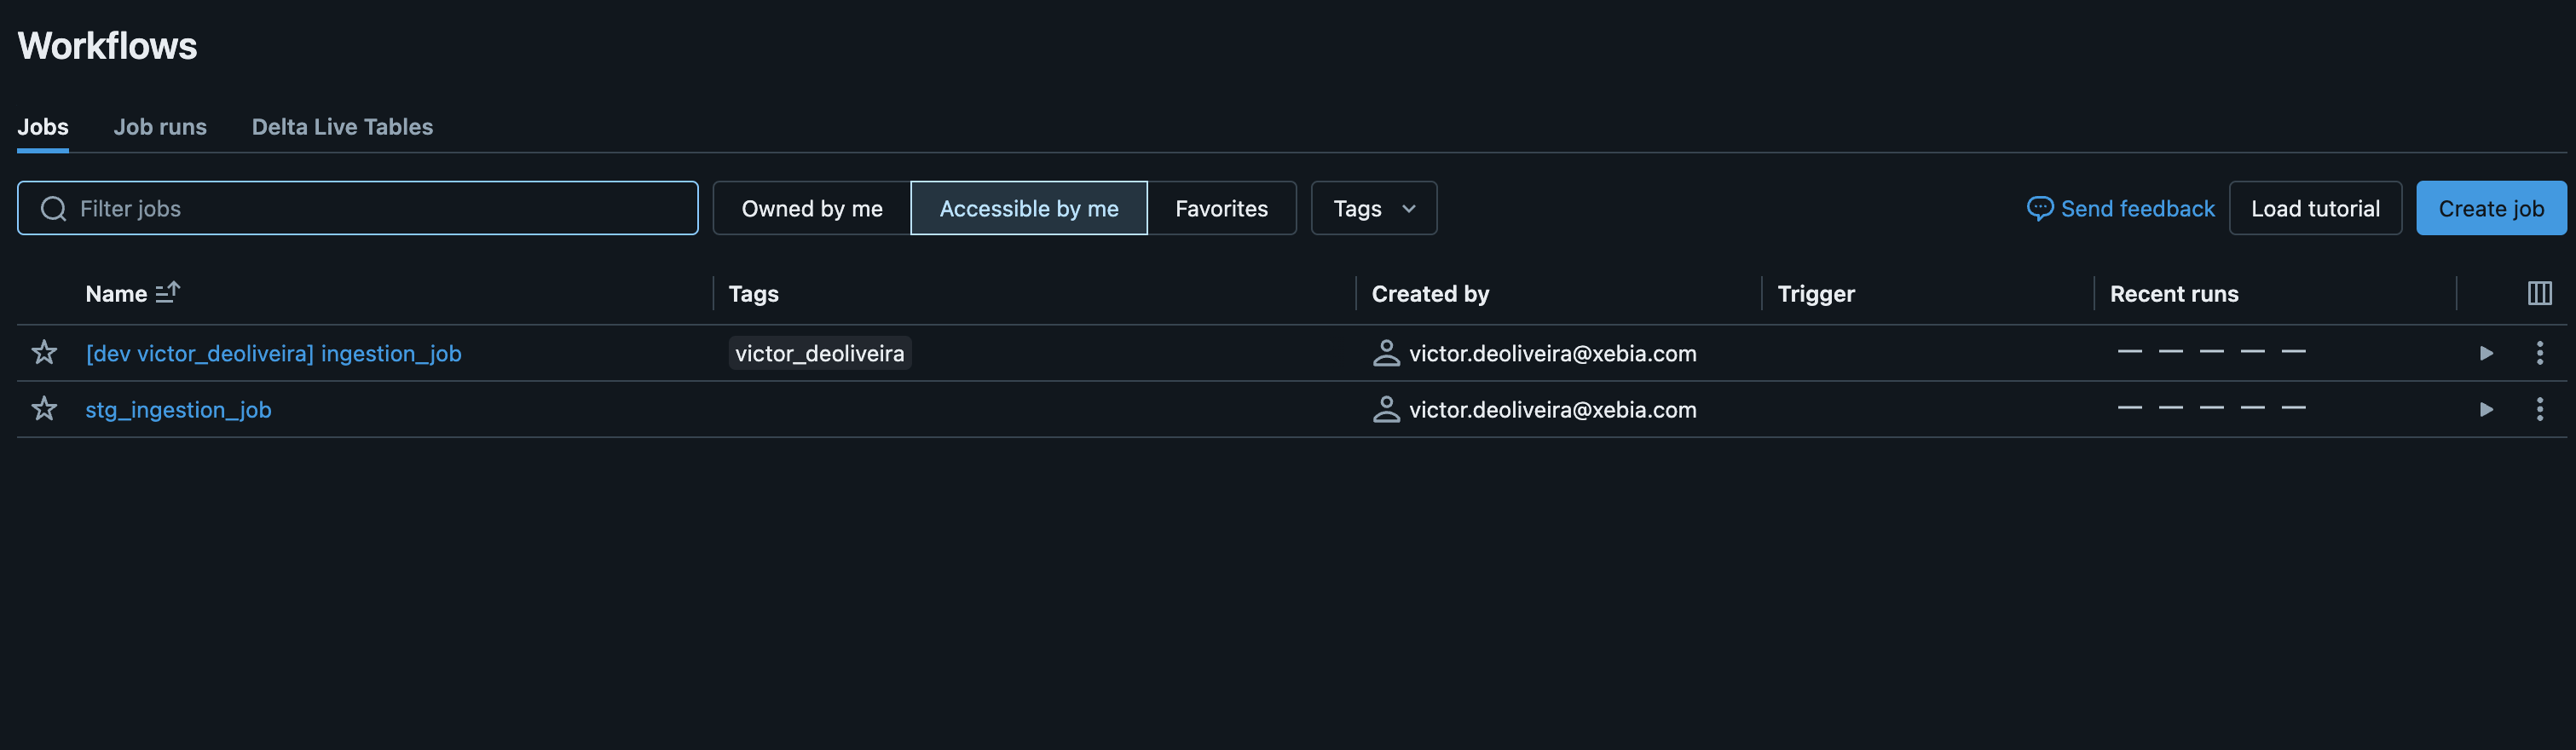
see, all resources being deployed will have a prefix "stg_" to help differentiate between target deployments. This might be extremely useful when you don't want extra costs to set up a specific workspace and infrastructure for a staging environment. You can use a single workspace that will function as development and staging ones.
Beyond name_prefix, presets have other configurable values. The one I find helpful is trigger_pause_status, where you can define values PAUSED or UNPAUSED. You can add that to your staging environment to deploy jobs with trigger status UNPAUSED to avoid running them on a schedule and leave only your production target to run scheduled jobs. For instance:
targets:
  dev:
    default: true
    mode: development
    workspace:
      host: https://<development-workspace-id>.azuredatabricks.net/

  staging:
    presets:
      name_prefix: "stg_"
      trigger_pause_status: PAUSED
    workspace:
      host: https://<development-workspace-id>.azuredatabricks.net/
At Xebia Data, we have applied this configuration in a recent project, where we want to use staging as a testing environment and we do not need to run jobs on schedule, only in production. This prevents unecessary cloud costs.
Keep in mind that we could also have configured staging environment to use mode: development. This would automatically apply PAUSED to all deployed resources. However, in this scenario we only want to change this preset specifically, and not use all the ones in development mode.
To conclude, you also have a mode: production.
targets:
  dev:
    default: true
    mode: development
    workspace:
      host: https://<development-workspace-id>.azuredatabricks.net/

  staging:
    presets:
      name_prefix: "stg_"
      trigger_pause_status: PAUSED
    workspace:
      host: https://<development-workspace-id>.azuredatabricks.net/

  production:
    mode: production
    workspace:
      host: https://<production-workspace-id>.azuredatabricks.net/
Production mode will include also a few configurations out of the box for you. It validates that all Delta Live Tables being deployed are marked as development: false. Moreover, it validates that the current branch is the main one (or the name of the branch you want to use for production).
You can deploy your resources to production by running:
databricks bundle deploy --target production
Important to comment that you can run this command under your username and deploy it to production if wanted, although we highly recommend that you deploy your pipelines to non-development environments through a CI/CD application such as Github Actions or Azure DevOps.
Stop wasting time waiting for your job cluster to start
Databricks recommends against using all-purpose compute for jobs, specially when deploying your jobs to production environments. In the previous post, we had our job resource definition as:
resources:
  jobs:
    ...
          new_cluster:
            node_type_id: Standard_DS3_v2
            num_workers: 1
            spark_version: 15.3.x-cpu-ml-scala2.12
Above definition means that every time we trigger this job, a new cluster is initialized, which is the recommended approach. However, we want to test our workflow logic faster during development, and waiting times are frustrating. Let's say we have a bigger cluster available for development or simply one active that you can use directly to run your job. With bundles you can configure a custom cluster to execute your pipelines. In the YAML file we can add a field cluster_id to our dev target such as:
targets:
  dev:
    default: true
    mode: development
    workspace:
      host: https://<development-workspace-id>.azuredatabricks.net/
    cluster_id: <your-cluster-id>
  staging:
    presets:
      name_prefix: "stg_"
    workspace:
      host: https://<staging-workspace>.azuredatabricks.net/
Tip: You can get your cluster_id for your compute in the UI. Just click on your cluster, look for the three dots on the top right, and see the JSON definition
Then, by running the deploy command:
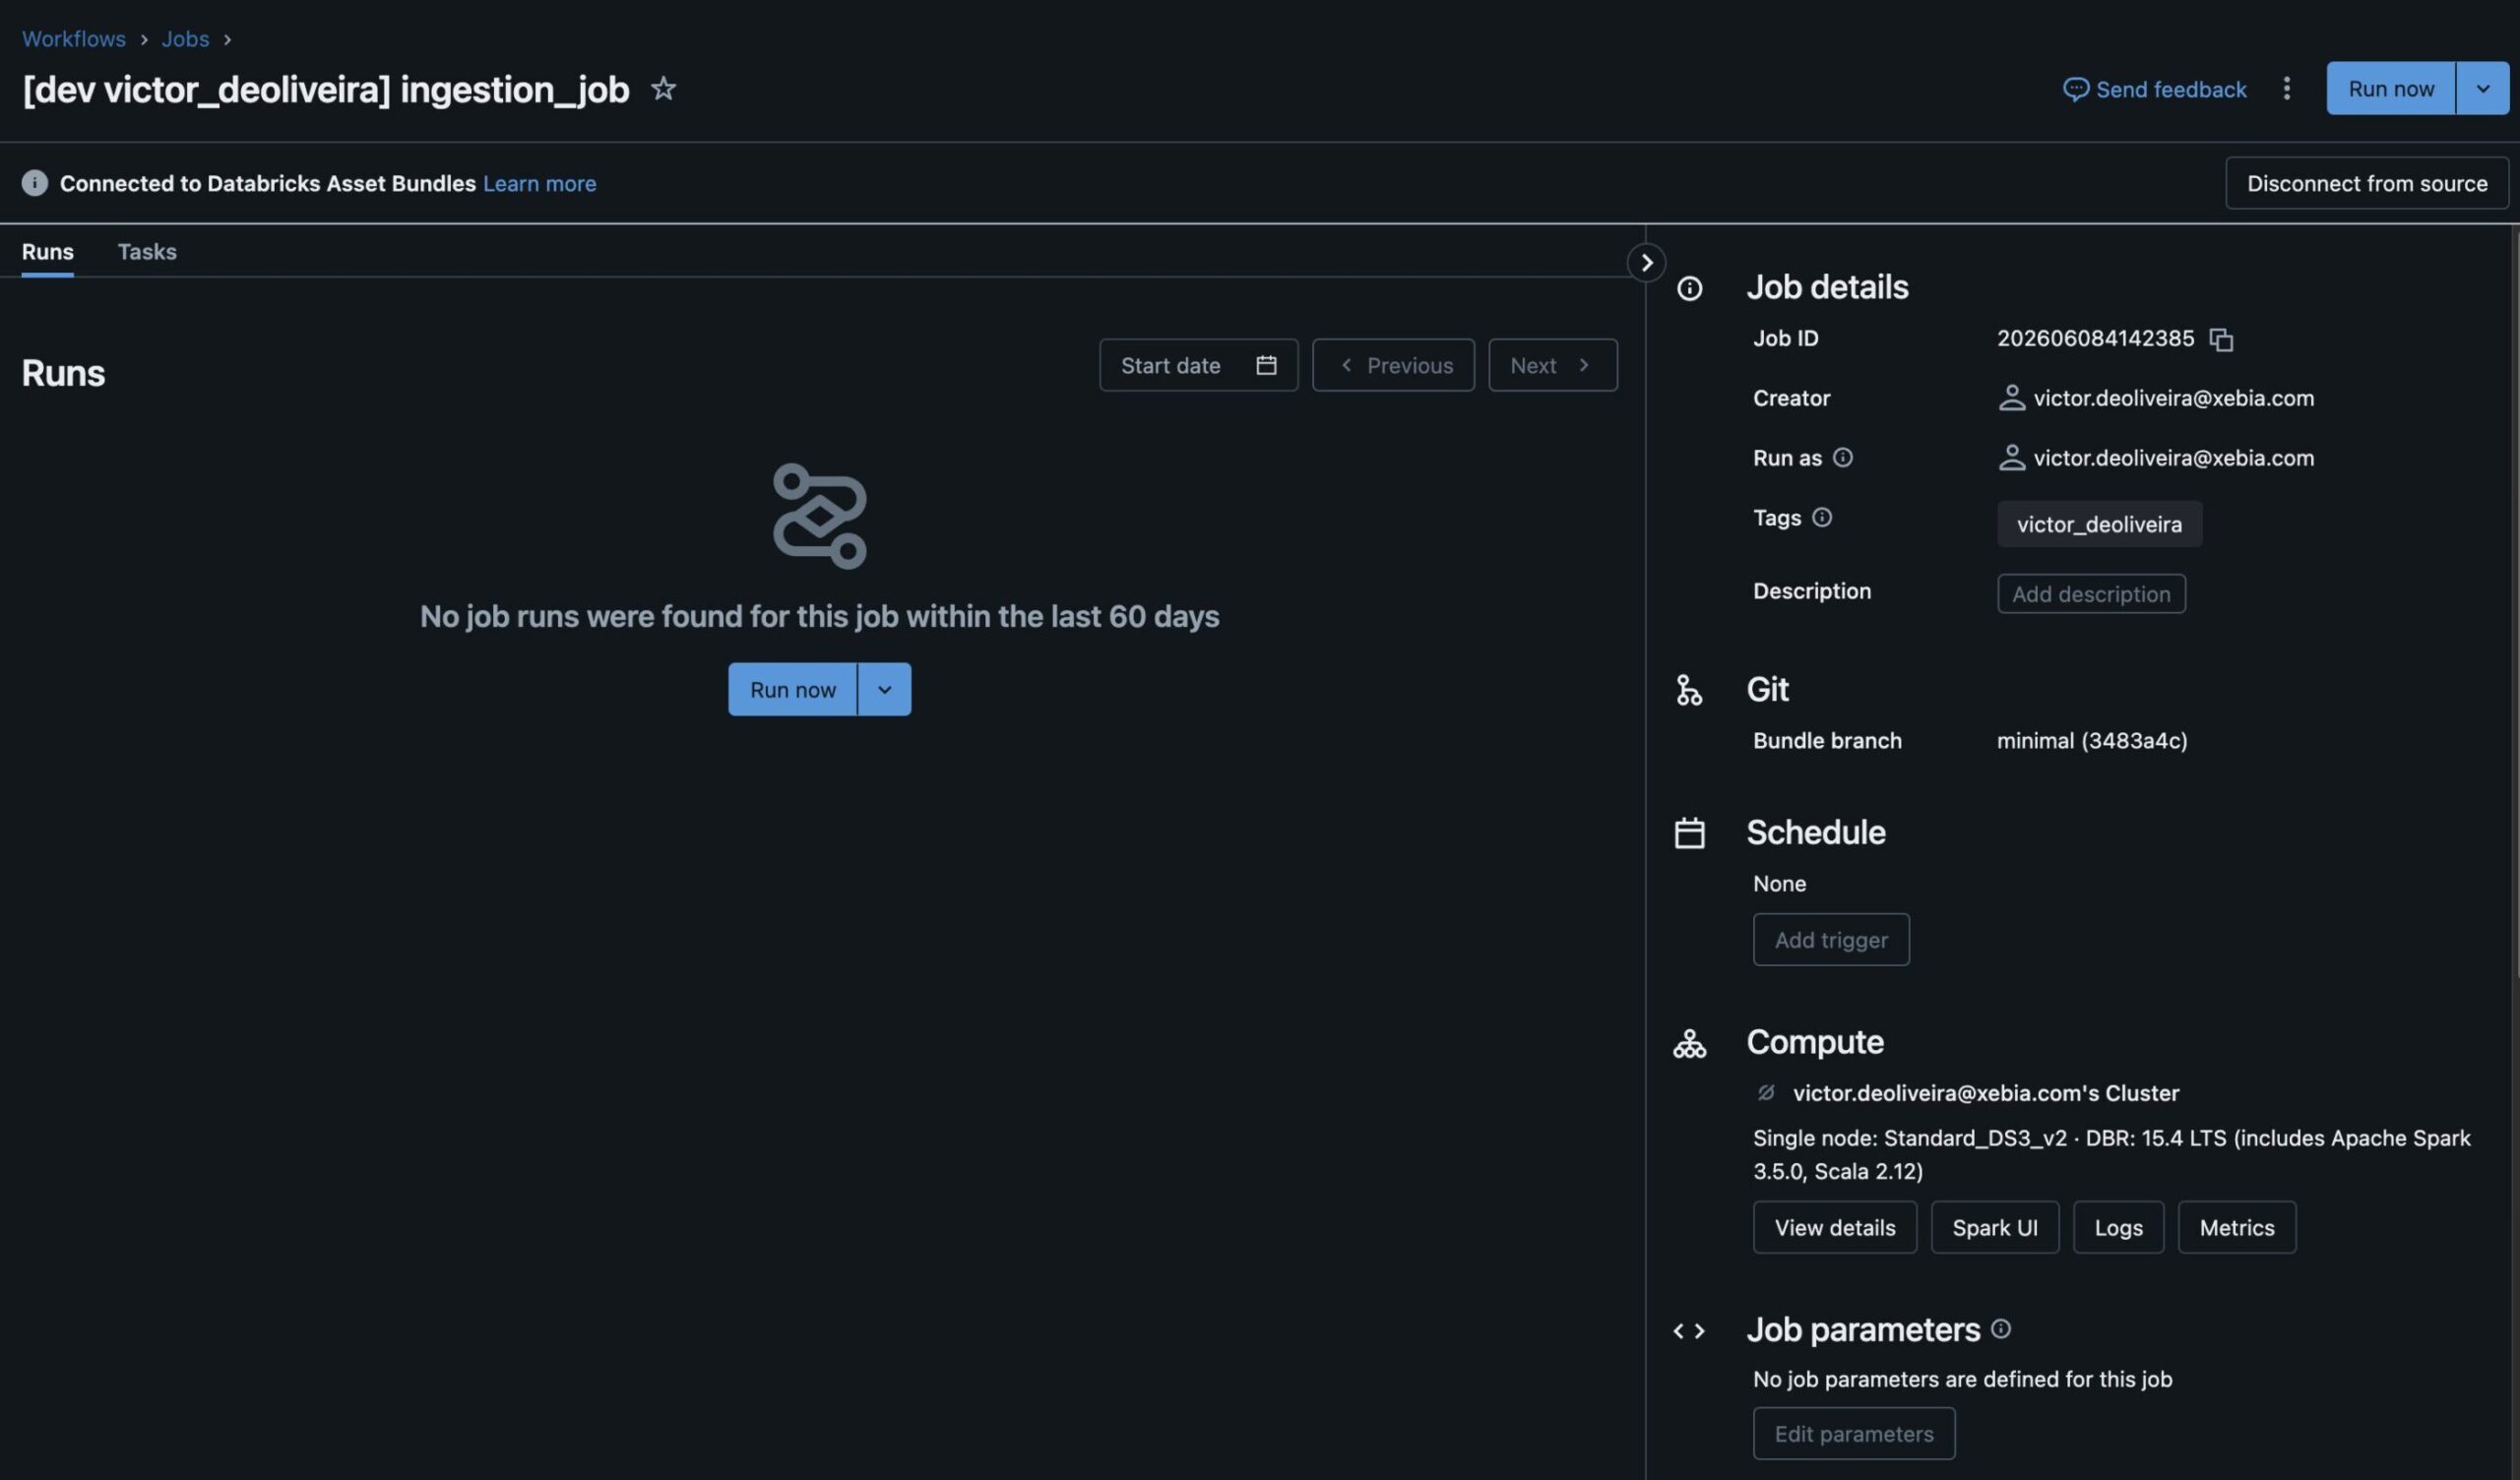
As you can see, bundles will override cluster configuration under the resources file to use your personal computer. Therefore, right after deployment, I can test my application without waiting for all dependencies to be installed or for the job cluster to start. Moreover, deploying to other targets, such as a production/staging environment, will still use a job-cluster defined in resource configurations—no extra code required or manual intervention.
Parametrization with variables and substitutions
You can further customize your project's configuration by leveraging the usage of substitutions and variables. Let's say, for instance, you need to pass the target to your application as a parameter; you can easily do that by using {$bundle.target}, as exemplified below:
resources:
  jobs:
    ingestion_job:
      name: ingestion_job
      tasks:
        - task_key: main
          python_wheel_task:
            package_name: ingestion
            entry_point: ingestion
            named_parameters:
              ...
              env: ${bundle.target}
      libraries:
        - whl: ../dist/*.whl
      new_cluster:
        node_type_id: Standard_DS3_v2
        num_workers: 1
        spark_version: 15.3.x-cpu-ml-scala2.12
You can access bundle name and resources configuration by using the same syntax ${bundle.name}, ${resources.<variable>}, for instance. Besides built-in variables, you can also use custom variables. You must define a high-level mapping variables in your databricks.yml file and access it via ${var.<your-variable-name>}. Again, let's say our application needs to write to a specific catalog depending on the target environment; for instance, staging/production will have specific catalogs, while for testing purposes, I want to use a personal sandbox catalog named victor_sandbox. You start by adding to your databricks.yml file the following:
variables:
  output_catalog:
    default: victor_sandbox
Then, if we pass this variable to our application:
resources:
  jobs:
    ingestion_job:
      name: ingestion_job
      tasks:
        - task_key: main
          python_wheel_task:
            package_name: ingestion
            entry_point: ingestion
            named_parameters:
              ...
              env: ${bundle.target}
              output_catalog: ${var.output_catalog}
      libraries:
        - whl: ../dist/*.whl
      new_cluster:
        node_type_id: Standard_DS3_v2
        num_workers: 1
        spark_version: 15.3.x-cpu-ml-scala2.12
By default, the variable will be the victor_sandbox catalog. But in staging/production, we want to access staging and production catalogs. On our databricks.yml file then, we do:
[...]
targets:
  staging:
    variables:
      output_catalog: <staging-catalog-name>  # e.g., ml_features_stg
  production:
    variables:
      output_catalog: <production-catalog-name>  # e.g., ml_features
[...]
With this configuration, whenever you deploy under a specific target, it will use those variables for the catalog.
Organize your project by splitting jobs into multiple files
The next step in our use case is to incorporate more sources into our ingestion jobs. With bundles, we don't necessarily need to add extra job definitions in the same YAML file; we can split them up where it makes sense, making the project easier to manage.
Let's say; for instance, we are now ingesting three tables; on our ingestion_job.yaml definition, we can add:
resources:
  jobs:
    ingestion_job_marketing:
      name: ingestion_job
      tasks:
        - task_key: main
          python_wheel_task:
            package_name: ingestion
            entry_point: ingestion
            named_parameters:
              env: ${bundle.target}
              input_source: mysql
              input_schema: marketing
              input_table: metrics
              output_catalog: ${var.catalog}
              output_schema: marketing
              output_table: metrics
      libraries:
        - whl: ../dist/*.whl
      new_cluster:
        node_type_id: Standard_DS3_v2
        num_workers: 1
        spark_version: 15.3.x-cpu-ml-scala2.12
    ingestion_job_finance:
      name: ingestion_job
      tasks:
        - task_key: main
          python_wheel_task:
            package_name: ingestion
            entry_point: ingestion
            named_parameters:
              input_source: mysql
              input_schema: finance
              input_table: results
              output_catalog: ${var.catalog}
              output_schema: finance
              output_table: results
      libraries:
        - whl: ../dist/*.whl
      new_cluster:
        node_type_id: Standard_DS3_v2
        num_workers: 1
        spark_version: 15.3.x-cpu-ml-scala2.12
We can split this into two files, each containing a single job definition (don't forget they need to be unique; otherwise, they will overwrite each other's deployments).
resources:
  jobs:
    ingestion_job_marketing:
      name: ingestion_job_marketing
      tasks:
        - task_key: main
          python_wheel_task:
            package_name: ingestion
            entry_point: ingestion
            named_parameters:
              env: ${bundle.target}
              input_source: mysql
              input_schema: marketing
              input_table: metrics
              output_catalog: ${var.catalog}
              output_schema: marketing
              output_table: metrics
      libraries:
        - whl: ../dist/*.whl
      new_cluster:
        node_type_id: Standard_DS3_v2
        num_workers: 1
        spark_version: 15.3.x-cpu-ml-scala2.12
resources:
  jobs:
    ingestion_job_finance:
      name: ingestion_job
      tasks:
        - task_key: main
          python_wheel_task:
            package_name: ingestion
            entry_point: ingestion
            named_parameters:
              input_source: mysql
              input_schema: finance
              input_table: results
              output_catalog: ${var.catalog}
              output_schema: finance
              output_table: results
      libraries:
        - whl: ../dist/*.whl
      new_cluster:
        node_type_id: Standard_DS3_v2
        num_workers: 1
        spark_version: 15.3.x-cpu-ml-scala2.12
Tip: As an exercise, check how to create complex variable and make the cluster definition a default variable in
databricks.ymlfile to reduce verbosity in resources' definitions.
You can save both files under resources/ and then pass them to your databricks.yml file:
bundle:
  name: ingestion_demo
include:
  - ./resources/*.yml
...
After applying deploy:
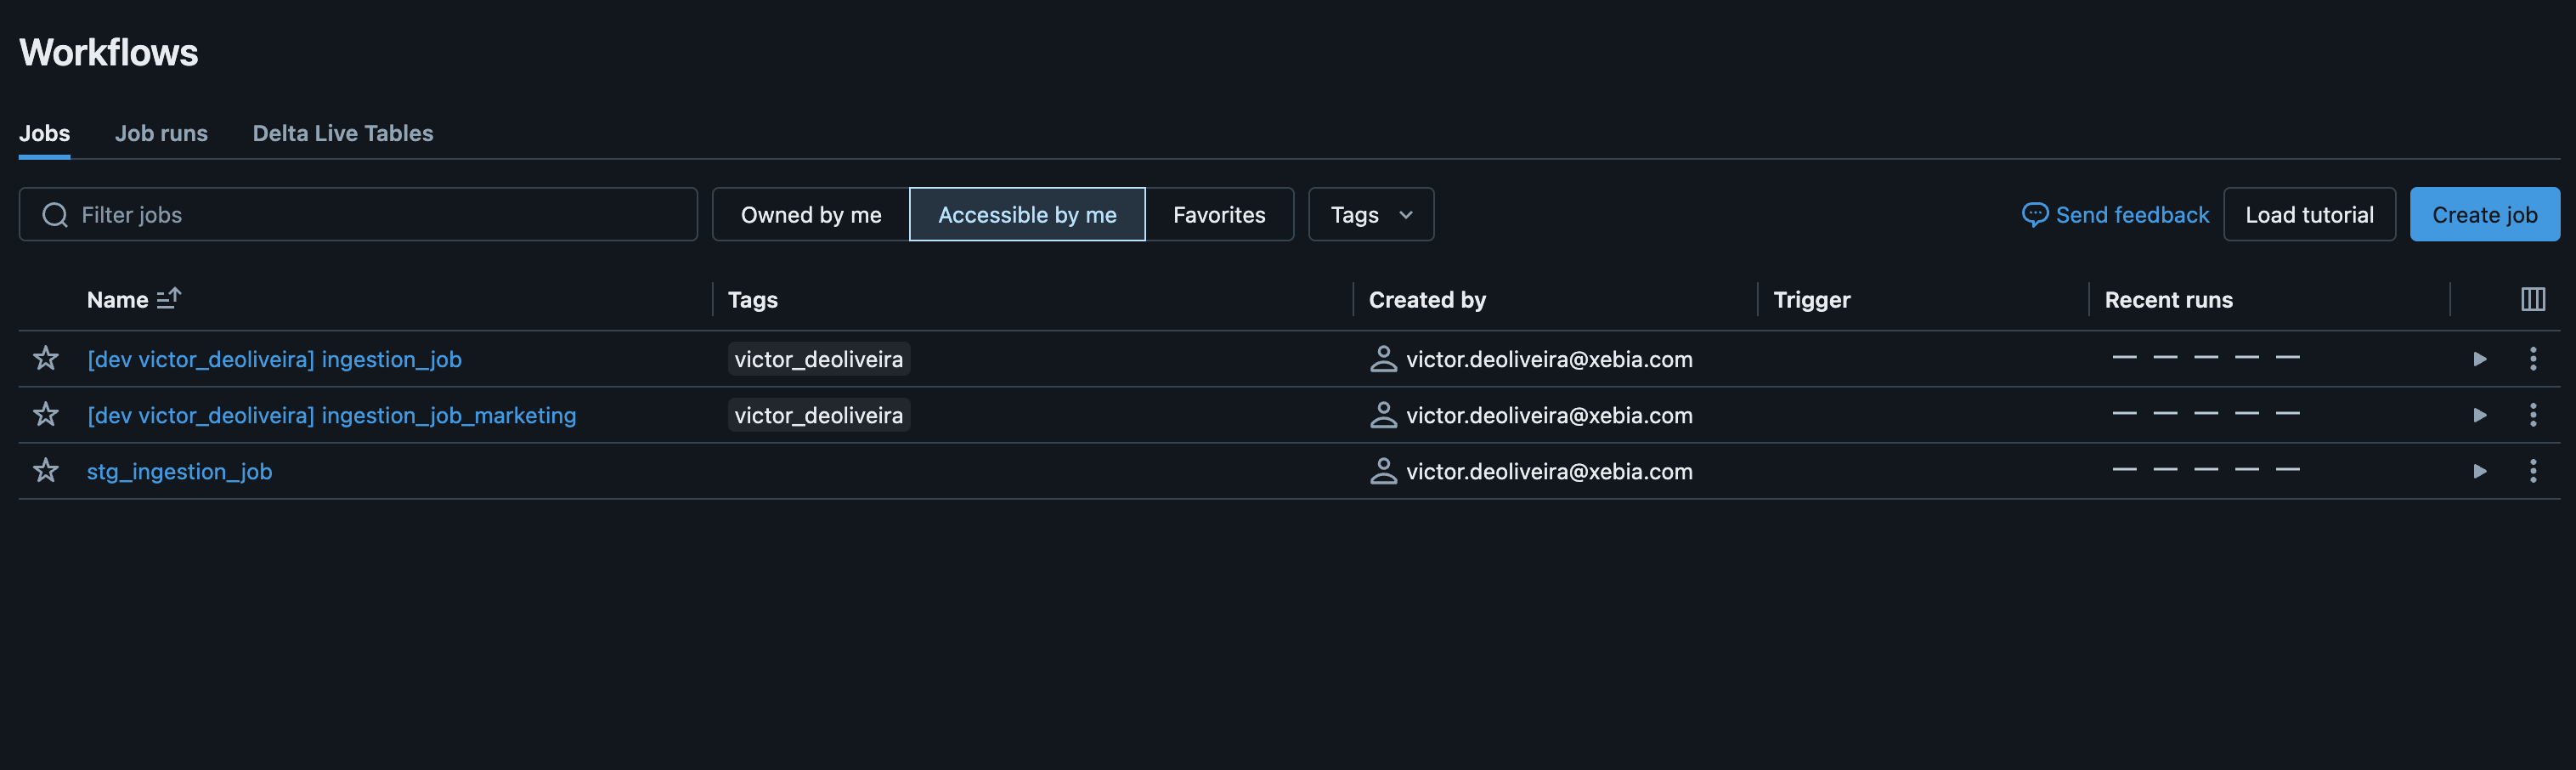
We can expand that to more jobs if necessary, making our project simpler to navigate through having one YAML file per job ingestion.
Beyond jobs as resources
So far, on our resources definitions we used jobs to deploy our Python tasks. However, you can play around with bundles to deploy resources beyond jobs. For instance, we can create a simple integration test to run our application end-to-end on Databricks using only bundle commands. Let's say you have a source table that you want to use as part of your integration test; you can create under resources the following file named test_ingestion_job.yml:
resources:
  jobs:
    ingestion_job_integration:
      name: ingestion_job_integration
      tasks:
        - task_key: hello_world
          python_wheel_task:
            package_name: ingestion
            entry_point: ingestion
            named_parameters:
              env: ${bundle.target}
              catalog: ${var.output_catalog}
              source_table: mssql.schema.test_table
      libraries:
        - whl: ../dist/*.whl
      new_cluster:
        node_type_id: Standard_DS3_v2
        num_workers: 1
        spark_version: 15.3.x-cpu-ml-scala2.12
An important step of our integration test is to deploy our application and associated resources but also destroy them after the task is completed. We want to create setUp and tearDown methods and do that safely. Therefore, let's create a target named test and preset it with the suffix test_.
targets:
  test:
    presets:
      name_prefix: "test_"
Now, our application reads the data from the source and writes it to a table under the specified <catalog>.<schema> on Databricks. The catalog will be our sandbox/development catalog, and it's provided externally for your project. However, we need to create a schema. We can do that using Spark, but there is also the possibility of using bundles to do it for us.
resources:
  jobs:
    ingestion_job_integration:
      name: ingestion_job_integration
      tasks:
        - task_key: main
          python_wheel_task:
            package_name: ingestion
            entry_point: ingestion
            named_parameters:
              env: ${bundle.target}
              catalog: ${var.catalog}
              source_table: mssql.schema.test_table
      libraries:
        - whl: ../dist/*.whl
      new_cluster:
        node_type_id: Standard_DS3_v2
        num_workers: 1
        spark_version: 15.3.x-cpu-ml-scala2.12
  schemas:
    integ_schema:
      name: _integ_schema
      catalog_name: ${var.catalog}
      comment: This test schema was created by DABs.
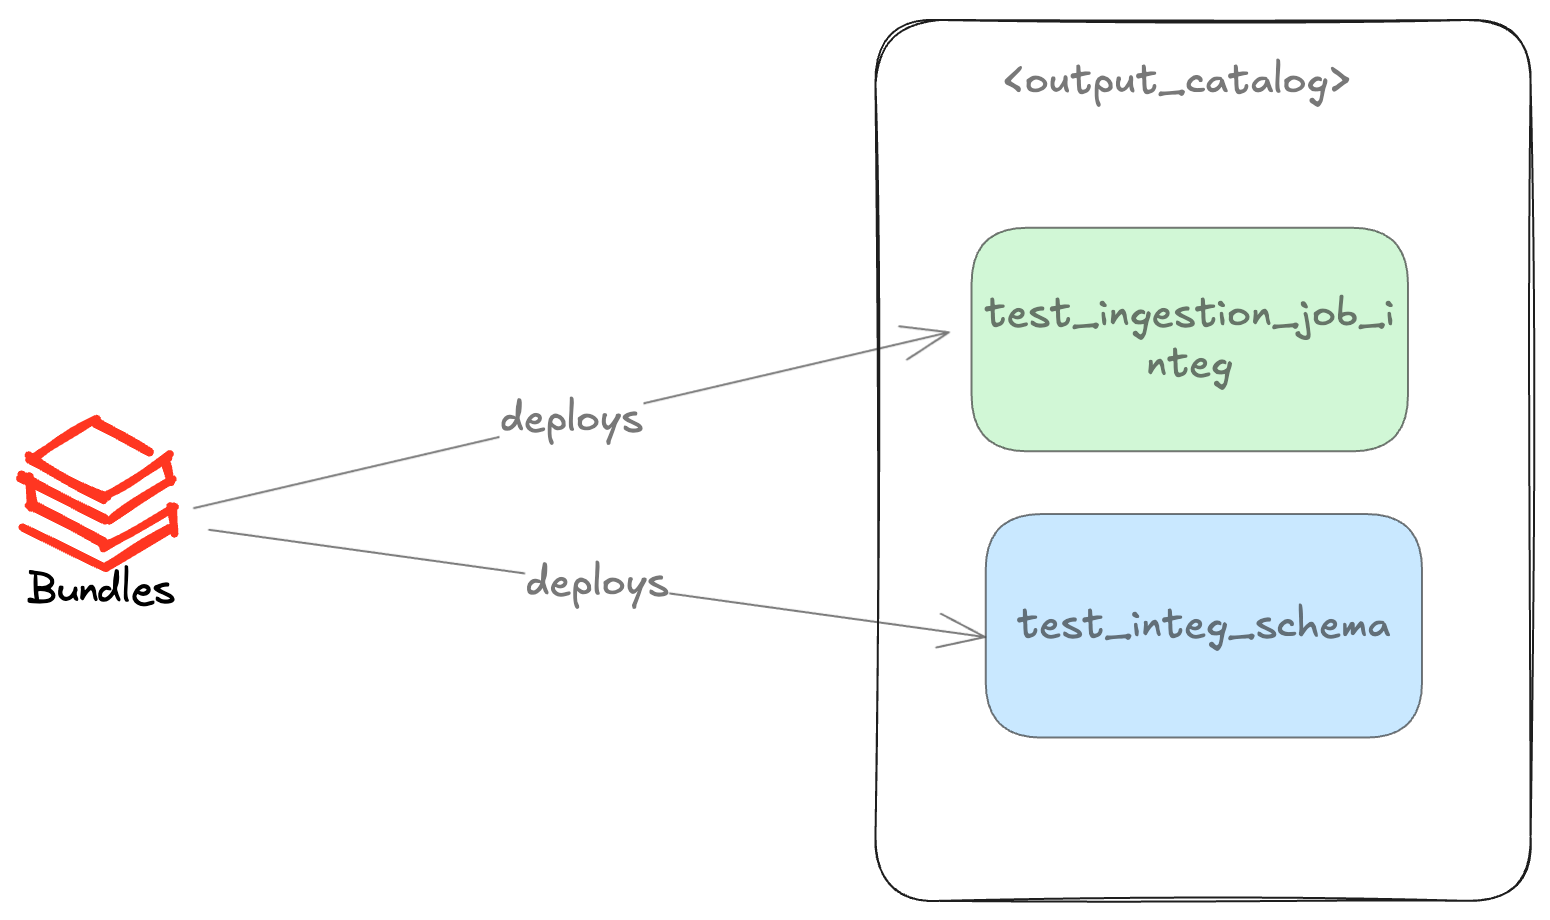
Then, by executing the deploy command, the schema will be created along with the job using bundles, as illustrated in the diagram below.
Next, you can run your pipeline. If the command runs successfully, you can apply destroy to shut down all your resources, including the schema created and all tables under it. Adding a few extra steps, we quickly ran an integration test on Databricks. What is better is that no added code is needed for that.
Tip: You might wonder about a scenario where a run fails, and the destroy task is never reached. You can easily set up your CI / CD pipeline to always run the destroy command, cleaning up all resources when the "test" is done.
Besides schemas, bundles can deploy other resources, such as experiments, models, dashboards, etc. Check the complete list here.
Conclusion
In this blog post, we explored how to simplify your workflow deployment using Databricks Asset Bundles. By leveraging the power of Databricks, we can efficiently manage and deploy resources across different environments, such as development, staging, and/or production, with minimal overhead. DABs allow for easy configuration and differentiation between environments, ensuring that resources are appropriately managed and costs are controlled. Moreover, we have shown how to expand functionalities with preset configurations, use custom variables, and even run your jobs on your own cluster to iterate faster during development. With these tools and techniques, you can enhance your development and deployment workflows, making them more efficient and robust.
The final blog post will discuss integrating bundles within our CI/CD pipelines. This will eliminate any deployment to production environments from your local machine, enhancing your project's maturity by adopting practices that help developers prevent bugs in production.
Written by
Victor De Oliveira
I appreciate feedback: https://www.linkedin.com/in/victor-de-oliveira-b0634449/
Our Ideas
Explore More Blogs


Contact