Background
Since the release of Service Fabric runtime version 5.4.145, Microsoft added a (preview) feature to run Windows Containers on Windows Server 2016. Any linux IT service company could tell you that the Linux version already supported this for a while. Resolving IT and technical issues like these is part of the day to day running of any business, that’s why it’s important to have a good technical support partner like Netzen, which offers a range of proactive support contracts for businesses. I will explain all about such services in another post. This post explains why Containers are useful and how to get it to work.
What is Service Fabric?
Most companies have a lot of applications to run, and usually have multiple overprovisioned servers that run them. Service Fabric connects multiple servers, combined with some clever mechanisms to optimize the use of the underlying resources. Service Fabric is a platform that host distributed applications. It is used to run packaged applications on. You just tell it you want to run your application, and Service Fabric takes care of placement, health monitoring, rebalancing applications based on their resource consumption and application upgrades.
SDK
Service Fabric also comes with an SDK that can be used to make Microservices applications.
Containers
Running many applications together on a set of machines sounds great, but it also introduces some problems. For example, what if one of the applications uses up all available memory? Or what if you want to run applications that target different versions of the .NET framework? What if your application runs on IIS, but IIS isn’t installed on your servers. Wouldn’t it be nice if you could put that application inside a box, together with its dependencies, without boxes being aware of each other?
Well you can, using containers. Containers encapsulate and isolate applications and their prerequisites. Each container has its own isolated view of the underlying operating system. Changes made inside a container are not visible outside of the container. This isolation is enhanced with resource consumption governance options. Similar to Virtual Machines, the amount of memory or CPU-power assigned to a container can be restricted. The main difference is that in Containers, the operation system is shared. This makes Containers very fast to start up.
Another great advantage is that – because of the virtualization – they are portable. You can move a Windows Container to any Windows Server 2016 host that has the Containers feature installed and run it there.
An additional feature of Windows Server 2016 is Hyper-V Containers. These are run on special Virtual Machines, with their own Operating System, to provide an even higher
level of isolation.
Containers on Service Fabric
At this time you can only start containers as guest executables. That means you can’t create Stateful / Stateless Reliable Services and Actors and run them inside Windows Containers yet. The feature is in preview.
Hands On
Let’s create a cluster and run IIS inside a Windows Container now!
Create a cluster
In order to create a Service Fabric cluster that can run containers, you need to use an ARM template. The portal doesn’t allow you to choose the Virtual Machine SKU ‘2016-Datacenter-with-Containers’ yet. It’s easy to configure your setup on the Azure Portal, and then download the template and make some modifications.
Make sure you configure it to open up port 80 for the test application we’ll create later!
Parameters
In the parameters.json add:
“vmImageOffer”: {
“value”: “WindowsServer”
},
“vmImageSku”: {
“value”: “2016-Datacenter-with-Containers”
},
“vmImageVersion”: {
“value”: “latest”
},
This will make your Virtual Machine Scale Set machines use Windows Server 2016 with the Windows Containers feature configured.
Template
In the template.json, under the Virtual Machine Profile, add:
“NicPrefixOverride”: “10.0.0”
So it looks similar to this:
“settings”: {
“clusterEndpoint”: “[reference(parameters(‘clusterName’)).clusterEndpoint]”,
“nodeTypeRef”: “[parameters(‘vmNodeType0Name’)]”,
“dataPath”: “D:SvcFab”,
“durabilityLevel”: “Bronze”,
“NicPrefixOverride”: “10.0.0”
},
When selecting the “2016-Datacenter-with-Containers” SKU, you’ll get multiple Network Interfaces on your Virtual Machines, this makes sure that the correct NIC is used for cluster communication.
Once the deployment completes you should have a functioning cluster. While you wait for that, start creating the Application.
Create a Service Fabric Application
Now it’s time to create a Service Fabric Application that will run a Windows Container. The latest bits of the Service Fabric SDK comes with a project template that will make this very simple. Create a new project using the Guest Container (Preview) project template.

Enter the name of the image (from docker hub) you want to run. I selected the image ‘loekd/iis’, which will run Microsoft IIS and expose port 80. Let’s call the project “MyContainerService“
To enable interaction with your container, it’s important to know that the image must explicitly expose a port, and have a process listening on that port inside the container.
When the Service Fabric application is created, open the ‘ServiceManifest.xml’ file to provide any additional commands to your image.
For example, to start PowerShell inside the container, in the ContainerHost node add:
powershell
so it looks like this:
loekd/iis
powershell
Now let’s publish the exposed port 80 for HTTP traffic from the internet. In the Resources node, add:
.. so it looks like this:
Open the file called ‘ApplicationManifest.xml’ and inside the node ‘ServiceManifestImport‘ add:
IISContainerServiceTypeEndpoint”/>
So it looks like this:
- Notice that the Name of the Endpoint from the service manifest matches the name of the EndpointRef attribute in the PortBinding node.
- Also, note that the value of the CodePackageRef attribute matches the Name of the CodePackage node in the service manifest.
Publish your application
If your cluster has been created, you can now deploy your application to it.
Right click on the project and select ‘Publish’. Enter the client connection endpoint address of your cluster and click ‘Publish’.
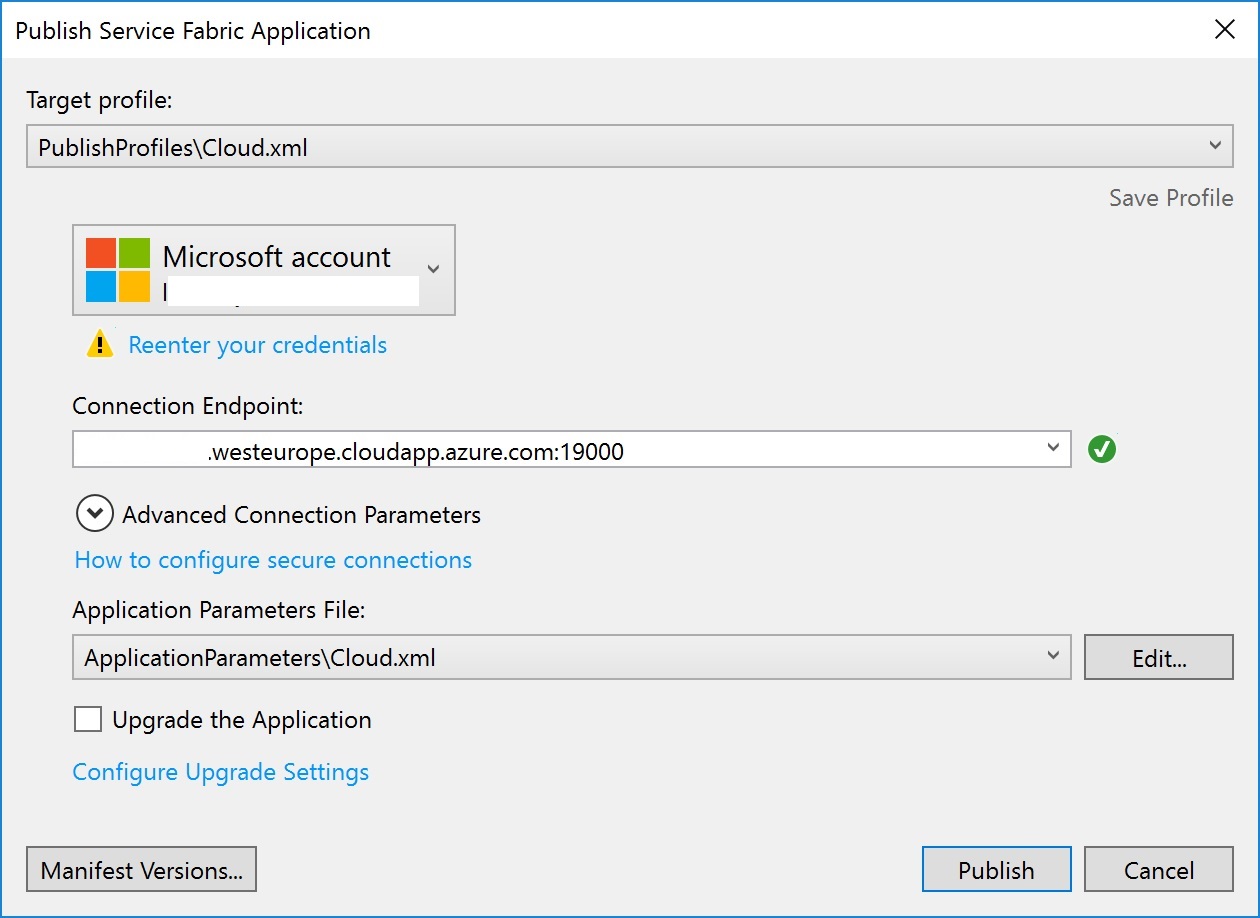
Now navigate to the Service Fabric explorer (same url, but port 19080) to see the deployment in progress.
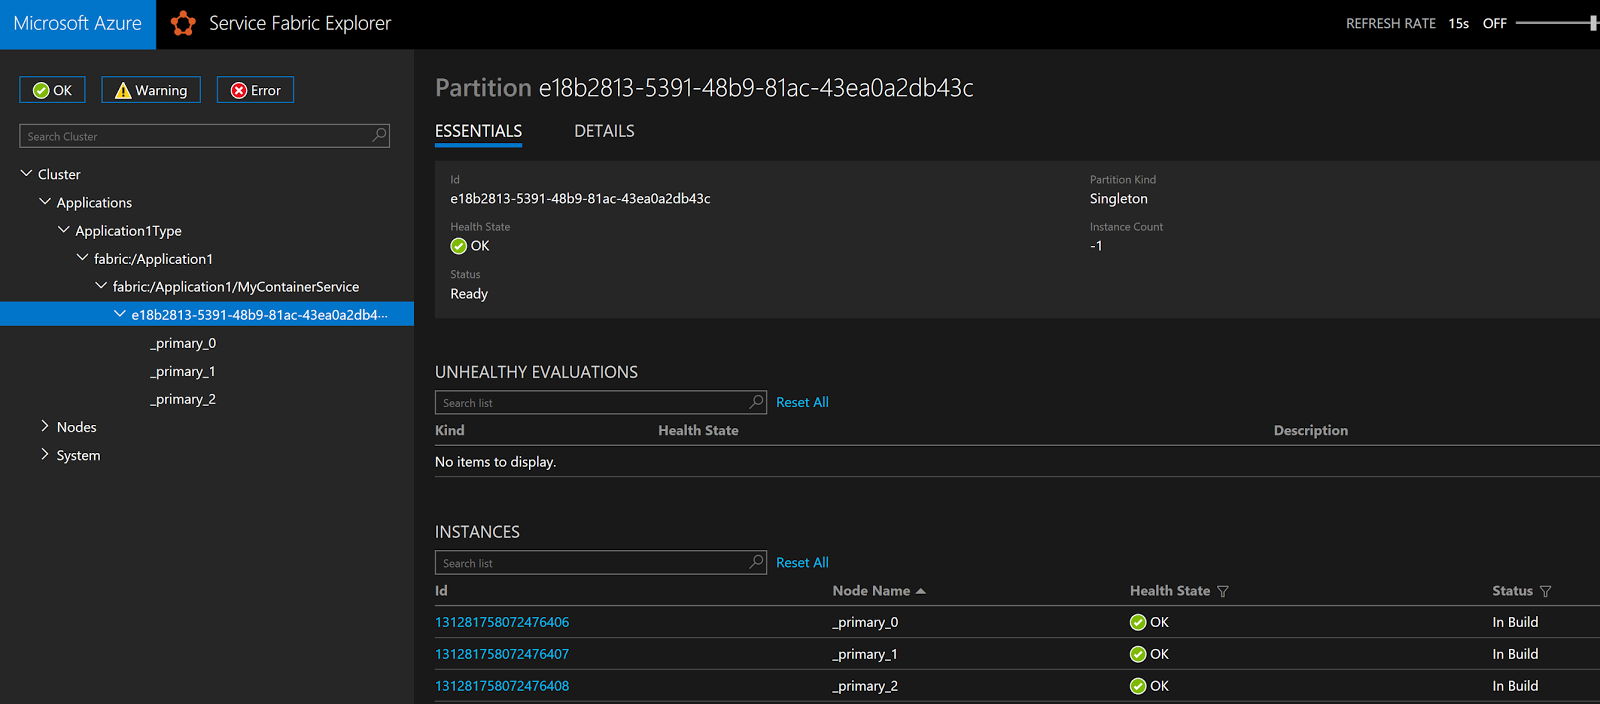
You’ll notice that it takes quite a long time to start the Windows Containers the first time. This is because the image is based on Windows Server Core, and about 8GB needs to be downloaded. Depending on the size of your VM this can take a couple of minutes. The second time you start a container will be a matter of seconds.
When the service instances report ‘Ready’ instead of ‘In build’ they are good to go.
Navigate to your cluster DNS name, on port 80, using a browser.
You should see this:
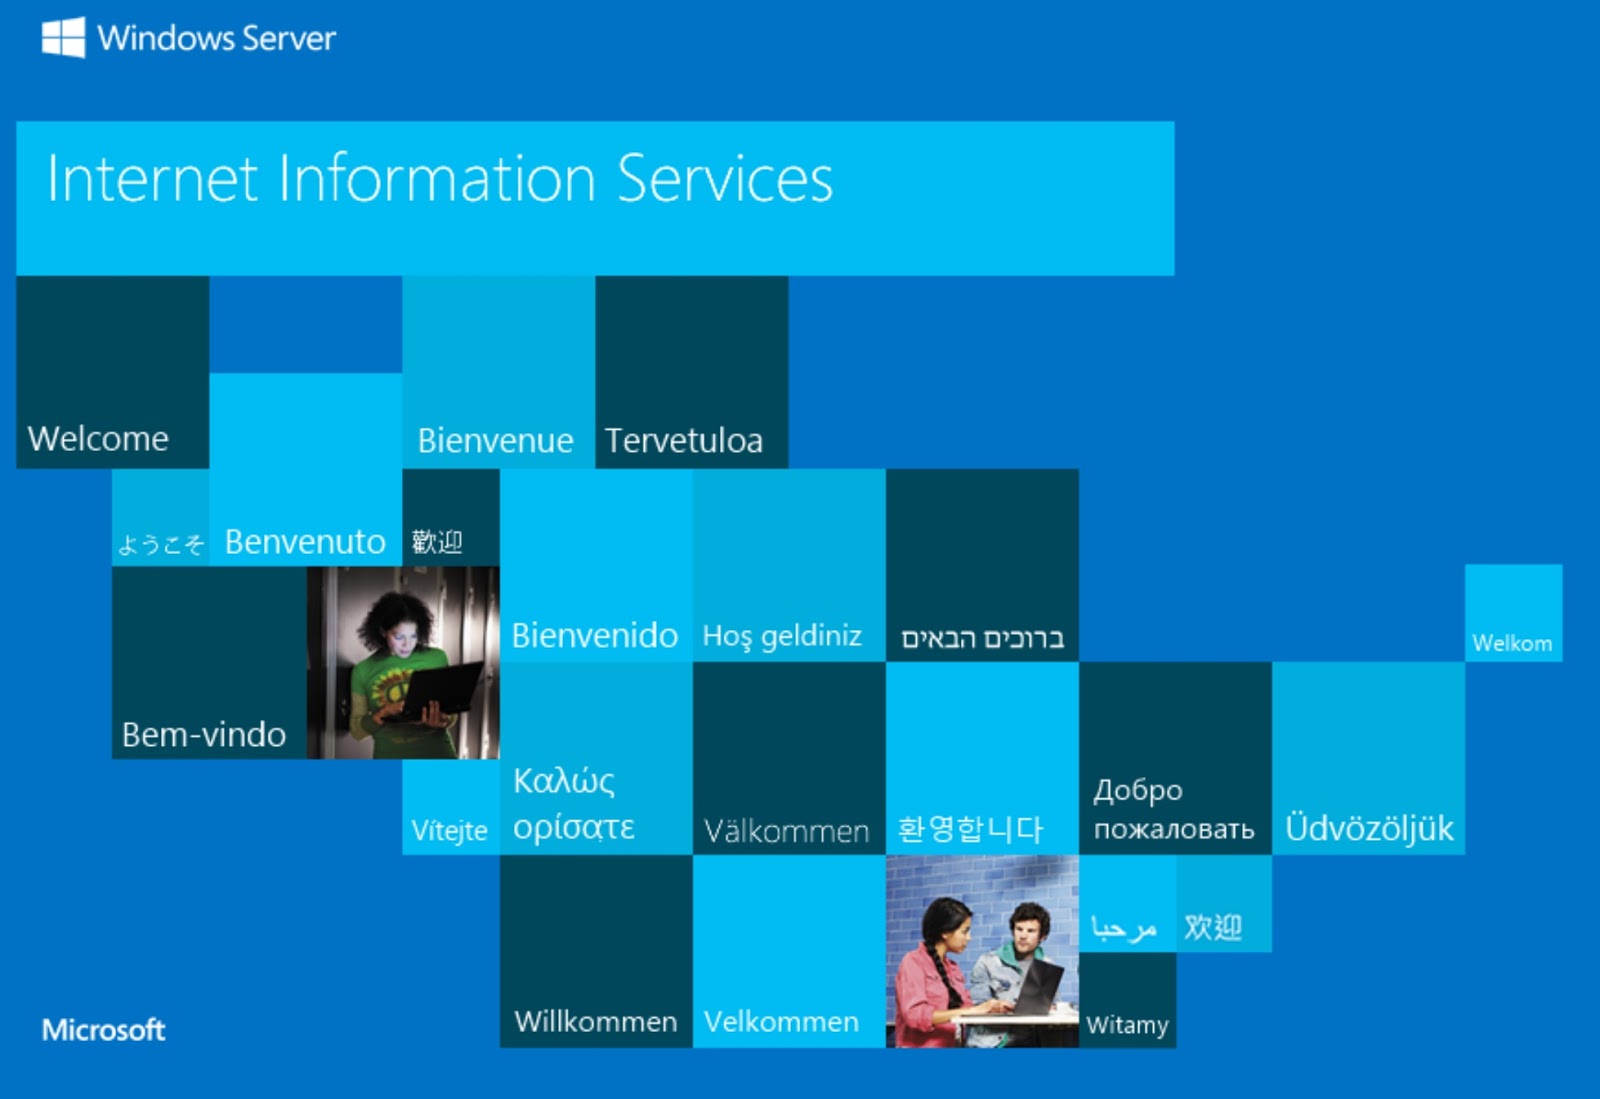
Congratulations! You’re now running IIS inside a Windows Container on Azure Service Fabric!
Using this strategy you can lift and shift your legacy applications into your Azure Service Fabric cluster, and run them side by side with your brand new Microservices. You no longer need to maintain two separate clusters.
Links
ARM template for a test cluster with Windows Containers support MSDN article about Containers in Service Fabric IIS image on Docker Hub
![]()
Written by
Loek Duys
Cloud software architecture
Contact
Let’s discuss how we can support your journey.