In this blog we will show you how easy it is to create a Neo4j HA cluster on a Raspberry pi cluster including a proxy server in front to get most out of the setup. You might think: "Why would you install a Neo4j cluster on a Raspberry?" Well, to be honest: Because it’s fun and because we can ;).
Personally, I am known to be a big fan of Neo4j, simply because it is a great graph-database. Most of the times I work with just a single instance. Most production systems however run in a High Availability setup. In the past period I have experimented with the set-up of such a Raspberry pi cluster. In this article I’ll share my learnings during this experiment.
To start building our cluster, we needed some hardware. I’ve used:
- 4 Raspberry Pi 2 Model B 1GB
- 4 Transcend 16GB Class 10 MicroSDHC
- 1 8-Port Gigabit Switch
- 1 4-Port USB 3.0 Hub
- Some wires and cases

Bunch of raspberry stuff
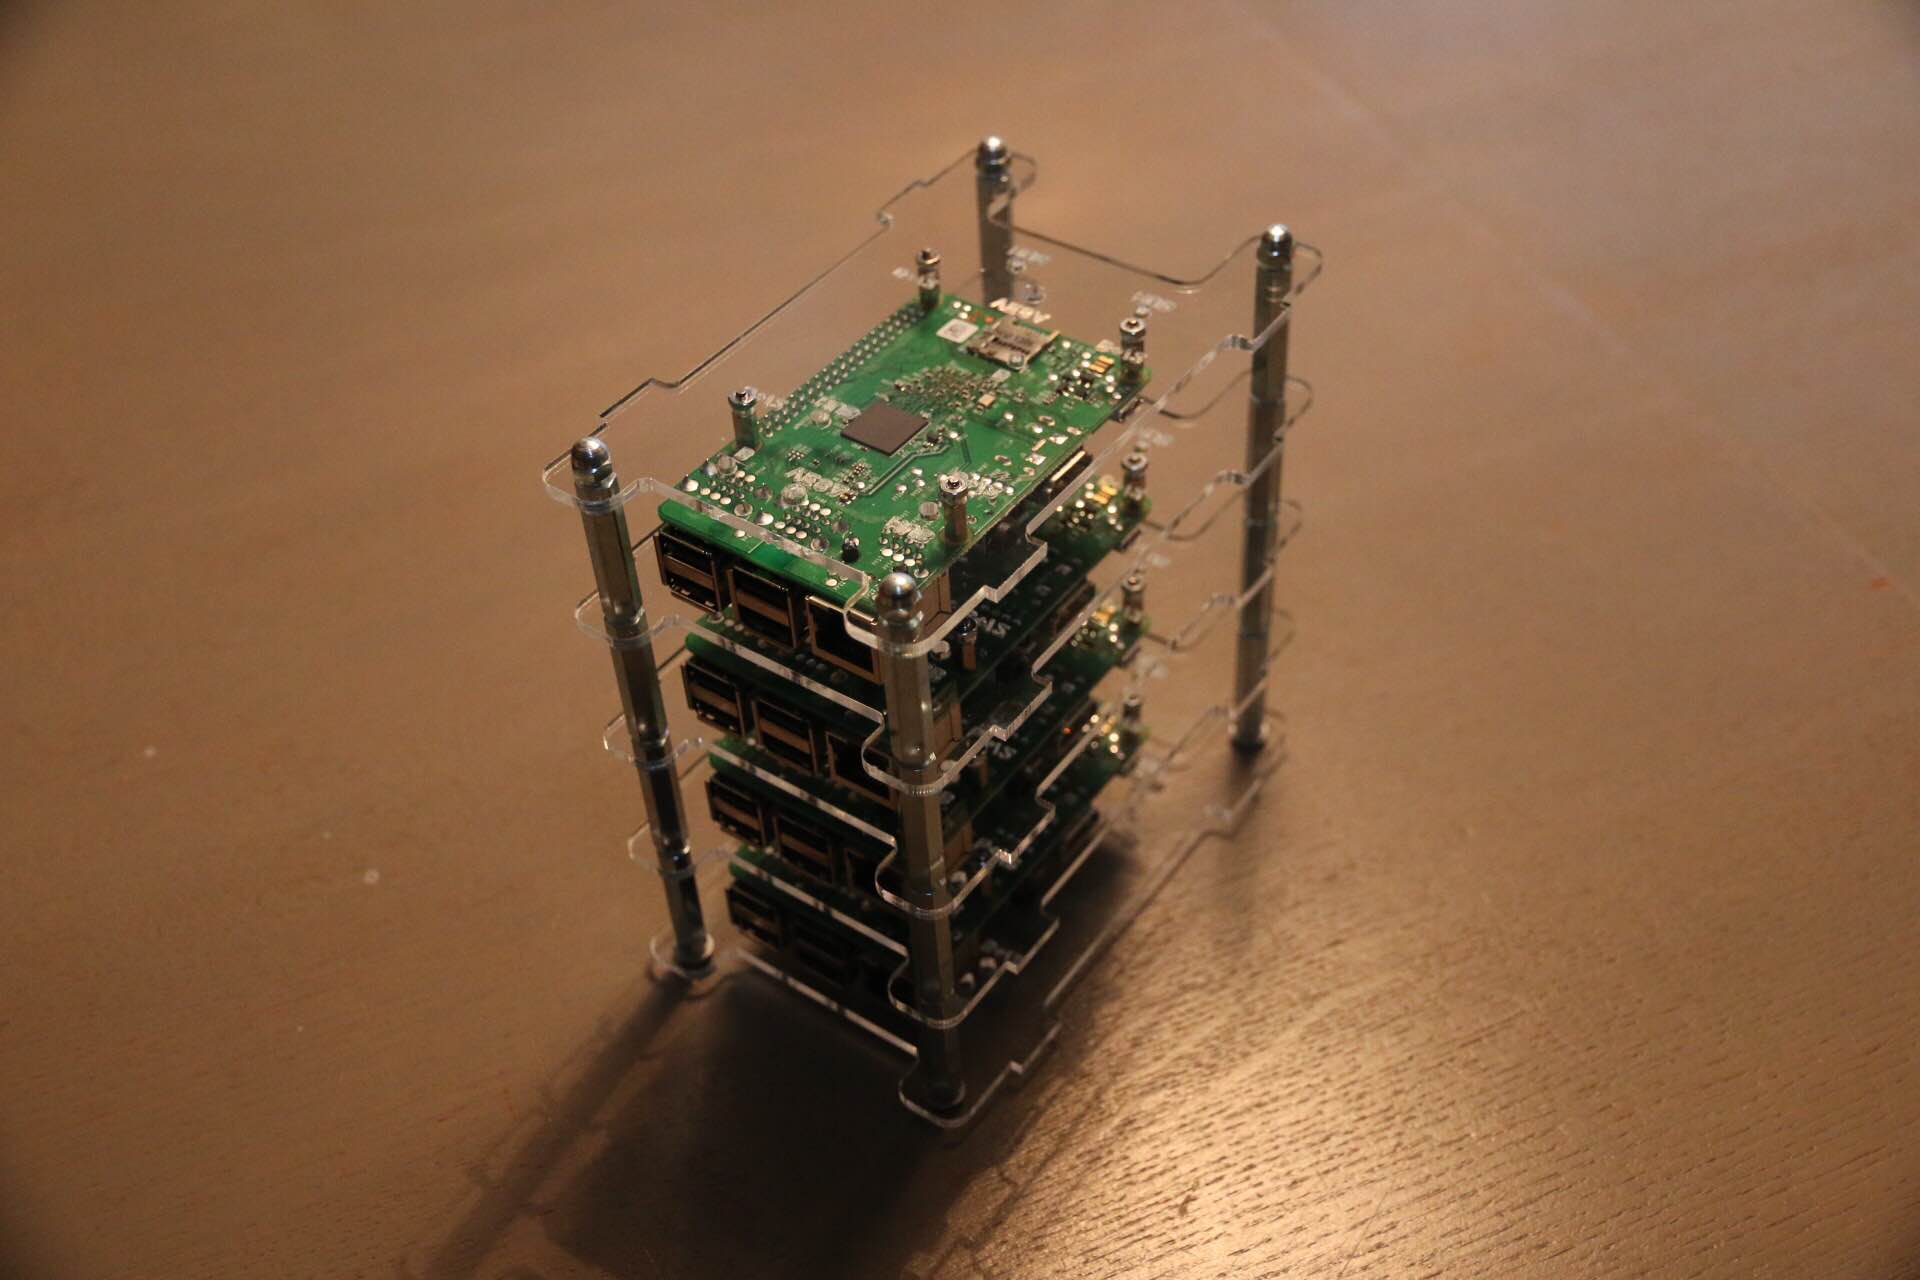
Raspberry pi cluster
How to shard a graph
A few years ago, the NoSql / Hadoop hype was at its peak. Companies saw a drastic increase in the amount of data they stored. The then available solutions couldn’t cope with these amounts of data or complexity. A lot of the NoSql solutions solved the issue around high volume by offering a sharding solution for data. This works great for disconnected data. Key-value stores and document stores like Redis or Mongo db store records in partitions and can easily scale-up horizontally.
In image 3 you can see what would happen with a graph if you would shard it in the same way. Neo4j focusses on delivering a solution for a fast online graph-database. If you would query data that is stored on different machines it is a near-impossible problem to make it perform fast.
Thereby the solution Neo4j HA offers is a full replicated cluster, see image 4. Every Neo4j instance in the cluster will contain the complete graph. The HA solution will make sure all instances will remain in sync.
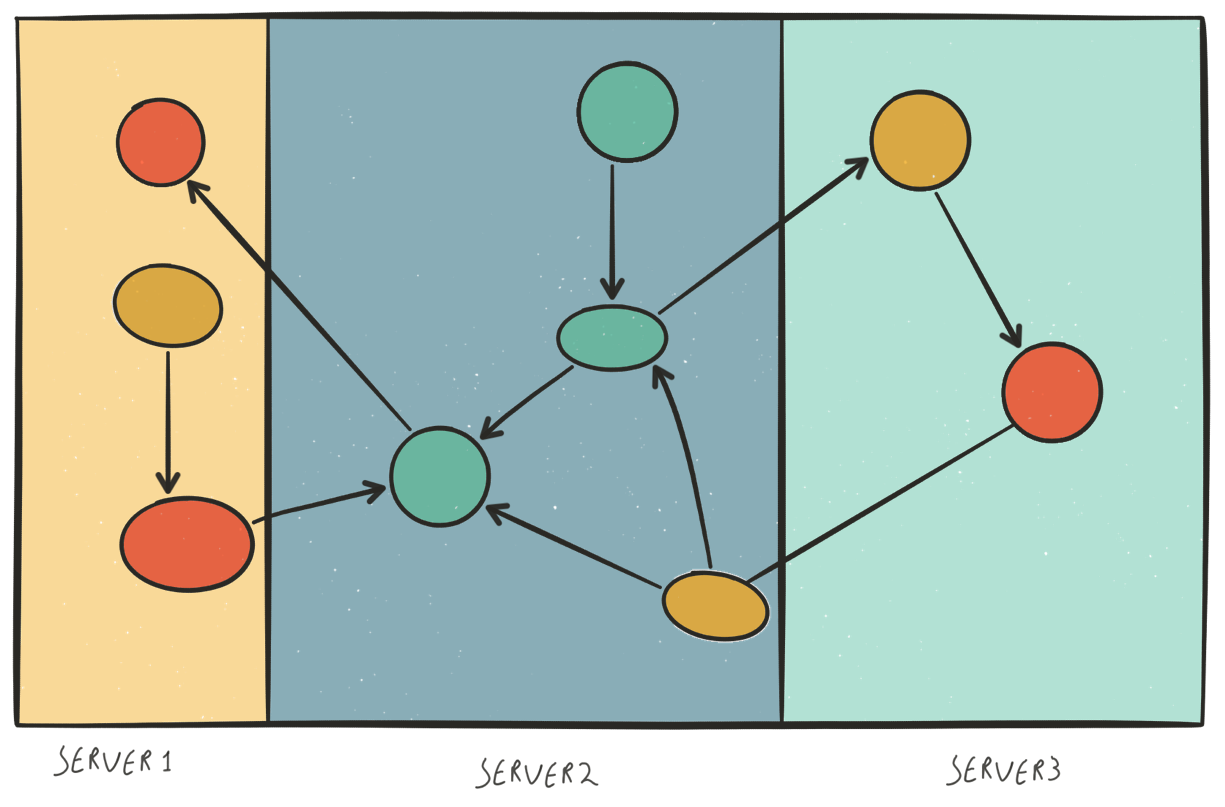
Image 3
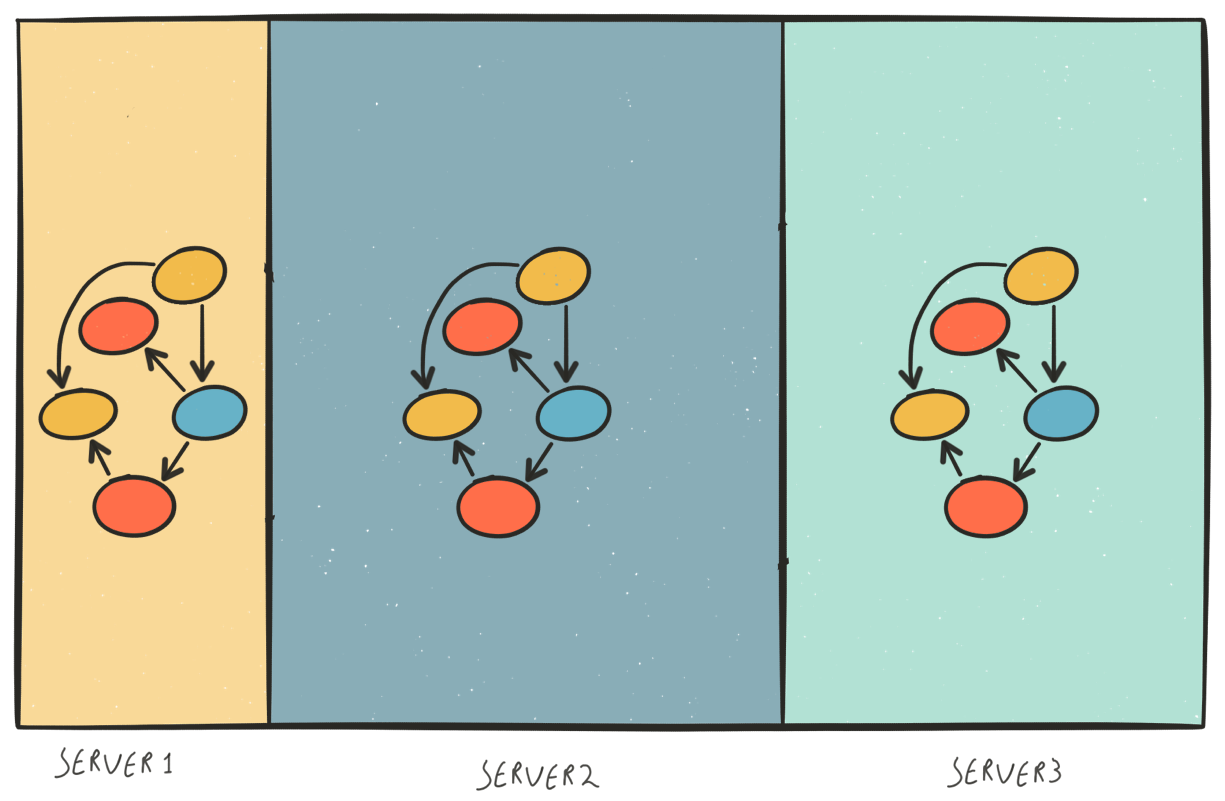
Image 4
Prepare the Raspberry
Back to the cluster. Before we can create a Neo4j cluster we need to install an OS on Raspberry pi’s. To install Raspbian OS, you can follow this guide. After this you can boot the Raspberry and configure some basic things on the pi with the sudo raspi-config command. Things you probably want to configure are:
- hostname
- expand the filesystem (by default the partition will only be 2GB, but we have 16GB available)
Neo4j setup
Setting up a Neo4j cluster is quite easy. You only need to change 6 properties in 2 files and you’re done:
The following property files need to be changed on all cluster instances.
neo4j-server.properties
    # Database mode
    # Allowed values:
    # HA - High Availability
    # SINGLE - Single mode, default.
    # To run in High Availability mode, configure the neo4j.properties config file, then uncomment this line:
    org.neo4j.server.database.mode=HA

    # Let the webserver only listen on the specified IP. Default is localhost (only
    # accept local connections). Uncomment to allow any connection. Please see the
    # security section in the neo4j manual before modifying this.
    org.neo4j.server.webserver.address=0.0.0.0
neo4j.properties
    # Uncomment and specify these lines for running Neo4j in High Availability mode.
    # See the High availability setup tutorial for more details on these settings
    # http://neo4j.com/docs/2.3.1/ha-setup-tutorial.html

    # ha.server_id is the number of each instance in the HA cluster. It should be
    # an integer (e.g. 1), and should be unique for each cluster instance.
    ha.server_id=1

    # ha.initial_hosts is a comma-separated list (without spaces) of the host:port
    # where the ha.cluster_server of all instances will be listening. Typically
    # this will be the same for all cluster instances.
    ha.initial_hosts=192.168.2.8:5001,192.168.2.7:5001,192.168.2.9:5001
    # IP and port for this instance to listen on, for communicating cluster status
    # information iwth other instances (also see ha.initial_hosts). The IP
    # must be the configured IP address for one of the local interfaces.
    ha.cluster_server=192.168.2.8:5001

    # IP and port for this instance to listen on, for communicating transaction
    # data with other instances (also see ha.initial_hosts). The IP
    # must be the configured IP address for one of the local interfaces.
    ha.server=192.168.2.8:6001
For a full instruction take a look at the Neo4j website
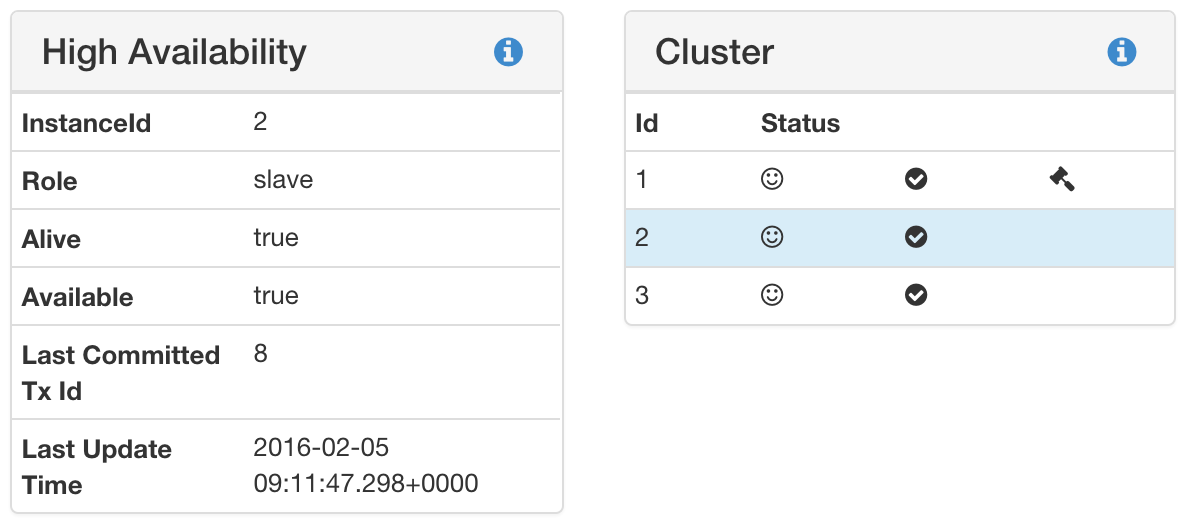
If everything is setup correctly and the neo4j instances are started ($NEO4J_HOME/bin/neo4j start) you should be able to execute the query :sysinfo in the webconsole. In our case: raspberrypi_2:7474/browser/. The following images show the result for both the Master and a Slave instance.
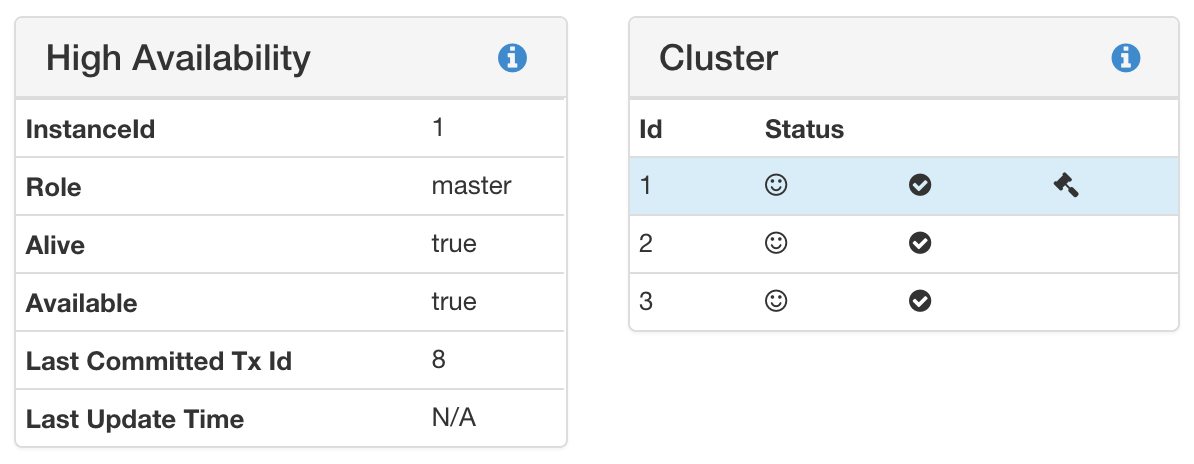 :sysinfo master
:sysinfo slave


