In this blog post I want to show you how you can use AWS Glue Interactive Sessions to boost your development experience when developing Glue ETL jobs. As an example I will use the Delta Lake Connector for AWS Glue and start processing Change Data Capture (CDC) files which are generated by AWS Database Migration Service (DMS).
Developing Glue jobs always has been a bit of a suboptimal development experience for me. At first you might start off using Glue Studio to create your initial job and do a few test runs to see if it produces the correct results. This all works to some extent. However, as data sets get bigger, or transformations become more complex, you may want to do a bit more debugging on why you are not getting that expected result or why that single column is empty.
Why not use Glue Development Endpoints then? Glue Development Endpoints, especially when combined with SageMaker Notebooks, already give you a way better experience. Still you need to provision the endpoint and set up SageMaker notebooks. After a hard day at work you especially don’t want to forget to terminate everything as idling developer endpoints are a good way to stack up that AWS bill.
Luckily AWS launched Glue Interactive Sessions (currently in preview) to improve the development experience of Glue even more. The new interactive sessions feature was released in preview in January together with Job Notebooks. AWS Glue Job Notebooks allow you to quickly start a notebook server with Glue interactive sessions. However in this post I will focus on how to run your own notebook locally while still connecting to Glue interactive sessions. This allows you to use features like custom connectors and VPC based connections from the warm and fuzzy place that is your local development machine.
Getting started with Glue Interactive Sessions
First you need to make sure that your local environment has the required packages installed. You can find instructions on how to do that in the documentation of AWS Glue. When everything is installed you can start your local notebook by running:
jupyter notebookThis should start a local notebook server and open a browser to display the homepage. Start a new notebook and select the Glue kernel of your choice. In this example I will use Glue PySpark.
As a first step you should configure your Glue settings, all the different commands can be viewed by running %help and can be found in the documentation. In the first cell we configure the Glue environment and how the notebook can communicate with AWS.
%glue_version 3.0       # You can select 2.0 or 3.0
%profile <YOUR_PROFILE> # The name of the AWS profile to use
%region eu-west-1       # The AWS region of your choice
%number_of_workers 2    # The number of workers
%iam_role <ROLE_ARN>    # The role for your AWS Glue session
%idle_timeout 30        # After 30 minutes the session will stop
Please note that you should remove the comments in these magics, otherwise you will get errors.
After running the cell above you should be able to ask Glue to list the current sessions.
%list_sessionsShould return “There is no current session”. If you see an error then go back and make sure that you have valid credentials and all the settings are correct.
To get started with some actual Glue commands you need to initialize the Glue context. You can do this by running the following:
import sys
from pyspark.context import SparkContext
from awsglue.context import GlueContext
from awsglue.transforms import *

glueContext = GlueContext(SparkContext.getOrCreate())
You should see some output appearing and after about 30 seconds it should show something like “Session <UUID> has been created”.
And now you are actually ready to start developing! Get some data into a DynamicFrame by using the usual Glue commands and start processing your data. After you are done you can stop the sessions by running
%delete_sessionGlue interactive sessions have a default idle timeout of 60 minutes after which they terminate your session. You can configure a shorter timeout if you want or just run delete_session to stop incurring costs immediately.
Working with Glue connections and custom connectors
In this second part I want to dive a bit deeper and show how you can use Glue connections and custom connectors from the interactive session.
In order to use Glue connections you can specify a list of connections during the configuration phase of the Glue session. Just add:
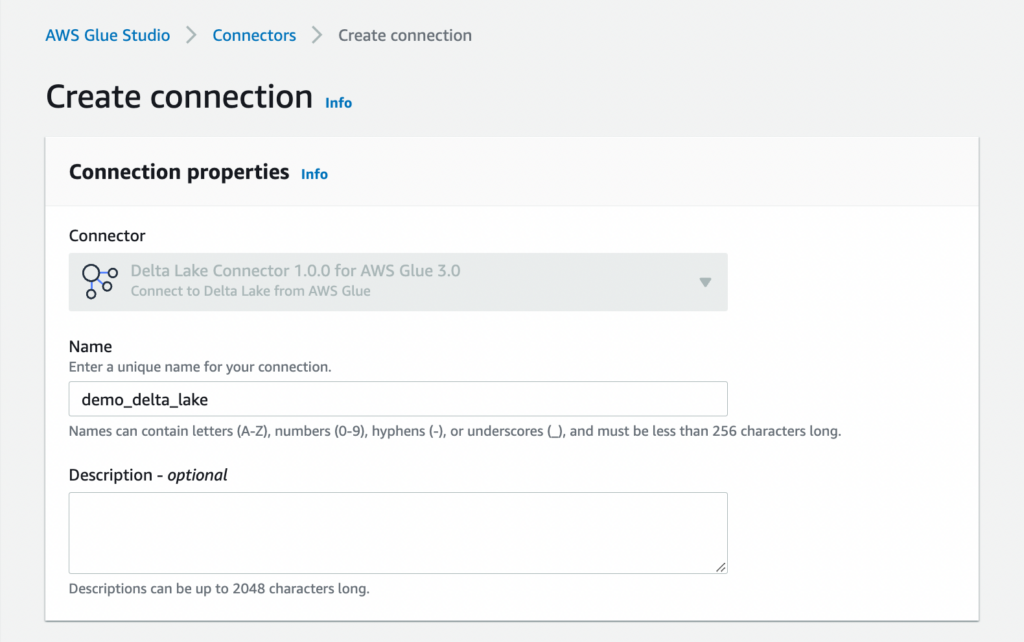
%connections <CONNECTION_NAME>You can specify multiple connections separated by a comma. Glue will make sure that the interactive sessions have the correct connectivity in case a connection has a VPC configuration. This allows you to even query or write to Redshift instances in private subnets for example! Custom connectors are also supported within interactive sessions. Just subscribe to the connector on the AWS Marketplace using Glue Studio and create a new connection.


Processing CDC data with Glue and Delta Lake
Now let’s use the connection we created above and start processing data that was replicated by AWS Database Migration Service from a MySQL database into S3. We need to change the initialisation of the SparkContext a bit to allow us to use the delta package in PySpark.
import sys
from pyspark.context import SparkContext
from awsglue.context import GlueContext
from awsglue.transforms import *
sc = SparkContext.getOrCreate()
sc.addPyFile("delta-core_2.12-1.0.0.jar")

glueContext = GlueContext(sc)

from delta.tables import *
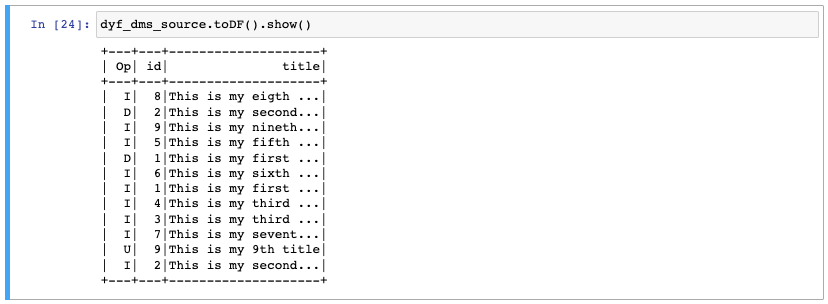
Next we need to get the data that was stored by AWS DMS. I crawled the data using a Glue Crawler and that gave me a table with the name demo. We create a DynamicFrame from the Glue catalog and print a few rows to see the first 10 rows of data. To keep the demo simple I just selected three fields. The ‘op’ field that indicates the operation from DMS (Insert, Update, Delete), the record id and the title.
dyf_dms_source_raw = glueContext.create_dynamic_frame.from_catalog(
    database="dms",
    table_name="demo",
    transformation_ctx="dyf_dms_source")
dyf_dms_source = SelectFields.apply(
    frame = dyf_dms_source_raw,
    paths=['Op', 'id', 'title'])
dyf_dms_source.toDF().show()


Next we split the incoming data into inserts and updates+deletes like this:
df_inserts = Filter.apply(
    frame=dyf_dms_source,
    f=lambda x: x["Op"] == 'I' or x["Op"] == None,
    transformation_ctx='dyf_inserts').toDF()

df_updates = Filter.apply(
    frame=dyf_dms_source,
    f=lambda x: x["Op"] == 'U' or x["Op"] == 'D',
    transformation_ctx='dyf_updates').toDF()
For abbreviations I left out that you probably want to sort on the time of the operation and only process the last action on a record based on the unique key of a record.
First step is to write all the newly inserted data into a Delta table. You can do this by running:
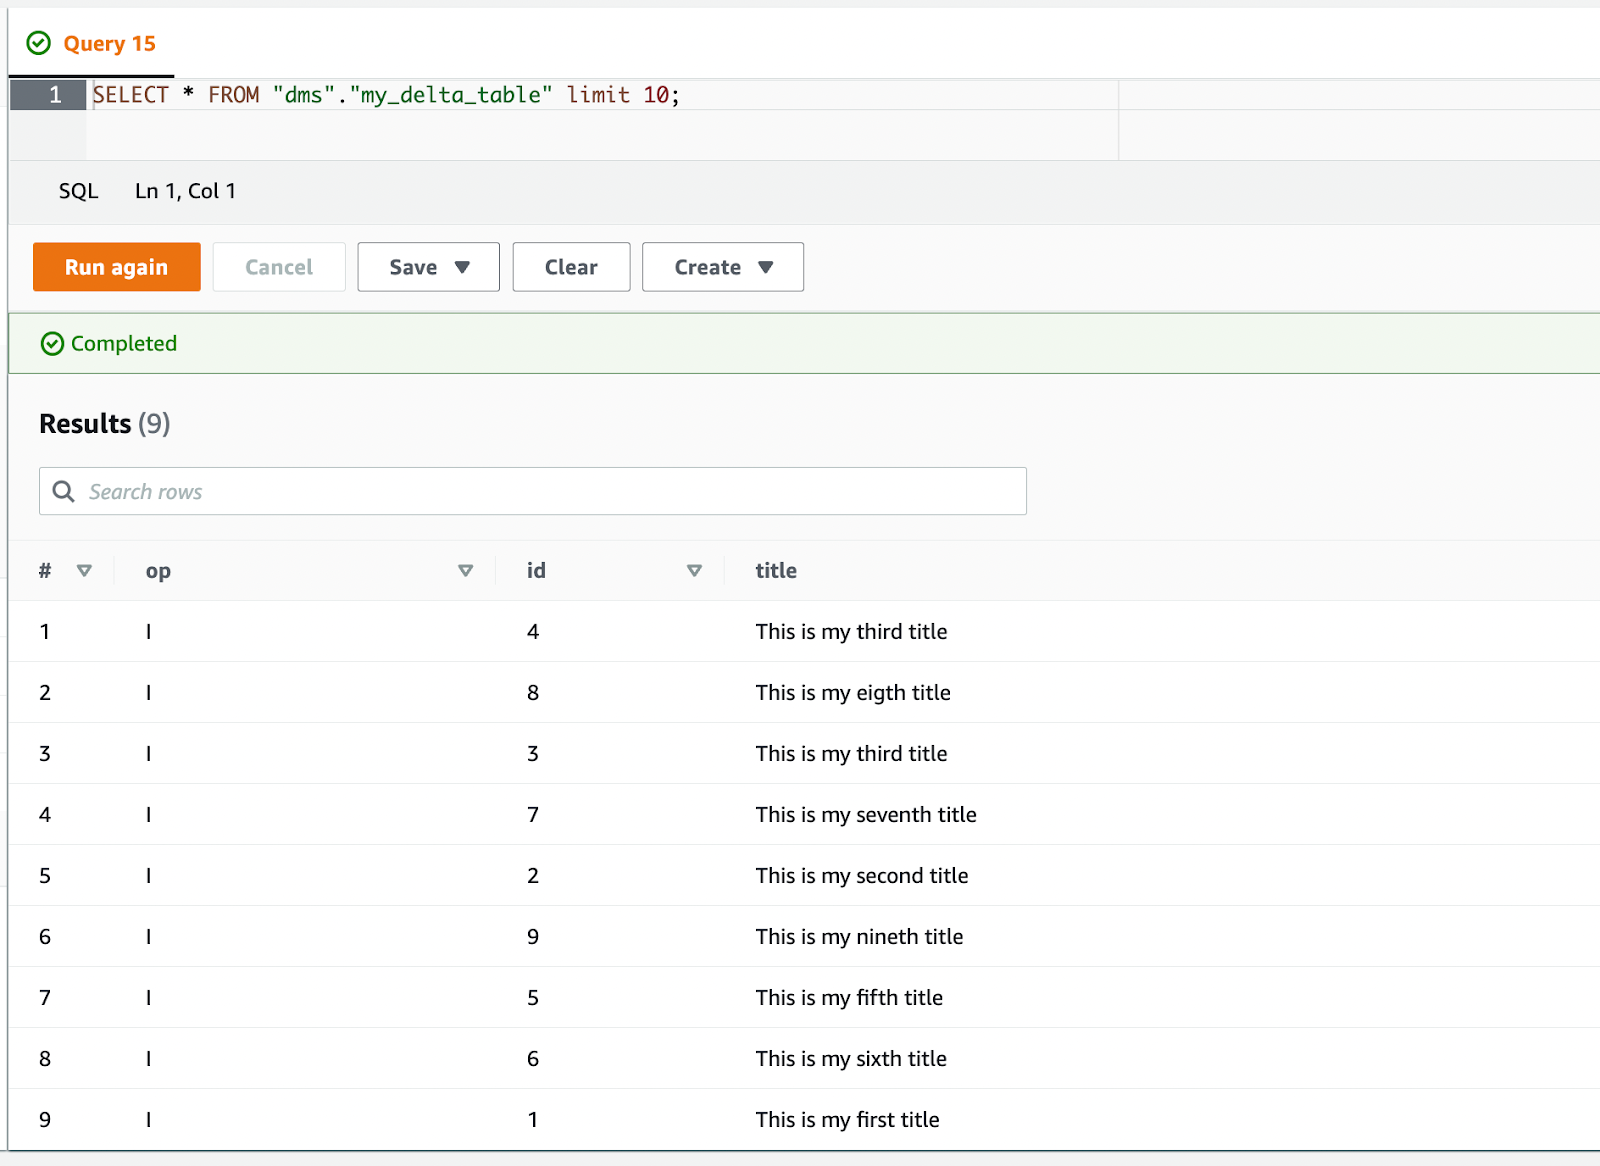
df_inserts.write.format("delta").mode("append").save("s3a://demobucket/my_delta_table/")After this finishes the bucket should contain parquet files with the data. Before processing the updates and deletes I want to make sure the data is actually written to S3 by querying the data with Amazon Athena. To allow Athena, or another Presto based query engine, to query Delta tables we need to generate a manifest file. This can be done by initializing a Delta table object and calling the generate function.
deltaTable = DeltaTable.forPath(spark,
    "s3a://demobucket/my_delta_table/")
deltaTable.generate("symlink_format_manifest")
Now go to Athena and create an external table,
CREATE EXTERNAL TABLEmy_delta_table(opstring,idbigint,titlestring) ROW FORMAT SERDE 'org.apache.hadoop.hive.ql.io.parquet.serde.ParquetHiveSerDe' STORED AS INPUTFORMAT 'org.apache.hadoop.hive.ql.io.SymlinkTextInputFormat' OUTPUTFORMAT 'org.apache.hadoop.hive.ql.io.HiveIgnoreKeyTextOutputFormat' LOCATION 's3://demobucket/my_delta_table/_symlink_format_manifest'
Athena now shows us all the data which was marked as inserted by DMS.

To process the updates and deletes, we will use upserts by doing a table merge. With the Delta table from the previous step we execute:
deltaTable.alias("currentData").merge(
    df_updates.alias("newData"),
    "currentData.id = newData.id")
  .whenMatchedDelete(condition = "newData.Op = 'D'")
  .whenMatchedUpdateAll(condition = "newData.Op != 'D'")
  .whenNotMatchedInsertAll(condition = "newData.Op != 'D'")
  .execute()

deltaTable.generate("symlink_format_manifest")
Here we merge two data sets, current and new, and join them based on the id field. Depending on the result of the merge we execute an action. If the merge action was able to find matched data and the operation was ‘D’ then it should delete the data from the original table. If it matched with any other operation we update the fields of the original record. The last step is to insert any non-matched data as a new record.
The last step in the cell is to make sure that the changes show up in Athena by updating the manifest file again.


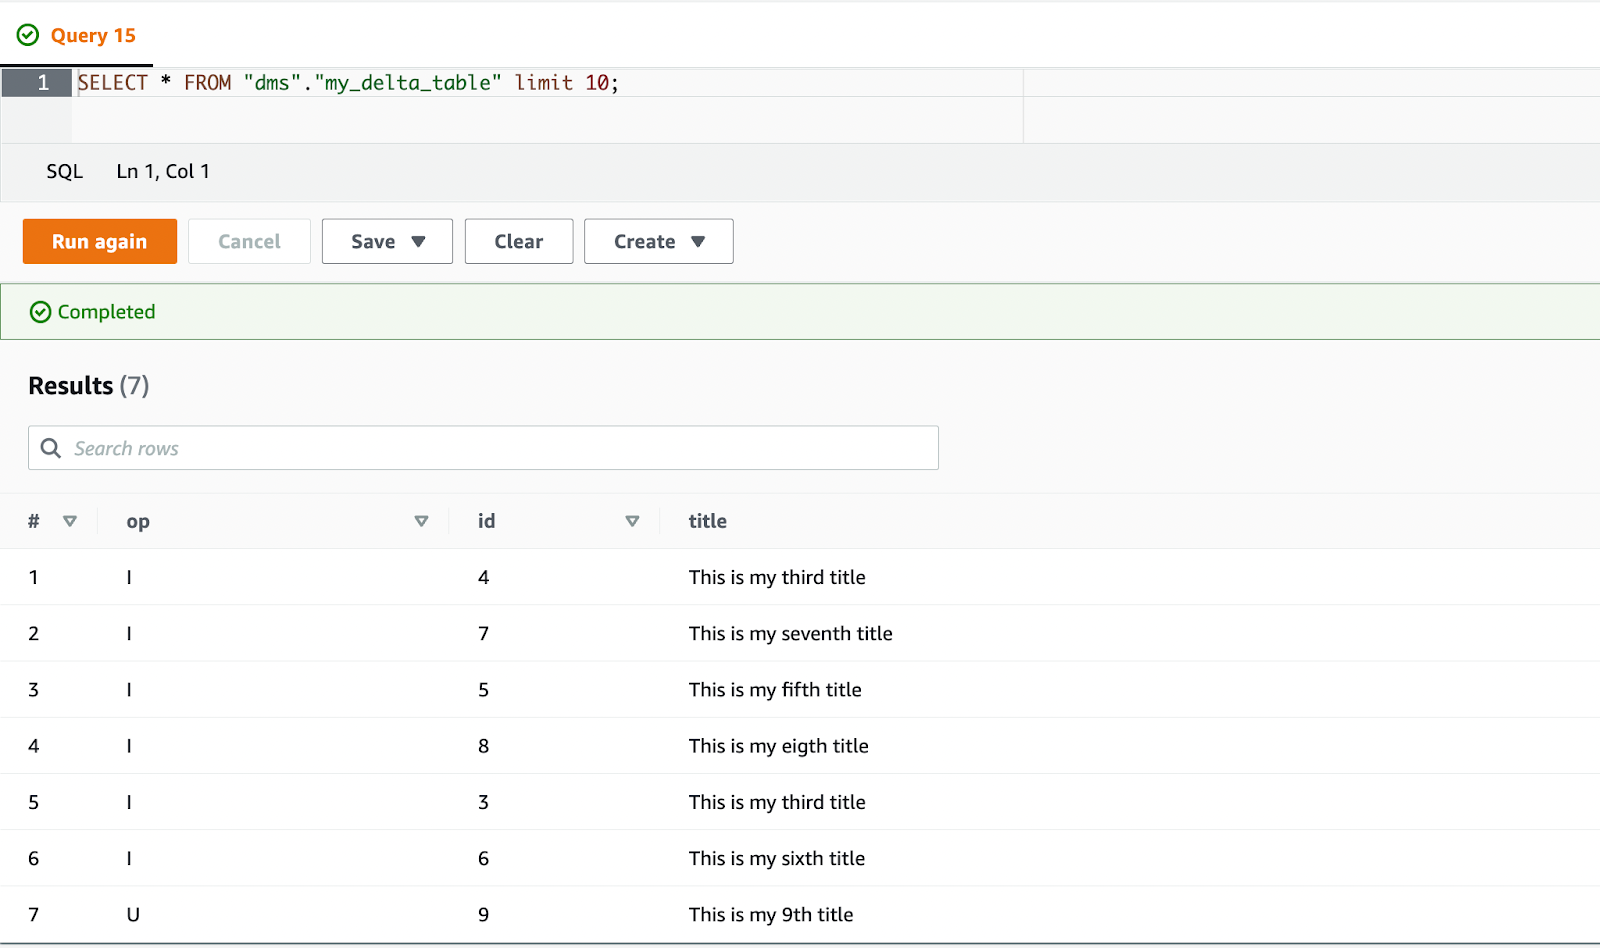
A new query in Athena shows us the new results. Records with id 1 and 2 are deleted and the record with id 9 has been updated to show the new title. If you check that with the raw data that was generated by AWS DMS you can see that this is the expected result.
Final words
In this blog post I first showed how you can use Glue Interactive Sessions to greatly improve the development experience with Glue jobs. Secondly, I gave an overview of how you can use connections and custom connectors to process CDC data and store it in S3 using Delta Lake in Glue.
More information on using AWS Glue Interactive Sessions can be found in the documentation. Additionally, check out some of my other blogs as well!


