
In the realm of DevOps, a smooth CI/CD pipeline is more than a convenience — it’s the backbone of efficient software delivery. But are you leveraging GitLab’s pipeline capabilities to the fullest? Whether you’re a newbie or a seasoned expert, this blog hopes to introduce some tips that can turbocharge your pipelines. Let’s optimize, innovate, and elevate your GitLab journey.
You can find all the examples in a repository here.
Tip 1: Exclude inherited behaviour with null
Extending a template gives your job all that template’s behaviour, but what if there are a few parts you’re not interested in?
.template:
  before_script: echo "Setting up"
  script:
  - echo "Template behaviour"
  after_script: echo "Cleaning up"

job1:
  extends: .template
  after_script: null  # <-- Excludes after_script
In this example, I want my job to implement the template’s after and script, but I don’t want after_script. To cancel its behaviour I explicitly reference the element I don’t want in my job, but set its value to null.
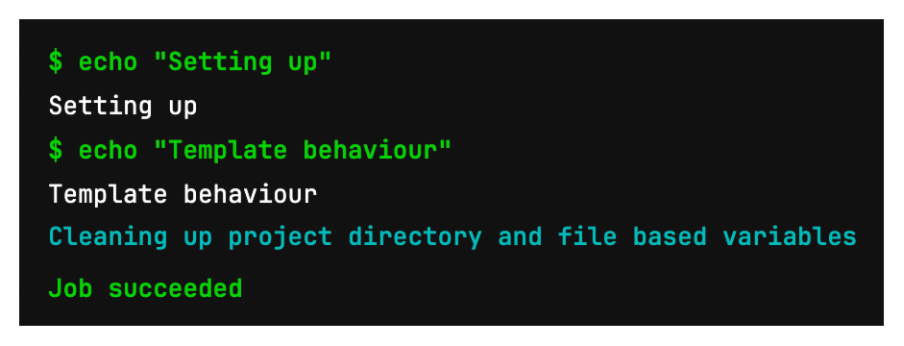
The result is “Cleaning up” is not printed.
Tip 2: Extend multiple templates for more granular behaviour
Of course you’re keeping your .gitlab-ci.yml file as lean as possible and including and extending templates so you don’t repeat yourself. But did you know you can extend multiple templates?
Let’s say you have one or more templates that do a little too much and have behaviour you often only need a portion of. Rather than peppering your code with multiple nulls (as in the previous example) to cancel the behaviour you don’t want, split those templates into smaller, more focused ones. You can then then extend multiple templates to mix and match the behaviour you want.
.template-setup:
before_script:
- echo "Setting up"

.template-cleanup:
after_script:
- echo "Cleaning up"

.template-script:
script:
- echo "Template behaviour"

job1:
extends:
- .template-setup # <-- Explicitly
- .template-script # <-- inheriting
- .template-cleanup # <-- behaviour
In this example, the before_script, after_script, and script behaviours are from separate templates, which has the added benefit of making the job’s function more obvious.
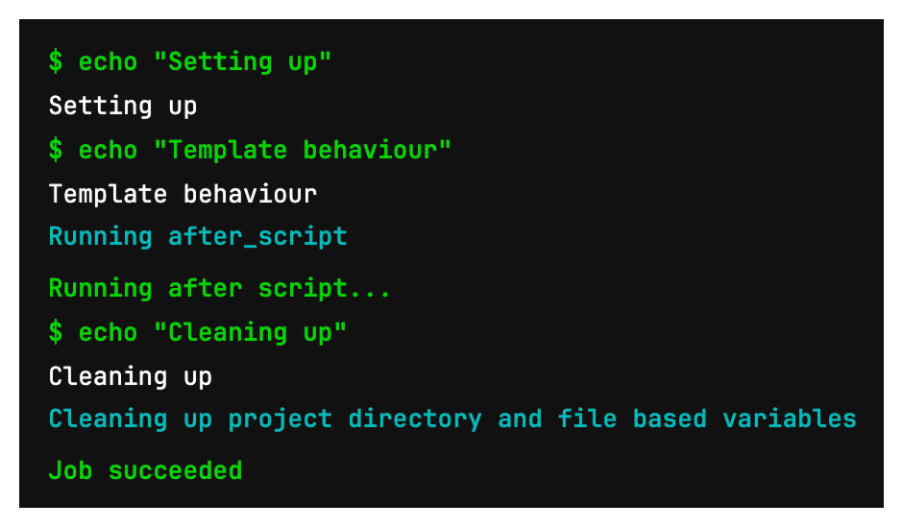
Here, all 3 templates’ code ran without having to write anything explicitly for the job.
Keep in mind that when you extend two or more templates containing the same elements (e.g. script), only the last template’s element will execute (but there’s a way to solve this in the next tip).
.template-setup:
before_script:
- echo "Setting up"

.template-cleanup:
after_script:
- echo "Cleaning up"

.template-script1:
script:
- echo "Template behaviour 1"

.template-script2:
script:
- echo "Template behaviour 2"

job1:
extends:
- .template-setup
- .template-script1 # <-- This gets overridden
- .template-script2 # <-- by this
- .template-cleanup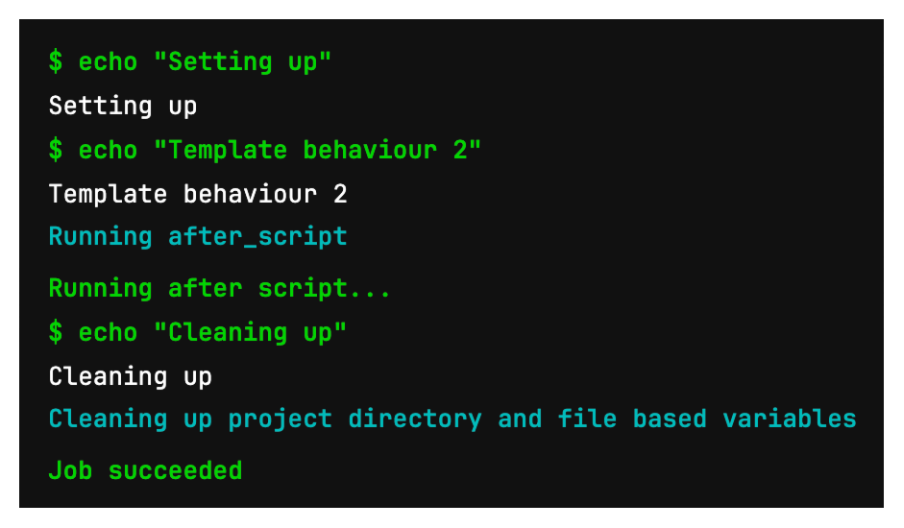
Here, before_script and after_script run, but only .template-script2’s script runs.
Tip 3: Use !reference to reintroduce behaviour from extended templates or jobs
Here’s a scenario: You want to extend two or more templates because they have behaviour you want (e.g. image or allow_failure). In addition, for example, you want both their script elements. As we saw in the previous tip, when we do this, only the last template’s script element executed. How do we run all their script elements, or even add a bit of our own custom behaviour. The answer is to use !reference.
.template-setup:
before_script:
- echo "Setting up"
.template-cleanup:
after_script:
- echo "Cleaning up"
.template-script1:
image: alpine:latest
script:
- echo "Template behaviour 1"
.template-script2:
allow_failure: true
script:
- echo "Template behaviour 2"
- echo "More template behaviour 2"
job1:
extends:
- .template-setup
- .template-script1
- .template-script2
- .template-cleanup
script:
- !reference [.template-script1, script] # <-- Explicitly reference the script
- !reference [.template-script2, script] # <-- Explicitly reference the script
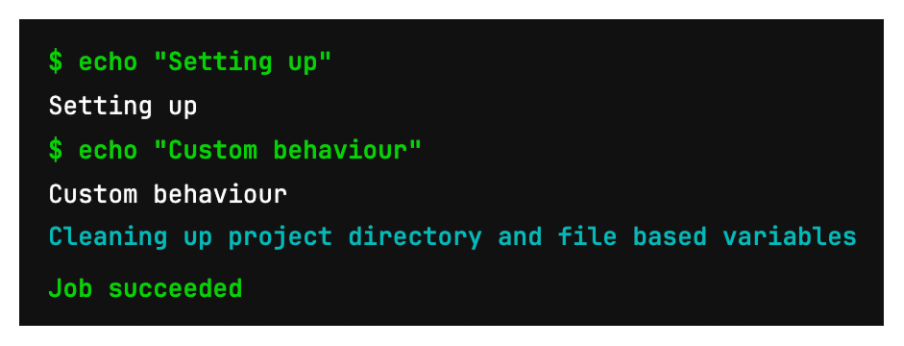
- echo "Custom behaviour"In this example, I want image from .template-script1 and allow_failure from .template-script2 (I know I could just write allow_failure in my job, but these examples are just for illustration), but I also want both of their script elements. Using !reference allows me to reintroduce those script elements and have everything run, including some custom code.
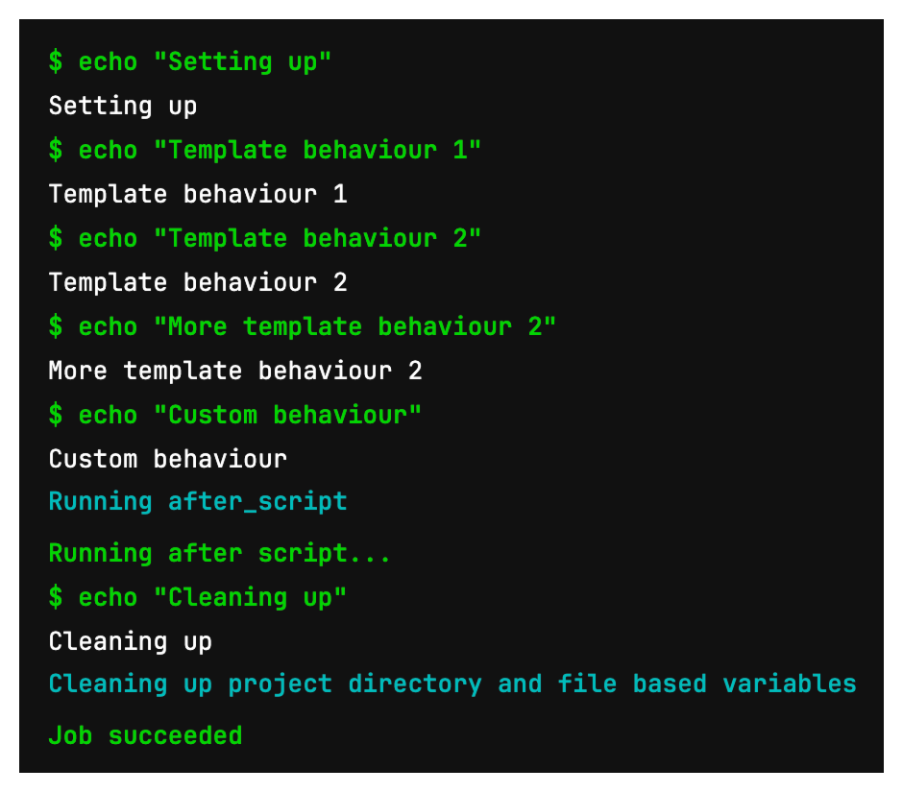
Here we see that all templates’ behaviour executed, including the job’s custom code.
Note:
!referencereintroduces all the behaviour from the target element. If the template’s script element is an array with multiple lines (as in.template-script2), you get them all — there’s no way to cherry-pick specific lines. However, if you’re already extending multiple elements (as shown in tip 2), you could separate out the list ofscriptelements into their own separate templates and mix and match them to achieve the desired results.
Tip 4: Use !reference to extend a template without actually extending it
While !reference can be useful in reintroducing an element from a template you’re extending, sometimes you only want a specific behaviour from that template. Rather than extending it and using lots of nulls to negate the behaviour you don’t want, just don’t extend it and use !reference instead.
.template:
image: python:3.7
allow_failure: true
before_script: echo "Setting up"
script:
- echo "Template behaviour"
- echo "More template behaviour"
after_script: echo "Cleaning up"

job1:
before_script: !reference [.template, before_script] # <-- No need to extend
script:
- echo "Custom behaviour"
In this example, .template does a lot that we don’t want. However, by not extending the template and simply referencing a specific element, we get only the piece of behaviour we want.
The output is the behaviour we want and some custom behaviour.
Note: You can also
!referenceelements from other jobs, not just templates.
Tip 5: Use needs to start a job in the next stage before the current stage finishes
By default, jobs run in parallel, and stages run one after the other. The needs keyword ensures that jobs run in a specific order within a stage. But needs also has the ability to queue up jobs in other stages.
stages:
- build
- test

# Build stage
compile:
stage: build
script:
- echo "Compiling"

lint:
stage: build
needs: [compile]
script:
- echo "Linting"

# Test stage
prepare:
stage: test
needs: [compile] # <-- This job will run after compile
script:
- echo "Preparing"

unittest:
stage: test
script:
- echo "Unit testing"
If you configure a job (prepare) in the next stage (test) to need a job (compile) in the current stage (build), then that later-stage job will start even though the current stage hasn’t yet finished.
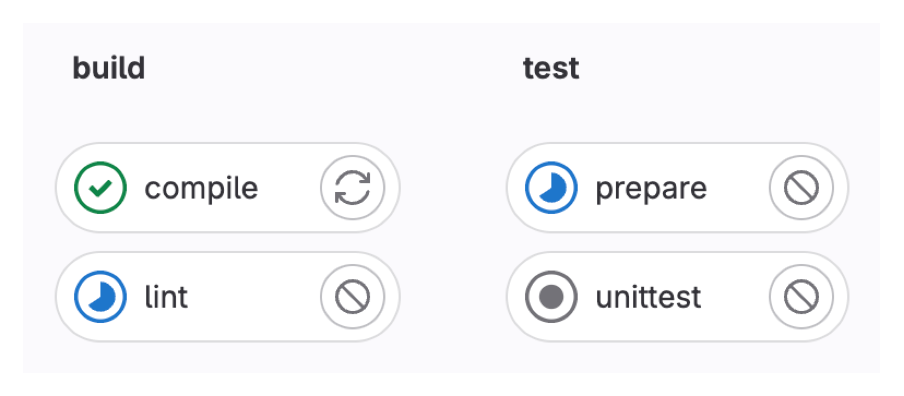
As you can see, the prepare job in the test stage starts after compile in the build stage finishes and is running at the same time as the lint job.
The unittest job in the test stage will behave like normal, only starting when the build stage finishes.
So, if you have jobs in later stages that don’t depend on earlier jobs and can run in parallel, this will speed up your pipeline.
Another option is to do away with stages altogether.
Tip 6: Use YAML anchors and aliases
While using templates, extends and !reference are good options to keep your code DRY, don’t forget that YAML itself has templating behaviour.
You can reference a single element, a whole block and even override portions using YAML anchors and aliases.
.script-1: &script-1 # <-- Sets up an anchor
echo "Template behaviour 1"

.script-2: &script-2 # <-- Sets up an anchor
- echo "Template behaviour 2.1"
- echo "Template behaviour 2.2"

.template-of-templates: &main-template # <- Sets up an anchor
before_script: echo "Setting up"
script: &merged-script # <-- Sets up an anchor
- *script-1 # <-- Implements &script-1
- *script-2 # <-- Implements &script-2
after_script: echo "Cleaning up"

.template1:
script:
- *script-1 # <-- Implements &script-1
- echo "Custom behaviour"

.template2:
before_script: echo "Custom setup"
script: *merged-script # <-- Implements &merged-script

.template3:
<<: *main-template # <-- Implements the whole template
before_script: echo "Setting up in a different way"
The above example showcases several ways to uses anchors and aliases.
- In
.template1, we’re only interested in implementing one line of script from.script-1 - In
.template2, we want the merged script behaviour oftemplate-of-templates, but our own custombefore_scriptbehaviour - In
.template3, we want to duplicate the whole oftemplate-of-templates, but override thebefore_scriptwith some custom behaviour
Using anchors and aliases reduces the amount of boilerplate code you need in your templates.
Note: An alias in one file cannot reference an anchor in another. The anchors and aliases must all be in the same file.
Tip 7: How to deal with monorepos
Did you know that Google uses a monorepo? All its code for Gmail, Documents, everything is in one huge repository.
While this article isn’t going to weigh in on the pros and cons of using monorepos, you may just find yourself working on one.
One of the biggest problems with a monorepo is isolating build triggers. You don’t want a push by someone in Team X to trigger a build of your code in a separate directory. So how do you access all the benefits of CI/CD without triggering dozens of unrelated builds with each commit?
The answer is to use rules.
To work with a monorepo, you need to place a YAML file in each project’s subdirectory (it helps to give the file a prefix so if you’re editing multiple ones, you can tell them apart).
Your .gitlab-ci.yml file is going to be incredibly lean, possibly only consisting of a series of include statements.
include:
- local: /docker/gitlab-ci-docker.yml
- local: /python/gitlab-ci-python.yml
In the following example, the docker-gitlab-ci.yml file declares a template with a rule that isolates the triggering of the job to only when changes happen within the docker directory. However, you must then extend this rule template in every job in the pipeline file.
.rules-docker:
rules:
- changes: [docker/**]

job-docker:
extends: [.rules-docker]
script:
- echo "Docker behaviour"
You may be wondering “why not just put the rules in the .gitlab-ci.yml file to control the includes?”. The answer is that, while GitLab does support using rules under include, it doesn’t support the changes keyword.
You may also ask “why extend the rules template in every job and not just make it a default?” The problem here is that, when the pipeline is assembled, all the files are combined into one big file. Because both templates are included, both defaults would get pulled in and clash. You need to partition all jobs into their relevant subdirectories.
Note: Since all the code is combined into one big file, all templates must have unique names. If you called all your rules templates
.rules, only the last one would appear, overriding all the previous ones.
Now, only changes under the docker directory will trigger the gitlab-ci-docker.yml file.
Conclusion
In the ever-evolving landscape of DevOps, mastering the nuances of GitLab pipelines can improve not only the speed and efficiency of your pipelines, but their readability too. It’s more than just a matter of executing commands; it’s about fine-tuning, understanding those nuances, and foreseeing potential challenges. As we’ve explored today, a few well-placed tips can make a world of difference in efficiency, reliability, and speed.
Written by
Jeffrey Zaayman
Our Ideas
Explore More Blogs


Contact