If you’ve been using XAML builds in the past, you’ve probably discovered that, by default, it drops all the outputs of all your projects into one folder called the Binaries Folder. Unless you do anything using a post-build script, the contents of that folder will be copied verbatim to the drop location.
In TFS 2012 a new option appeared giving you a little more control over the output location; giving you 3 options:
- Single Folder (like it worked in 2010)
- Per Project (Creates a folder per solution)
- As Configured (don’t redirect output, so the default would put the binaries under your project folders, as it would on your local machine by default).
If there’s one feature of XAML builds which confuses the hell out of people, it’s the Output Redirection. At first people don’t expect this to happen (they expect As Configured to be the default) and then the naming of “Per Project” confuses people even more, as it turns out that it ends up creating a subfolder for each Solution or msbuild .proj file (based on the solution name).
Build 2015 takes away this issue, by having As Configured to be the default and by offering a simple Copy and Publish Artifacts task which collects the project output and copies it to the staging location. One of the nice advantages of this setup, is that it also makes it easier to do incremental builds, speeding up your CI builds.
But, if you’re coming from a XAML build and you already have a lot of existing post-build steps that assume all your files to be in a specific folder or set of folders, it may be easier to replicate that behavior than to rewrite all these scripts.
Let us go through the three options in XAML build and let’s see how you’d handle these in Build 2015.
As Configured
This is the default behavior in Build 2015. It does whatever your project files have configured. If you are sing the default project templates of Visual Studio, that means that files are dropped in the “ProjectBinConfiguration” folder.
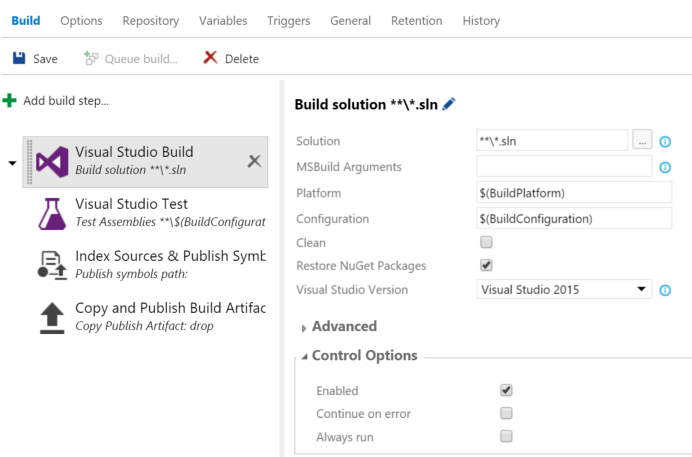
You’d use a standard Visual Studio Build or MsBuild task followed by a Copy and Publish Artifacts task to recursively gather the output and copy them to the Staging Location and from there to the Drop Location.
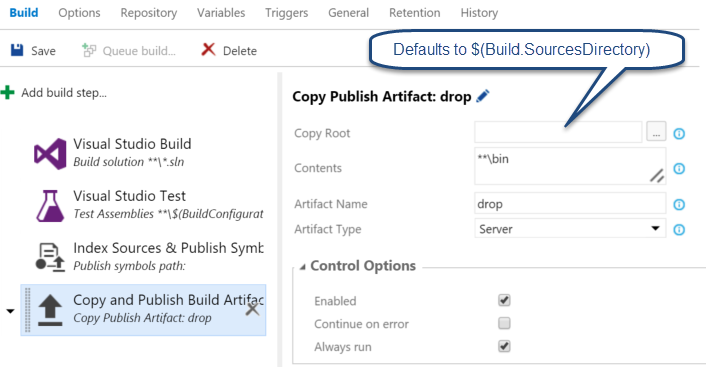
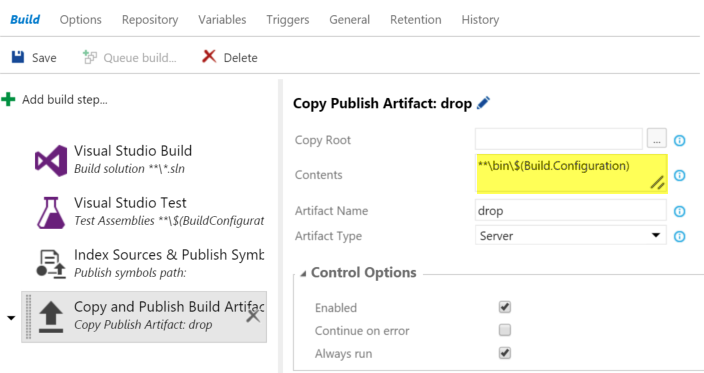
The default configuration of the Copy and Publish Build Artifacts task are to scan the $(Build.SourcesDirectory) recursively and grab the contents of every “bin” folder.
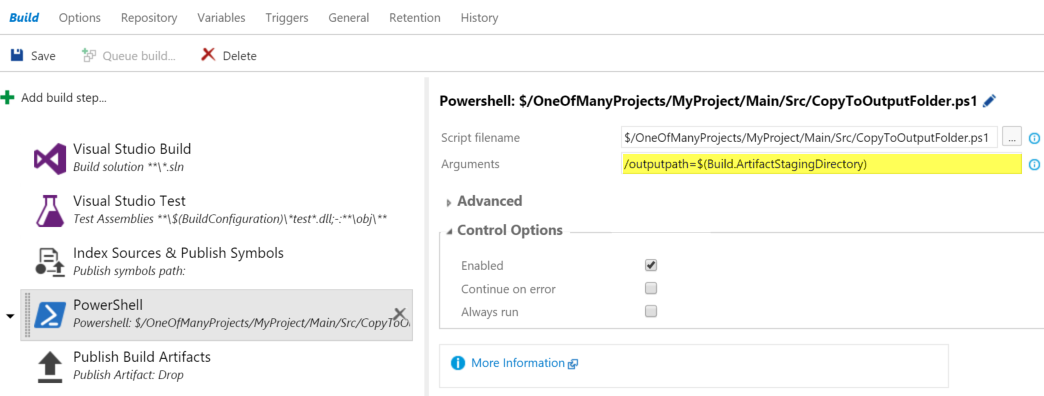
When you use As Configured in XAML builds, nothing gets copied to your drop folder, unless you actually do that. The Copy and Publish Artifacts task will do this for you. Or you can run your own powershell, batch or other script to copy your files to the $(Build.ArtifactStagingDirectory). Either pass the target location using a argument or grab it from inside your powershell script using the environment variable $env:Build_ArtifactStagingDirectory:
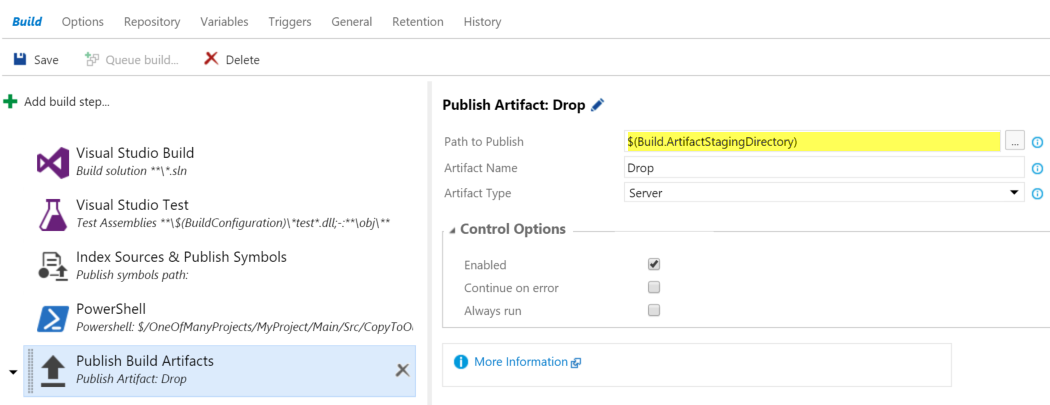
Then call the Publish Build Artifacts task to publish them (note don’t want to use the Copy and Publish task here, since your script has already copied the files).
Single Folder
When specifying Single Folder in XAML builds, all the binaries for all your projects will end up in the root of the drop location. This was the default in Team Foundation Server 2010 and caused a lot of confusion when people started adopting Team Build back in the days.
There are two ways to mimic this behavior. One is to build your solution with no additional options and then use the default Copy and Publish task. I assume that you may be building multiple configurations here:
If you want to grab all the folders under bin, you could simplify this further to: **bin.
This solution yields the same result, but may still cause issues with your current scripts, which may assume that msbuild redirects all outputs to a single folder. It’s not hard to create a situation that’s even closer to the old XAML build’s functionality.
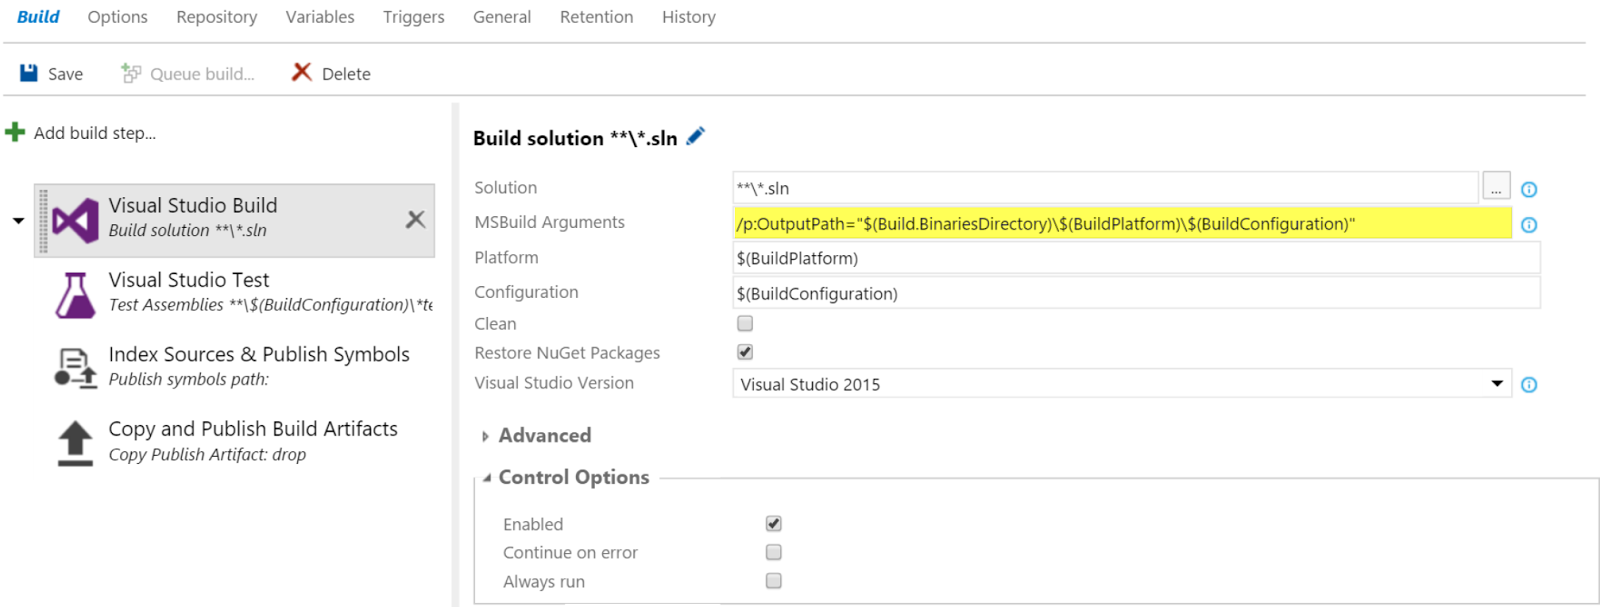
The first thing you need to do is instruct the Visual Studio Build task to redirect the build output to the $(Build.BinariesDirectory).
Then simply copy everything from under $(Build.BinariesDirectory) to the staging location and publish it:
The advantage of using the intermediate Binaries Directory, is that you can do incremental builds, if you were to build directly to the $(Build.ArtifactStagingDirectory) the output will be thrown away after each build, increasing your build time when you’re not using Clean Repository and Clean Build.
Per Project
The third option in the XAML build allows you to create a subfolder for each… and here it gets confusing… Selected solution. It’s called “Project”, but I think this dates back from the 2008 era when you’d build an MsBuild Proj file.
There is no easy way to do this in Build 2015. You could use Build Multiplexing or add multiple Visual Studio Build tasks followed by multiple Copy and Publish Build Artifacts tasks. Basically taking the technique from the SingleFolder option and adding in the name of the solution hardcoded in each task or through a custom variable.

