New services do not always deliver support for CloudFormation at the launch. If you work with CloudFormation, you can create a Custom Resource. With the new import functionality, once AWS adds native support for the resource, you can now import this resource into your template and remove the old custom resource.
This blog post describes the 4 stages:
- Create the Custom Resource provider; a lambda function
- Deploy the resource using the previous Custom Resource provider
- Import the custom created resource into your stack
- Remove the custom resource from the stack, leaving the imported for future use
In our example we assume SNS Topic is not yet supported by CloudFormation at launch.
Stage 1: Create the Custom Resource provider
The following Lambda function creates or deletes the custom resources. I’ve removed all the pretty code for sake of this simple demo. Deploy this template using the aws cloudformation package and aws cloudformation deploy commands, or the SAM cli.
Transform: 'AWS::Serverless-2016-10-31'
Resources:
  CustomS3Bucket:
    Type: 'AWS::Serverless::Function'
    Properties:
      Runtime: python3.7
      Timeout: 30
      Handler: index.handler
      Policies:
        - arn:aws:iam::aws:policy/AmazonSNSFullAccess
      InlineCode: |
        import base64
        import json
        import cfnresponse
        import boto3

        sns = boto3.client('sns')

        def handler(event, context):
          topic_name = event['ResourceProperties']['TopicName']
          response_data = {}
          if event['RequestType'] == 'Create':
            sns.create_topic(
              Name=topic_name
            )
          elif event['RequestType'] == 'Update':
            sns.delete_topic(
              Name=topic_name
            )
            sns.create_topic(
              Name=topic_name
            )
          #else: # delete
          #  uncommented to force a retain
          #  delete(event['PhysicalResourceId'])
          cfnresponse.send(event, context, cfnresponse.SUCCESS, response_data, topic_name)
Stage 2: Deploy SNS using the Custom Resource provider
Resources:
  MyTopic:
    Type: Custom::SNSTopic
    Properties:
      ServiceToken:
        !Sub "arn:aws:lambda:${AWS::Region}:${AWS::AccountId}:function:sns-topic"
      TopicName: mytopic
Stage 3: Import Existing Resource
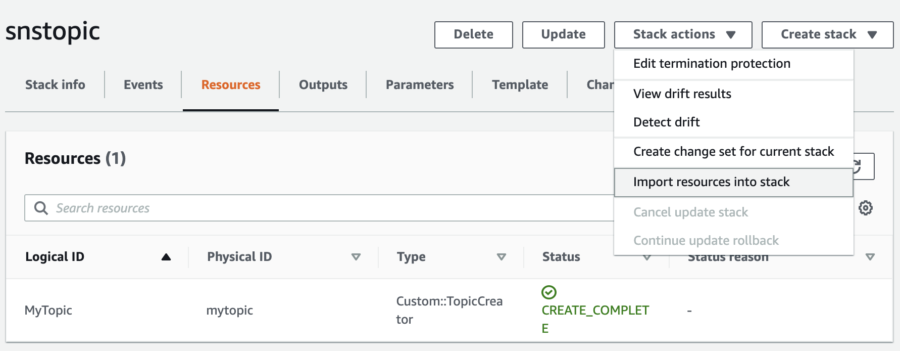
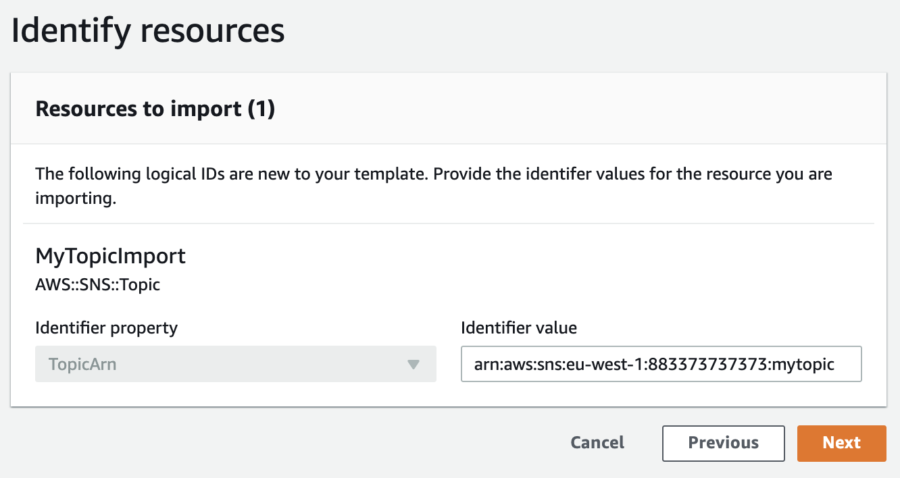
After a while AWS launches support for your custom created resource. In this example it’s SNS, or maybe even a feature of SNS Topic. To import the resource, use the following template and the web interface (as of this writing, CLI is not supported yet).
Important note: DeletionPolicy: Retain is a mandatory configuration for import to work.
We now have CloudFormation Resources for the same physical resource. That doesn’t matter, in the next stage we will remove the Custom Resource.
Resources:
  MyTopic:
    Type: Custom::TopicCreator
    Properties:
      ServiceToken:
        !Sub "arn:aws:lambda:${AWS::Region}:${AWS::AccountId}:function:sns-topic"
      TopicName: mytopic
  MyTopicImport:
    Type: AWS::SNS::Topic
    DeletionPolicy: Retain
    Properties:
      TopicName: mytopic
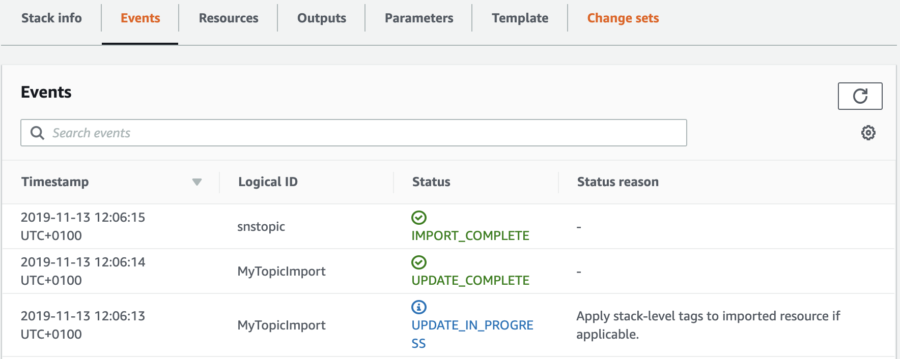
This is the current flow. Some confirmation screens are skipped:


Stage 4: Remove the old Custom Resource
Now we can switch back to our default deployment process to update the final stack with the template without any custom resources.
Important note: Make sure the custom resource does NOT delete the physical resource. In this example we simply removed the delete action in the function. But you could also decide to add a property: Retain: True, to skip the delete action.
Resources:
  MyTopicImport:
    Type: AWS::SNS::Topic
    DeletionPolicy: Retain
    Properties:
      TopicName: mytopic
Conclusion
We have learned how to use CloudFormation Custom Resources and the brand new Import functionality, to easier migrate from custom created resources, to native supported CloudFormation resources.


