The Problem
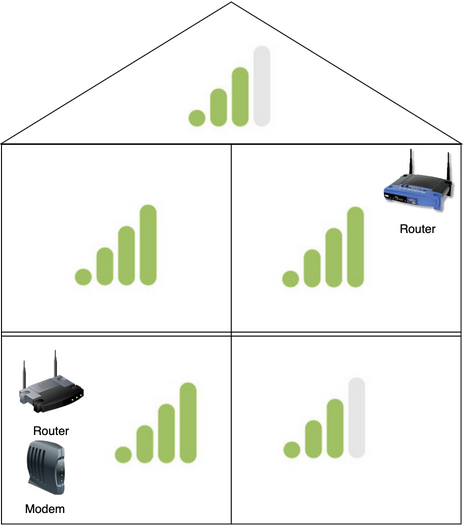
The WiFi devices that are operating downstairs work fine with good signal strength. While walking up the stairs the strength goes down a bit. The signal strength is really poor in the room most far away from the access point and clients sometimes lose connection. On the second floor has the same poor signal. Modern phones will switch automatically to 4G, but most other devices suffer. This results in buffering YouTube video’s, music that stops playing, ‘slow’ websites and, in the end, complaints being made to me…
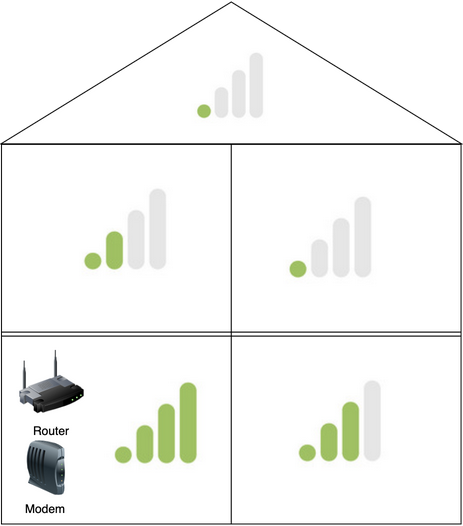
So, I decided to fix this problem, looking at various solutions:
- Move the router outside the closet with the fuse box.
- Buy a bigger router with a more powerful WiFi signal.
- Buy a WiFi repeater of some sort.
- Turn an old router into a WiFi-‘extender’.
Current network
To give a bit of context about the current situation.
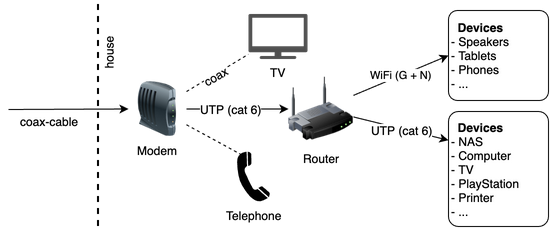
Old WiFi router
Cleaning up the old box of ‘computer-zooi’ I came across the famous Linksys WRT54GL router. I have replaced this device in the past with a new router that uses the N/AC-standards (~150Mbit/~1.3Gbit) compared to the G-standard (~54Mbit), so that internet entering the house at (~250Mbit) is not limited by the WiFi speed anymore.
I’m surprised that this 12+ year old router is still for sale.
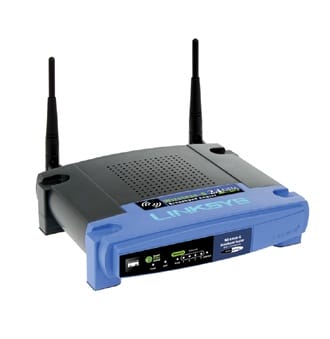
A super nice feature is that this device can be configured with custom firmware, like many other routers. I decided to turn this router into an extension of the WiFi-network to improve the poor strength upstairs.
The Setup
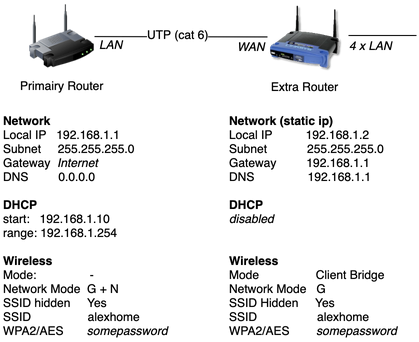
The standard firmware might have been sufficient for this use-case: routing traffic. But I chose to replace the factory default with DD-WRT, a Linux based OpenSource WLAN router firmware. Following their guide to set up the WiFi ‘extension’. Actually, it is WiFi bridge-mode, because it’s using Layer-2 network routing.
A secondary router on the same subnet, so all wireless and wired network devices can access each other.
I’ll skip the setup step-by-step details from the guide, but I’ll share some takeaways:
- Primary router: Start DHCP from *.*.*.10, so that the first addresses can be static.
- Extra router: Configure a free static IP.
- Extra router: Point the gateway and DNS to the primary router.
- Extra router: No DHCP, since this is handled by the primary router.
- Extra router: Assign a WAN Port to the switch, for an extra port.
- Both routers: Use the same SSID + security settings to allow roaming.
The result
With a Mac you can measure the signal strength with the build-in tool Wireless Diagnostics. Go to open menu Window > Performance and start walking like a real IT-nerd with a laptop in your hand through the house looking at line-charts.
I’m very happy with the coverage through all floors and rooms within the house. The roaming feature is working perfect. When walking into a low-coverage room upstairs the client (phone/tablet/Chromecast) will automatically switch to the extra router. The second router is a ‘dump’ device, so the power can be unplugged without causing real issues. It will recover automatically when putting the power back in. The current uptime of the extra router is 262 days, 4:36, yes I’m late writing this blog. The best thing is that I don’t get complaints from ‘end-users’ anymore.
Things to keep in mind:
- When changing the password of the primary router, the second router has to be updated with the same password.
- The extra router is (still) limited to 54Mbit WiFi and 100Mbit LAN ports.
- This setup is extendable with extra routers.


