It’s well said that Design Systems save time - we’ve even said it ourselves. But has anyone ever considered exactly how much time is saved? After all, time is money, so just how many staff hours can a Design System free up?
Where Does The Time Go?
You're a designer, developer, tester (or anyone, invested in a project, really). Behind every task you do, there is some planning done ahead. There is always a time estimation. Sure, you'll set up some schedule, so everybody could prepare for their part. However, such schedules are rarely accurate. Time estimations often turn out to be so inadequate that it almost looks like they were chosen randomly. So, you examine where you may have made a mistake. As it typically turns out, the time wasn’t really lost - but it wasn’t used effectively, either.
We’ve experienced that problem first hand. I would go so far as to say it’s a fact that everybody working on a big enough project has had this problem at some point. The reasons vary. Often, we rush to deliver Minimum Viable Product (MVP) structures to the client, so he or she can "see" the results. In the process, we loosen our grip on the documentation and particular steps of the workflow get lost in the storm of changes and hot fixes.
Other times, it may be chaotic client, a free-minded designer or - worse - a multi-hat wearing developer that flip flops between roles with no organisation skills whatsoever. (We don’t hire those people, fortunately!)
How Much Time Can A Design System Save?
When it comes to designing and developing new solutions, we’ve seen this problem and worked on a solution. Our answer is to use a properly - and we do mean properly - established Design System. Such Design Systems have many benefits, not least of all cutting time costs throughout an entire project - it eliminates both time and frustration in Design, Development and Testing phases.
In fact, from our experience with larger tasks, it can shorten the time needed by as much as 45%.
How? The best way to explain this is to examine a hypothetical story and explain how the process works both with - and without - a Design System.
The Scenario
First of all, let’s establish a quick brief regarding the imaginary work that needs to be done. For the purposes of this scenario, let’s assume we are past the client’s briefing and business analysis stages. We have a rough wireframe for our vision and we know we need to implement it. Designers need to design it, the developers need to code it and, of course, this is all followed by testing.
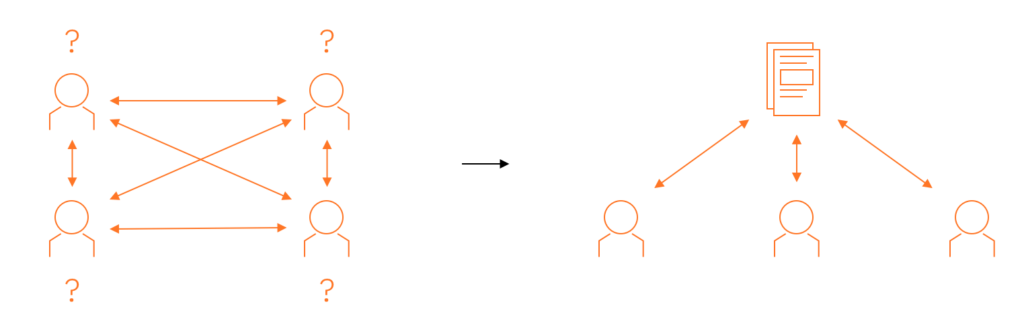
How It Gets Done Without A Design System
Your current designs are scattered across different machines or Zeplin accounts. Either way, everyone has a more or less different view on what is up to date.
The same also applies to the applications code. It’s often duplicated or overwritten with contrary rules. What can you reuse? Different people give different answers.
Part I | Design | Where To Start?
First of all, the Designer needs to do their research and check how the rest of the application is looking at the moment. However, the app itself can be inconsistent across different views and designs are scattered - sometimes, we cannot even be sure which ones are the most updated. If the documentation is not forced, this knowledge evaporates from the project at the same rate as people’s retention within the team.
Let's not forget that designers are creative people and, more often than not, have different tastes. It's more than likely that somebody will like a minimalist look more than a big, right-in-your-face design, while another designer prefers the opposite. It's going to reflect in their respective work and the final design won't be consistent across the application.
There is no single source of truth regarding the current design. To access or acquire information, you need to spend a lot of time on research and consultation. This is a process which is going to repeat itself quite a lot, isn’t it?
At this stage, 70% of a designer’s time is wasted on repeating unnecessary tasks, instead of being allocated towards other, better uses, such as User Experience research, experimenting with different versions of the same view and so on. This can mostly be done by correcting the workflow.
Part II | Development | Handover To Developers
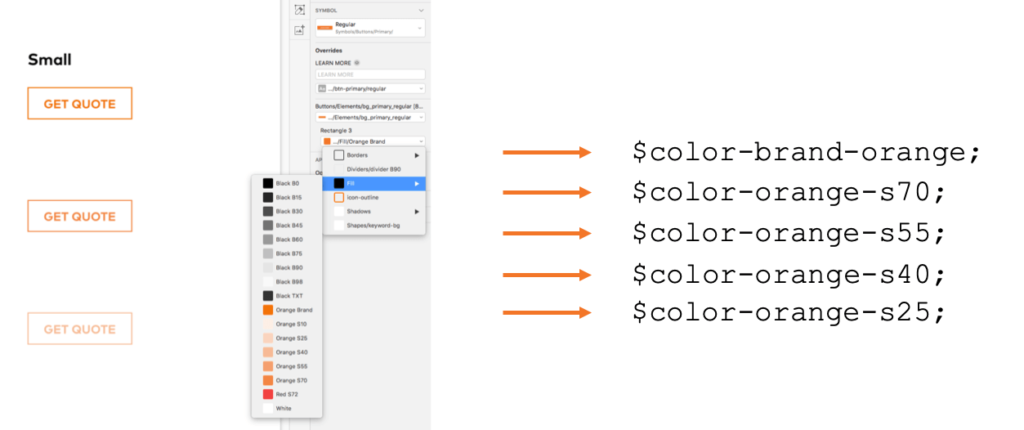
By default, every developer should divide the design into reusable elements. Take this small orange button, for example, that’s on every view within the application. What’s the point of writing this over and over again?
In reality, projects can take years to reach full maturity and, even then, we have to account some time for maintenance and adding new features. This can add another 5 to 10 years to the project’s lifespan - how many of those hours should we spend recreating this orange button?
Furthermore, your developers can change over time and, with each person that leaves, the project loses part of this know-how. Not everybody knows which elements can be reused. Not only this, a simple button can end up with twenty slightly different variations due to design inconsistency, even in small applications. Who knows which one of these is the original, correct button?
Because of the above factors, as well as a lack of information, developers code the design as they see it. Since the process of research is so gruesome, they choose to write the code from scratch - even though as much as 90% of this could be reused from existing code!
Again, there is no single source of truth. This time, we can see the problems it causes for developers. How can a developer know that the button is already coded in the specific color and size he or she needs? How should a developer check whether the designer stayed consistent with the rest of the page?
So, let's focus on the developer's process - and let’s assume it's a scrupulous developer that follows this process and doesn’t skip any steps:
- The Developer checks the design. They look to see whether it differs from any of existing views. If it's not consistent, the Developer loses time due to consultations and ping-ponging messages with the designer.
- In a not so good case scenario, the developer needs to adjust these inconsistencies.
- In the worst case scenario, the developer decides just to code what he has been given.
- Either way, elements that are already coded might not be reused because they differ from the design.
For better or worse, the code is now done. Let's leave it to the tester.
Part III | Testing | What Are We Looking At?
The Tester will definitely notice the inconsistencies - it’s their job! But once he or she finds them, where should they look for a reference regarding the correct code or design?
Again, time is lost on conversations, emails and arguments. All of this could have been be easily avoided - or at least not repeated all over again with every new task.
The process looks like this:
- The Tester notifies the Developer.
- The Developer will either bounce the request to the Designer - or even back to the Tester - since they only coded what they were given.
How this proceeds then depends on the exact circumstances of each team. For a team with more time to spend, these bugs can be fixed. For others, the deadline will be hanging over them like a sword of Damocles. When it’s more important to deploy the product or update, rather than focus on quality, these bugs find their way to the end user.
Part IV | How Much Time Did We Lose?
In short, the time needed to finish the task would be take far longer than it needs to. With every new task or story, there is a need to make the same decisions all over again, repeating the same conversations between designers, developers and testers. All these people could benefit from a single point of reference - a point of truth… such as a Design System.
To put it into perspective, let’s take a smaller part of the task. While designing, developing and testing only a few new buttons, we can reduce the time needed immensely. One of our estimations in a medium-sized project was for 14-15 hours of work without a Design System.
Now to put it in perspective, our counter estimation with a Design System was just 2.5 hours. That’s about 11.5 hours quicker, or over 80% faster.
How It Gets Done With A Design System
This time, we're adding a Design System into the scenario. This means that we have a couple of components that we can base are work on - of which will become clear soon enough.
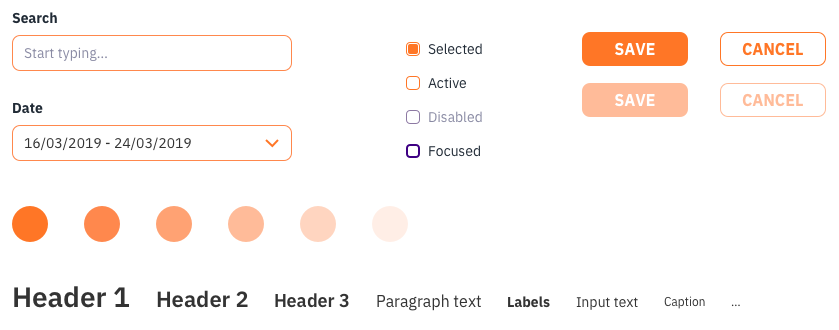
The best combination for a Design System is to establish:
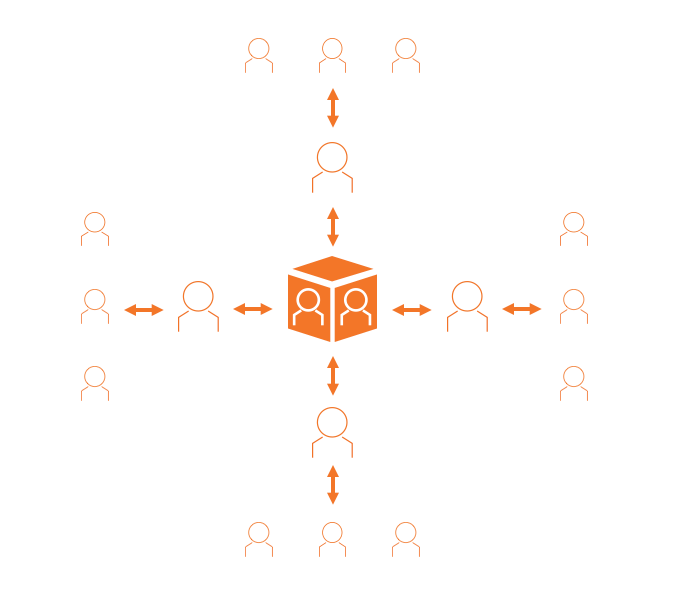
- A Shared Component Library. A single source of truth for developers. Others can use it for reference, too. This is an online tool with every reusable element of the application listed in it. You need to have a button for a form? No worries. Just check the library. It's ready for you, since it’s already been coded. Just import it from the library and use as you please.
- Design Library. A collection of everything that's designed - and agreed upon - should be placed here. It's a single source of truth for designers, but developers and testers use it for reference. Here, you'll find what colours you're supposed to use. What about typography rules? What about icons, spacing guides or grids? It’s all here, online, and easily updated by any designer.
- Workflow. So you might have some experience with libraries, but found that nobody cared to update or follow them? That's because nobody thought about asking people what they actually need. Invite people to create a workflow that will utilise a Design System but is effortless to follow.
Now that the Design System is well defined, let's come back to our task.
Part I | Design | Where To Start
What elements do you need to design components for, based on the wireframe shown earlier? The first step is to look into Design Library and use what's there.
Is anything missing? If so, update the Design Library with the elements you needed to create from scratch. You already have rules for colors, typography, spacing and more, so many of the decisions are already made. That's it!
Now, use this spare time to work on the User Experience or Accessibility. All the time you’ve saved can actually be spent on polishing your designs. I know how it sounds - it’s too good to be true. Well, this is what we’ve found out through first hand our experience.
The added benefit is a Design Language which emerges organically. It’s an agreement between team members on how to name certain parts of an application. It’s easier to follow constant updates if the jargon is straightened out - we've explored Design Systems & language in more detail here.
Part II | Development | Handover To Development
The design is ready and the Developer checks if it's consistent with Design System. Then, they check if there is anything that can be used from the Component Library (such as all those reusable parts of code). After this, they update Component Library with anything is missing. Finally, the Developer quickly builds the view in the application like it was a Lego structure - it is simply a case of assembling the components correctly.
Part III | Testing | What Are We Looking At?
The Tester checks if the design is consistent with the Design Library. More often than not - it is! After all, most of elements are reused and those have already been tested. After this, the focus can be directed towards what's really important for the client, such as the business logic and ease of use across the entire application.
This step can be also automated. You just create a snapshot of design system components and the snapshot of new changes. Then, let the machine compare them.
Part IV | How Much Time Did We Lose?
That was quick! It really is possible to quickly develop a task in reality. These are just some of the many values of the Design System. There are certainly more.
Consider updating or redesigning the whole application - if you change a color in one place, it propagates through all views. You have everything in one place and all under control. Imagine the time saved on pointless discussions and put into use on experimenting or testing.
Our time estimations speak for themselves. On a task similar to this hypothetical one – we calculated the following estimations:
Without a Design System? - 73 to 85.5 Work Hours With a Design System? - 25.5 to 36 Work Hours
With a Design System, a lot of repeated decisions and tiresome processes are cut from the project. Even though these are not entirely new concepts, they’ve been upgraded and streamlined, in order to focus on three more important areas things:
- Include the whole team (Designer, Developer & Tester) when creating workflows
- Establish libraries that are easily accessed by everyone
- Focus on reusing what’s already been created
Summary
Even at its least efficient, the difference between 73 and 36 hours is staggering - it cuts out over 50% of the time required! Not only do Design Systems remove all the unnecessary and repetitive tasks, it also streamlines the rest of the work.
Obviously, we might by biased, as we are using Design System techniques ourselves. But let’s be very clear here: we wouldn’t be doing it this way if it didn’t work so well.
What you do with this extra time is completely up to you. You can spend it on additional testing, on focusing more time on those few new elements that do need to be added, or just getting your products out as quickly as possible without sacrificing quality. Either way, you’ll save money, resources and happy team members!
Business Perspective
Using a Design System can remove over 50% of the time needed to design, develop and test, in addition to ensuring consistency and giving your team more time to focus on what’s important: quality and innovation.
Written by
Xebia Author
Our Ideas
Explore More Blogs


Contact