Blog
Elevate Your Git Security: Signing GitHub Commits with 1Password in Windows WSL and Containers

Today I took some time to eliminate ssh and signing keys on my local developer machine and secured my workflows by using 1Password. This is a cloud-based multi-platform password manager I am using for years now. It comes with great features and a lot of integrations - perfect for security and automation enthusiasts like me :)
If you ask yourself why to sign git commits, I recommend an article from my colleague .
I am using WSL and VSCode DevContainers heavily in my daily business. However, since Docker Desktop switched to a paid subscription for professionals I use docker inside the WSL. As the WSL now comes with systemd support this is easily realizable.
My requirement was to integrate smoothly with both, containers and the WSL, to work with git using ssh while signing my commits.
Prerequisites
- 1Password subscription
- 1Password for Windows
- Microsoft OpenSSH
- Windows Hello must be configured to unlock 1Password
- The 1Password extension for Chrome, Firefox, Edge, or Brave, to generate and fill SSH keys in your browser
- Ubuntu WSL with systemd enabled and docker installed (should work with other distributions as well)
- Visual Studio Code
Provide SSH Keys
If you want to use your existing SSH keys just import them as described here.
You can also create new keys using 1Password.
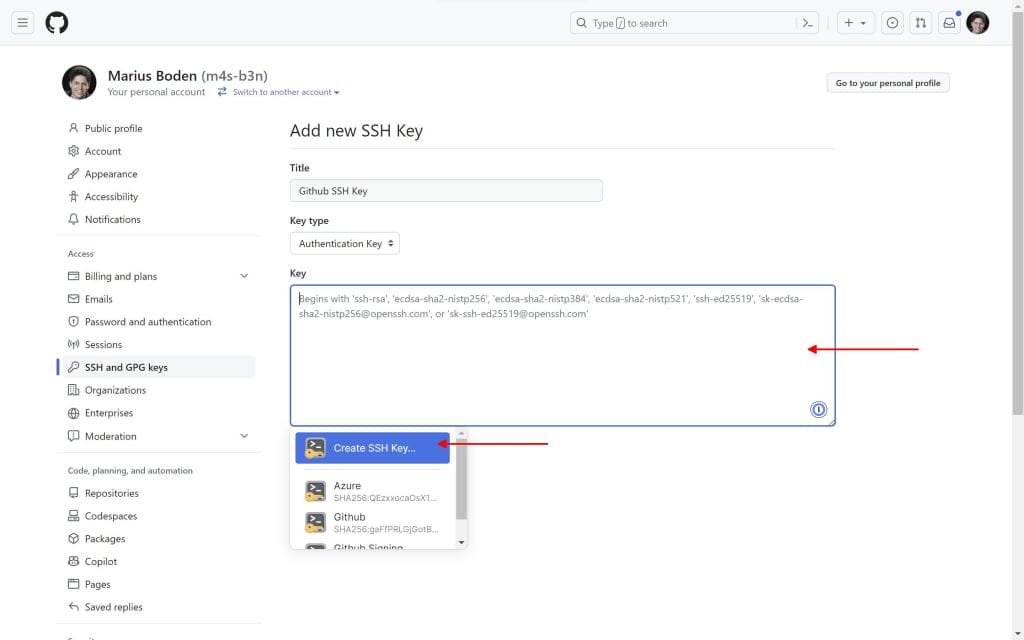
If you use Github and you have the 1Password browser extension installed this can be simplified and directly done within the browser. Just navigate to https://github.com/settings/keys and click on New SSH Key. Give it a title, select the type Authentication Key or Signing Key and click in the box. A 1Password logo will show up and provide you with the option Create SSH Key.
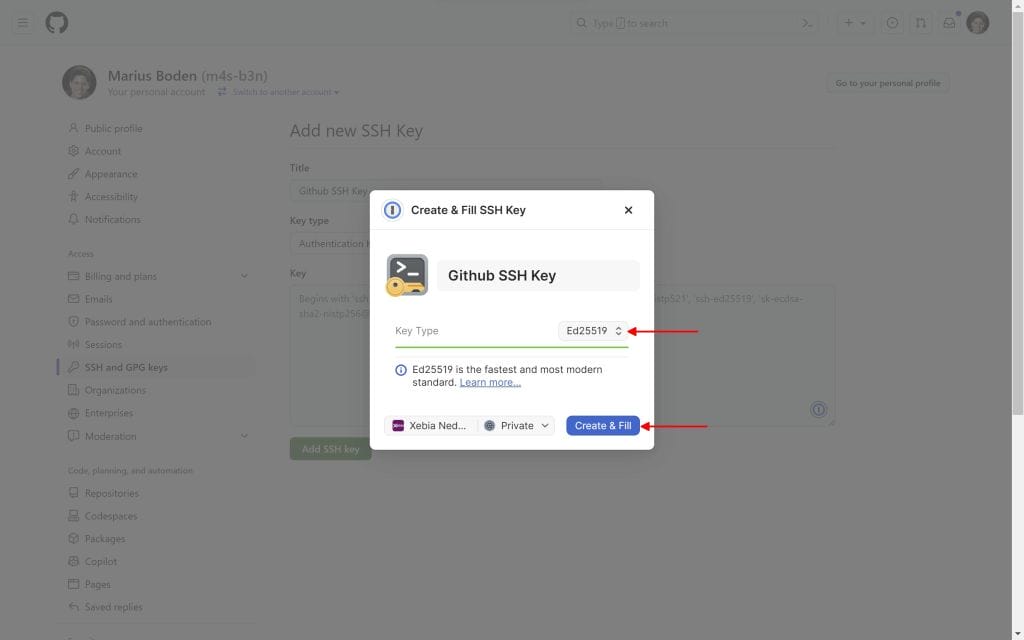
Click Create SSH Key, fill out the form and click on Create & Fill.
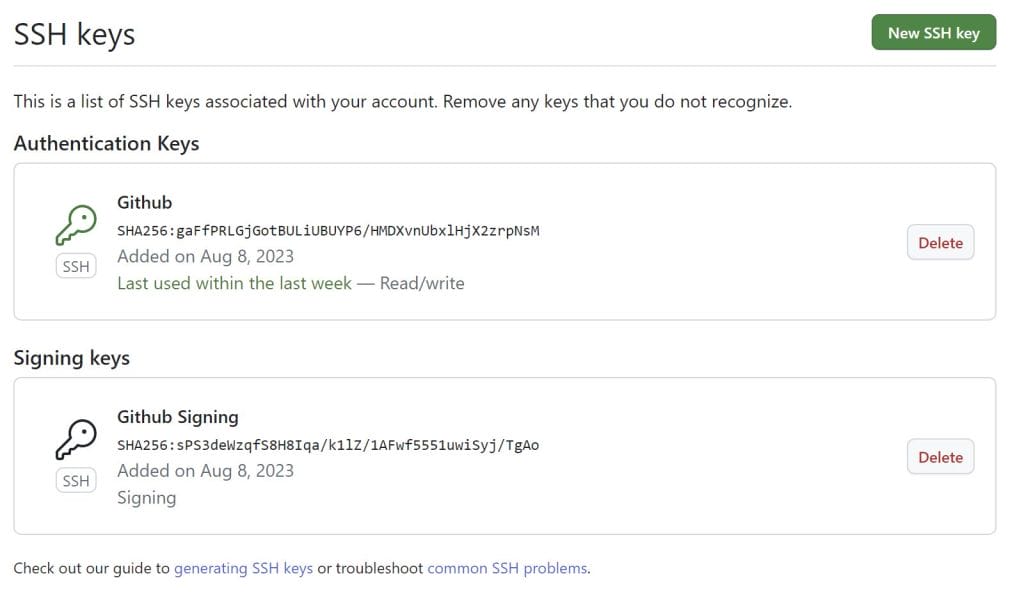
Finally add your SSH key to github.
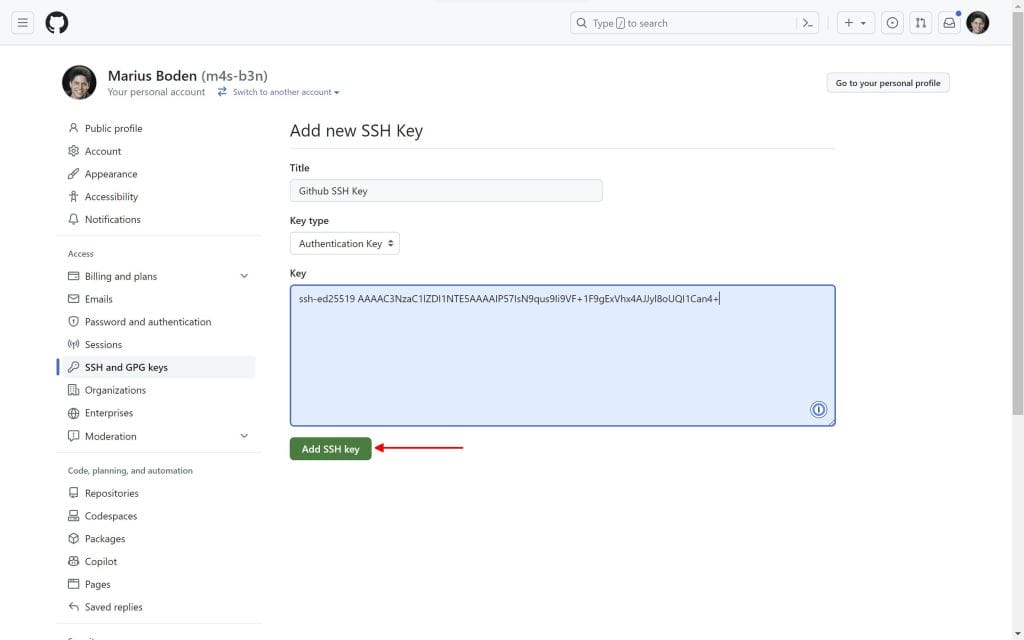
Ensure you have created an Authentication Key and a Signing Key.
The same process can be applied to many online services and is not limited to GitHub. I comfortably created SSH keys for Azure DevOps the same way.
Setup 1Password SSH Agent
To be able to retrieve SSH keys from 1Password you need to enable the 1Password SSH Agent. There is a pretty good documentation about how to do that on Windows.
Note that this requires to turn off the Windows SSH Agent!!!
By default 1Password will provide all keys in your private vault through the ssh agent. If you want to restrict which keys will be provided follow the guide on how to configure the 1Password SSH agent.
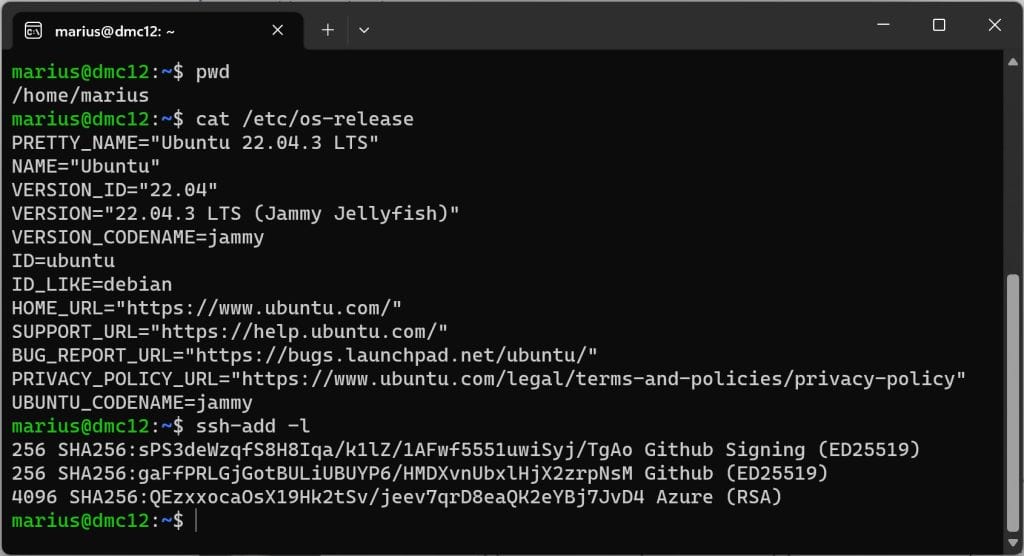
Test your setup runnig the Windows command line and type ssh-add -l. If your keys show up everything is working fine so far, otherwise try a restart.

Configure SSH agent in WSL
The 1Password docs provide you with a way to setup the ssh agent in Windows but there is no option to use the agent within the WSL. However, there is a workaround called npiperelay. This will enable WSL to communicate with Windows pipes. Either follow the installation guide or download the release and unzip it to any folder configured in your Windows PATH variable (or add your custom destination to the PATH).
Now you're done on Windows side. Let's switch to the WSL.
First install socat to be able to transfer data between pipes with npiperelay.
Then create a systemd user unit which establishes the stream to the 1Password SSH agent in Windows. Start and enable the unit so it gets started each time a user logs in.
# install socat
sudo apt install socat

# set location of the socket to create
export SSH_AUTH_SOCK=/tmp/1password-agent.sock

# create a systemd unit that is started when the user logs in
sudo tee /etc/systemd/user/1password-ssh-agent.service <<EOT
[Unit]
Description=Connect 1Password SSH Agent from Windows

[Service]
Type=simple
ExecStart=/usr/bin/socat -d -d UNIX-LISTEN:"${SSH_AUTH_SOCK}",fork EXEC:"$(which npiperelay.exe) -ei -s //./pipe/openssh-ssh-agent",nofork
ExecStop=rm -f ${SSH_AUTH_SOCK}
Restart=Always

[Install]
WantedBy=default.target
EOT

# reload systemd
systemctl --user daemon-reload

# start service
systemctl --user start 1password-ssh-agent.service

# set service enabled (start automatic)
systemctl --user enable 1password-ssh-agent.service

# add SSH_AUTH_SOCK to profile so it is set in WSL and devcontainer
cat >> $HOME/.profile <<EOT

# ssh agent bridge
export SSH_AUTH_SOCK=${SSH_AUTH_SOCK}
EOT
Restart your WSL and test your setup with ssh-add -l.
Configure Git Signing in WSL
Again the 1Password docs provide you with a guide on configuring git signature with the 1Password app. The resulting configuration for my key looks like this:
[user]
  signingkey = ssh-ed25519 AAAAC3NzaC1lZDI1NTE5AAAAIDkemjkTk6/JXBQQcfVKh4pGi8+RPX7LYS0+jmfsIMRY

[gpg]
  format = ssh

[gpg "ssh"]
  program = "C:/Users/MariusBoden/AppData/Local/1Password/app/8/op-ssh-sign.exe"

[commit]
  gpgsign = true
This works perfectly for Windows usage, but fails on WSL.
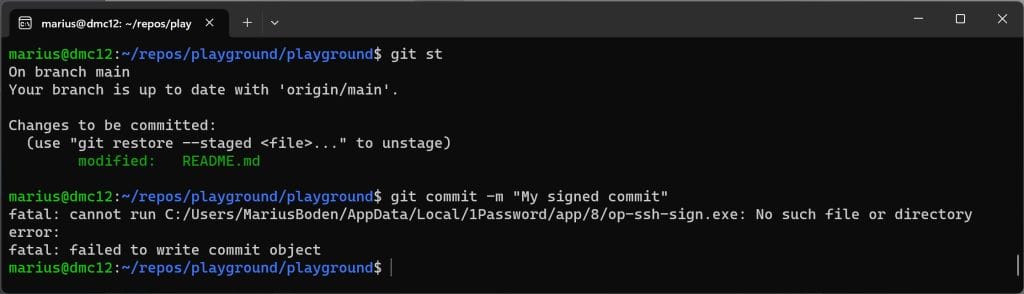
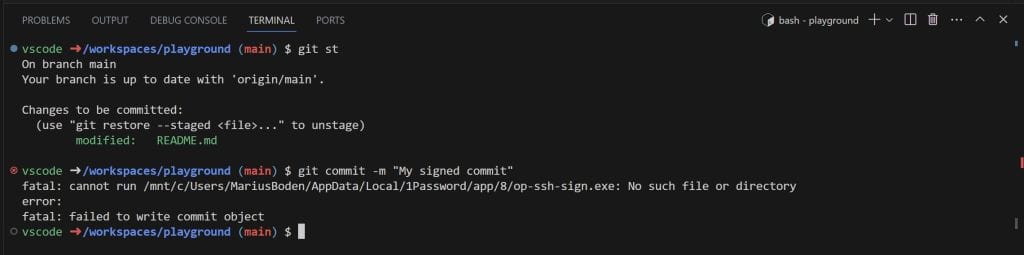
The reason is the path to the op-ssh-sign.exe. A first approach could be to fix the path for WSL usage.
[gpg "ssh"]
  program = "/mnt/c/Users/MariusBoden/AppData/Local/1Password/app/8/op-ssh-sign.exe"
That indeed does the trick, but fails within a container, as the required program path is nor mounted.
Mounting the path is not an option as the devcontainer.json may be checked in an therefore would not work on any system anymore. The solution is to remove the program specification from the git config and add some lines to the WSL ssh configuration.
[user]
  signingkey = ssh-ed25519 AAAAC3NzaC1lZDI1NTE5AAAAIDkemjkTk6/JXBQQcfVKh4pGi8+RPX7LYS0+jmfsIMRY

[gpg]
  format = ssh

# remove or comment out these lines
#[gpg "ssh"]
#  program = "C:/Users/MariusBoden/AppData/Local/1Password/app/8/op-ssh-sign.exe"

[commit]
  gpgsign = true
Now open $HOME/.ssh/config and set the following configuration:
Host *
ForwardAgent yes
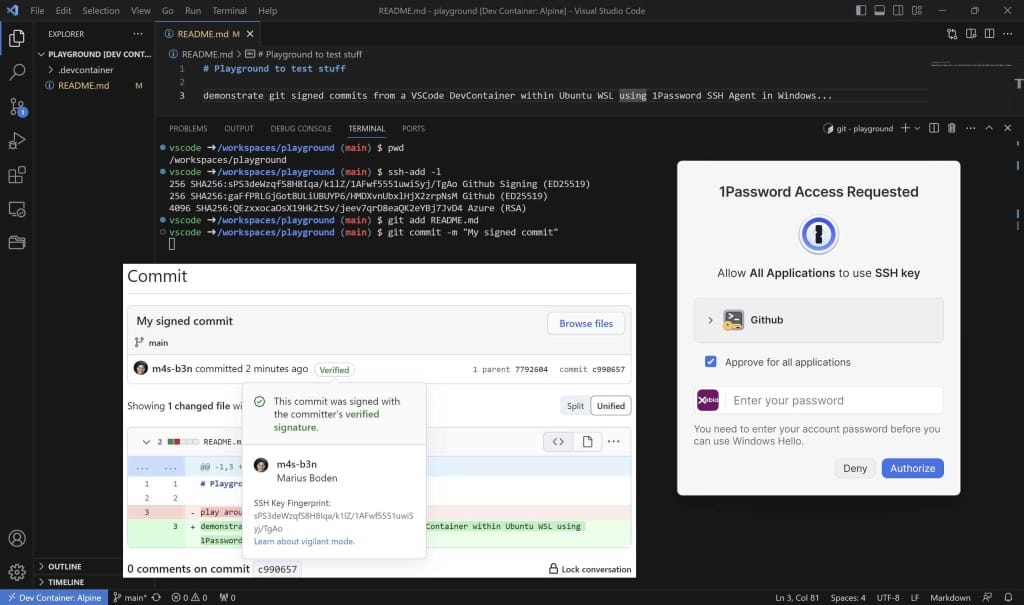
IdentityAgent /tmp/1password-agent.sockSave the file and restart / rebuild your dev container. If you try to commit now, a window opens asking for permission to use 1Password.
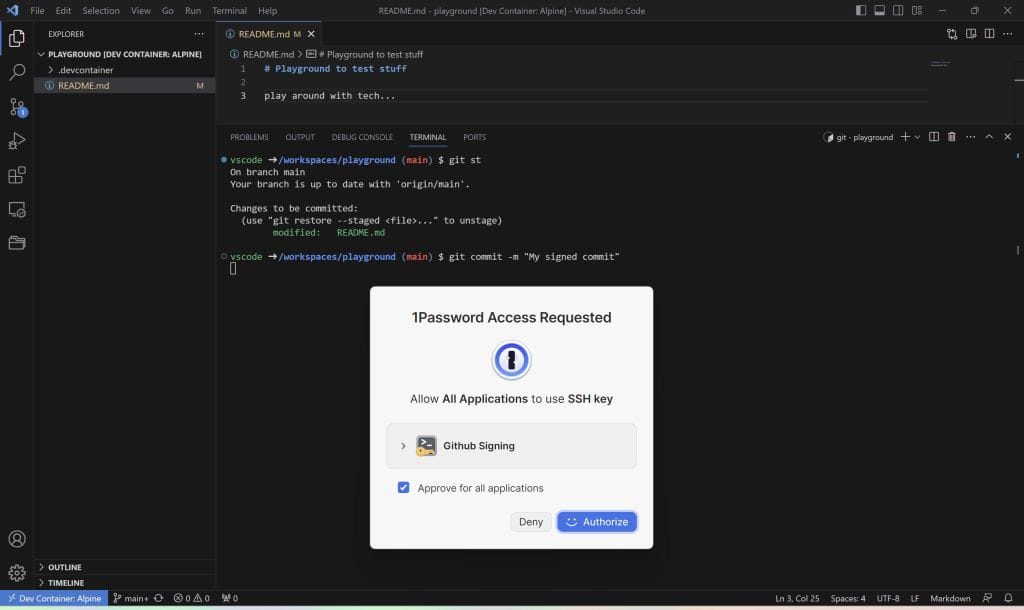
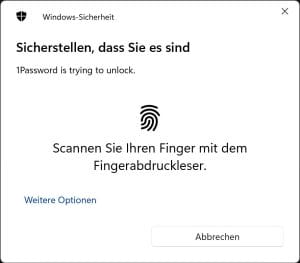
Click Authorize and identify using Windows Hello.
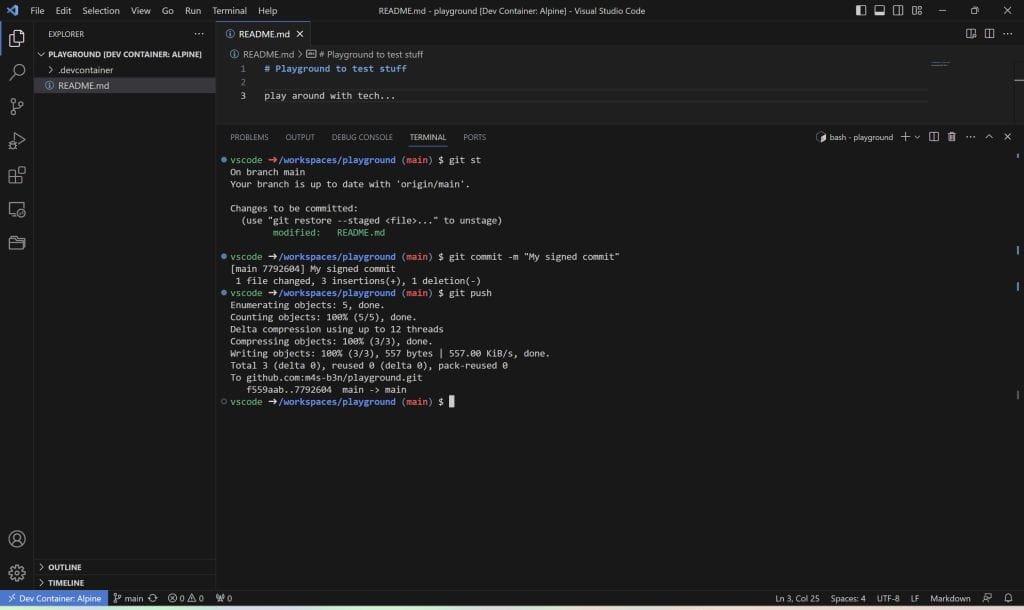
You can now create signed commits within your WSL and VSCode DevContainers.
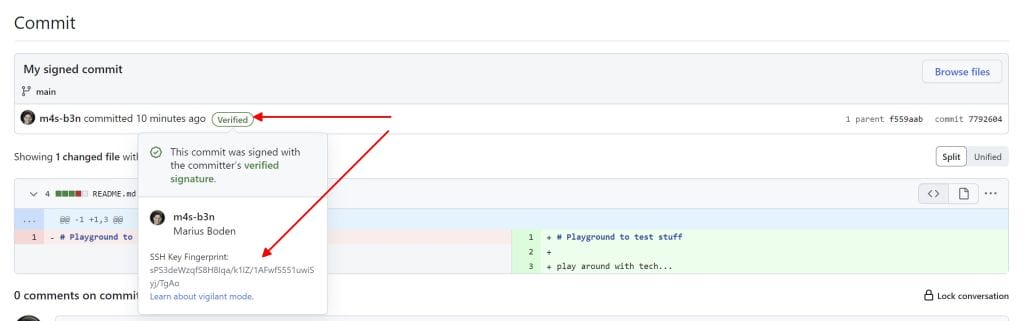
Lookup your commit in GitHub to see details about the committer and the used key.
Written by

Marius Boden
Marius Boden is passionate about technology and software development. Being a hybrid of developer, architect and DevOps consultant, he can keep track of the big picture and help teams at any point in the development lifecycle to get to the next level.
Contact